27/01/22 : 1950 DOHC Manx Gardengate Project - Recent 'Bitting' and 'Bobbing'
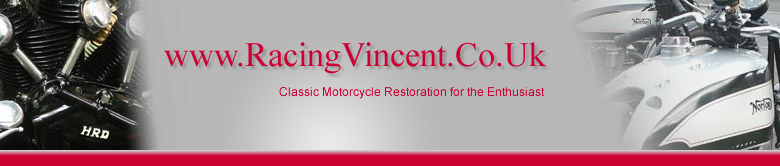
Above: 'Longstroke' type Manx Square Head - but with a Difference!
On the face of it - a standard looking (and really nice condition) Manx 1940's 'Square' head .. . but see writeup on the left for why things are not what they seem!
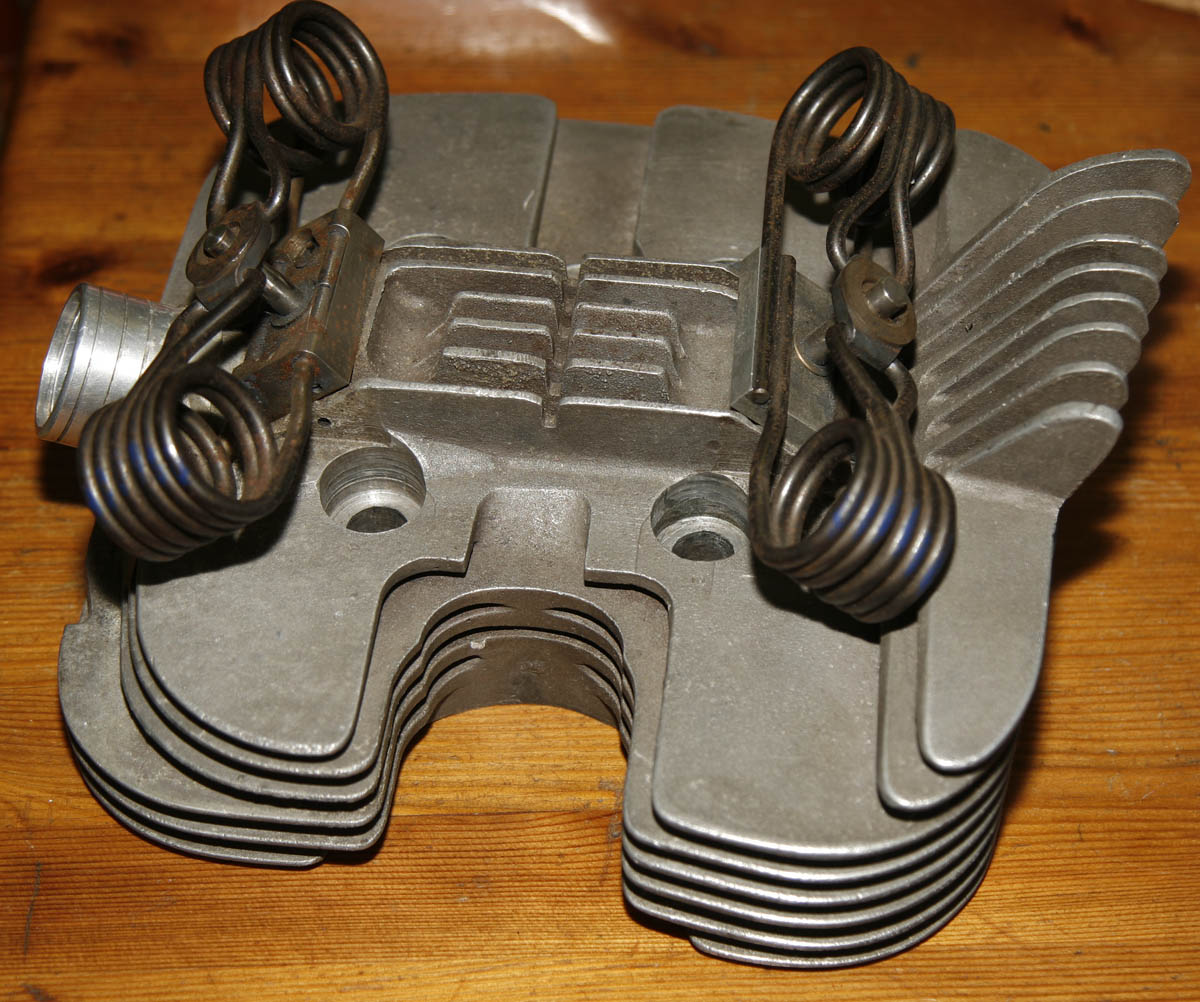
Below: And more of a clue .. . shown in Close-up
Look carefully and you can see that the inlet tract of this 'Longstroke' Head is very different from normal, with a much modified deeper downdraught modification and later DOHC Featherbed valvegear fitted
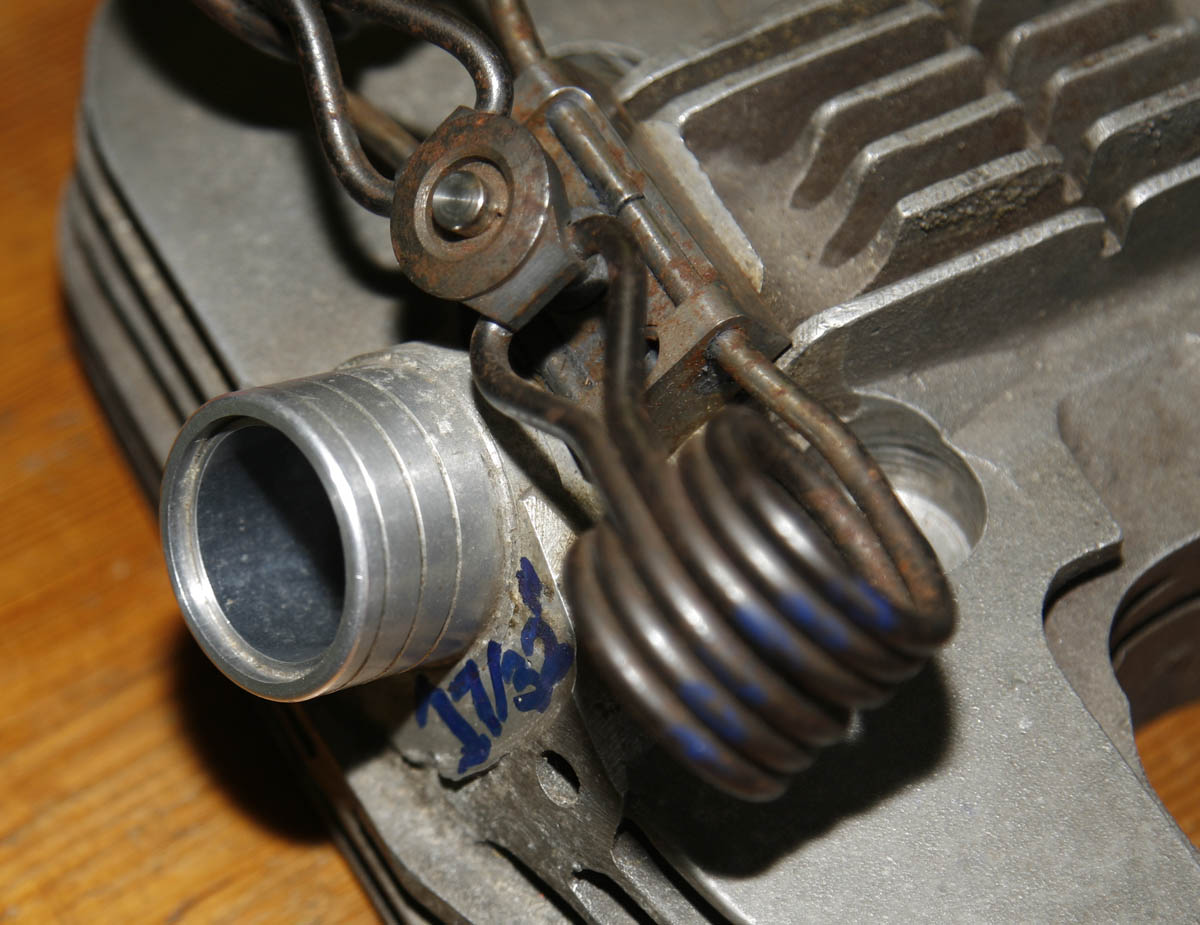
Below: And finally . . . a trial fit (just for the camera) of a later DOHC Shortsroke cambox loosely fitted to this Longstroke head . . . as still have not found a genuine Longstroke cambox
I am sure many of you are the same - but I normally have at least one or two 'current' restoration projects going on, while at the same time have a few longer term restoration projects waiting in the wings - and from time to time those 'Maids In Waiting' grab my attention for a short period.
My two 'current' projects at this time are my 1919-1920 Douglas 2 3/4hp (TT Rep) build - see this Blog update below for a picture of that, and a 1939 M30 (SOHC) Manx Norton - the first year of the Gardengate frame, with so called 'Suicide' frame, because the rear stand swung forward, which was only fitted for that year.
Well, as well as those two rather nice project builds - I am very fortunate that one of those longer term projects 'waiting in the wings' is nothing less than a 1950 DOHC Gardengte 500cc Manx Norton - of which many would argue was the ultimate incarnation of the Gardengate Manx.
In that last year of production (while the Norton Works team were first starting to use the Featherbed Manx models) - the production Gardengate Manx gained a whole raft of smaller changes - i.e. the introduction of the rear magnesium conical hub (which had much larger brake shoes than the previous road type rear brake plate), alloy fuel and oil tanks, damped front forks and magnesium SLS conical hub . . . and arguably the most important change - some of that last batch were fitted with DOHC Longstroke engines.
The Chance to Acquire a Couple of Interesting Parts For The Build:
So although I had the majority of the 'large' and difficult parts needed to rebuild this 1950 project (including the correct original DOHC type frame, which is immediately identifiable from the similar SOHC frame), the two parts I was missing was the correct magnesium 1950 conical hub - although I did have the correct brake plate and shoes, and a correct early Longstroke DOHC cambox.
.jpg)
And another departure from standard 1950 Manx Specification -
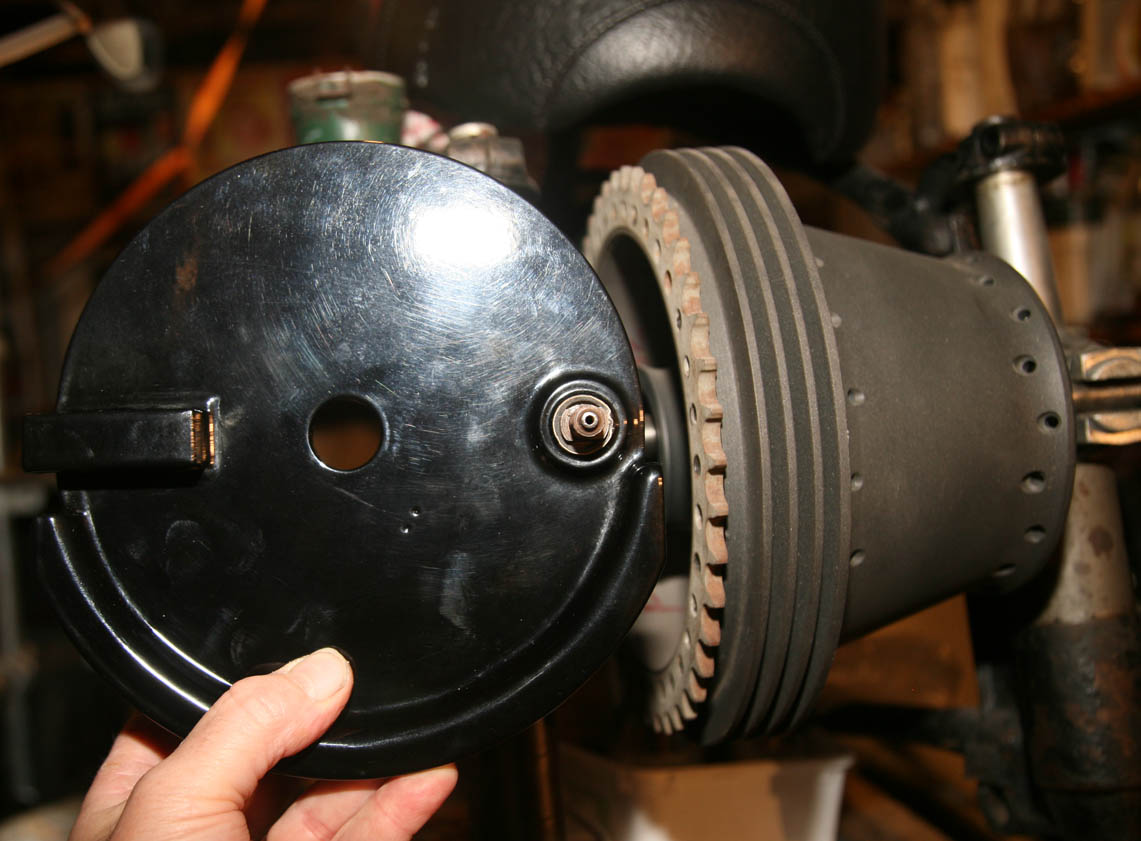
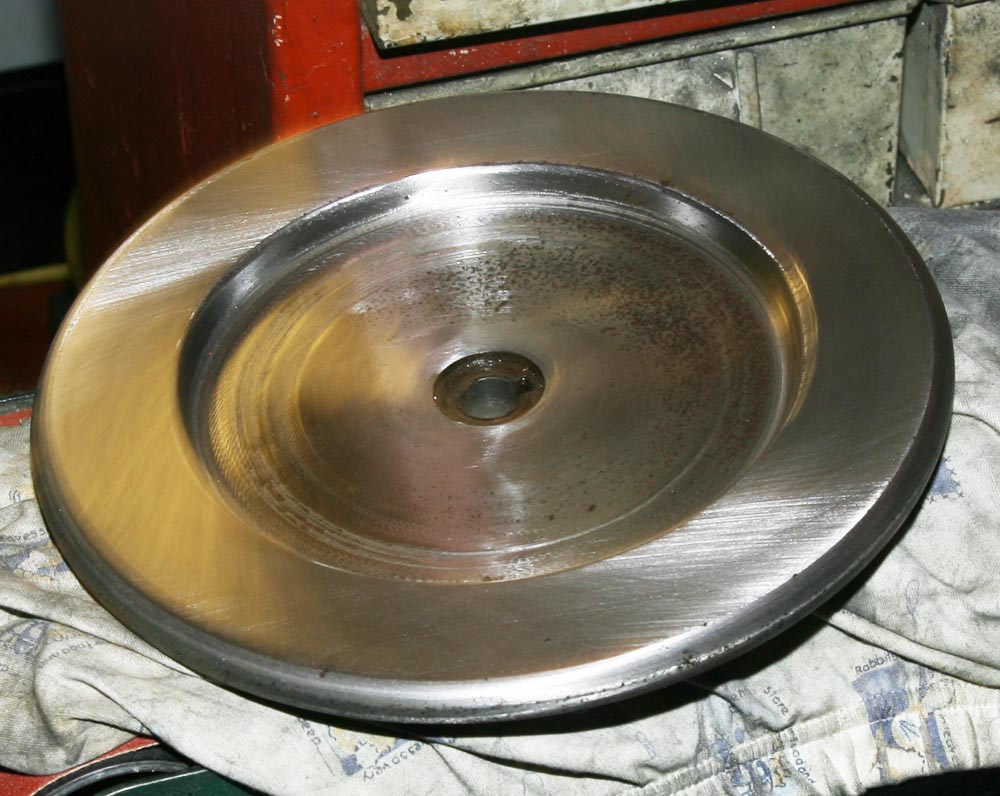
The 'Mother' of all Manx brakes - TLS (shortstroke type) brake plate and shoes in a genuine 'Beart' Manx drum - notice the huge cooling fins
just poking through, from behind the period alloy 'Bacon-Slicer' disc
. . . . Too nice not to use!
- - Nh For the early L/S DOHC cambox, well - that is still a problem, but as earlier articles on this Blog page will tell - my possible solution to that is to try and fit a nice original Shortstroke DOHC cambox I already have and have restored. I know the mount points for this type of cambox are different - but I am also told the Shortstroke cambox has different valve angles - which may mean surgery to the head of the engine I have for this bike (which currently has a nice Manx SOHC cambox on it). But actually - as that was already such a nicely rebuilt head - I knew that if surgery was required, I would just swop that head for another original Bi-metal Manx head I have - which I know already needed some work.
But then, a year or so ago, a close friend - and serious collector himself showed me the head shown in the photograph, which was surplus to his requirements. As you can see from the photograph it is a lovely looking original full alloy skulled Longstroke square Manx head (albeit, originally of 350cc type). But what is so unusual about it is - many years ago it looks that it ihas had serious work done to the inlet tract and valves to convert it to a far more 'Downdraught' configuration and much larger inlet port size - ah ha - possibly to Short Stroke configuration! In addition it has had what look to be shorter DOHC valves and later shortstroke Manx valve springs fitted. My friend acquired it many years ago - and has an idea it was professionally done by well known tuners in their day - possibly for a special 250cc engine, as the valves are suprisingly small.
Looking it over - and giving it some thought, I knew I would regret letting this head pass me by - so I have now acquired it with the view of it being a possible solution to my shortstroke cambox issue for the 1950 project. I know I will need to check angles (and carb position - I still wish to fit a period 1950 Amal RN carb) and at the very least will need some surgery to the valve seats and skull to make it suitable for a 500cc engine (bigger inlet valve and possible squish head) - but the head is otherwise in such beautiful original condition, and the work on it is so professionally done - it would have been a real shame not to at least try and use it.
I am hoping this project will be the subject of future restoration articles
- but the 1950 Manx was a signifcant year, because as well as the last year of the Gardengate Manx (yes - I know a few went into 1951, but this was pretty much the last 'spec') - it signifited some quite fundamental improvements - not least being the first year of the magnesium 'conical' rear brake . . . which became so well known in Featherbed Manx models.
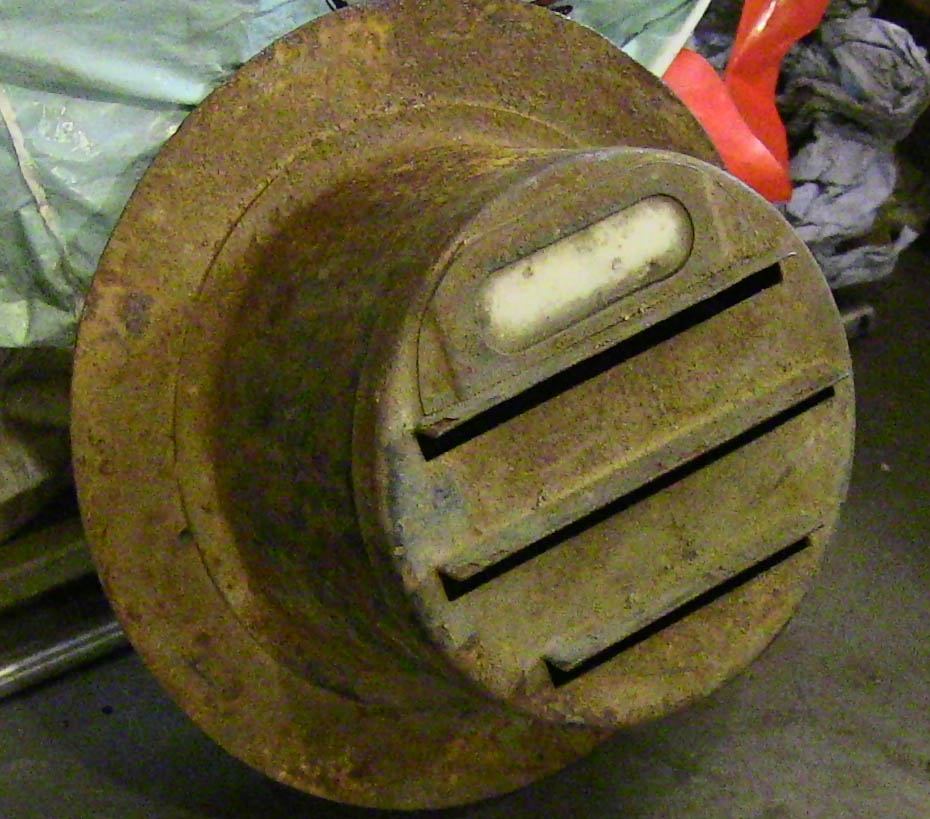
However - definitely one of hardest genuine Manx parts to find - is the Conical type rear brake plate and shoes fitted to the 1950 Gardengte - see in this photo - the larger square peg on the left - allowing the plate to be slid into the the rear Gardengate plunger castings. Only made for one year.
Front Wheel - Justifying It To Myself!:
And again - a year or so ago, a possible solution to my other missing part presented itself. As mentioned I already had the nice original and correct for 1950 Magnesium SLS front brake plate and shoes. However, I did not have the correct (new for 1950) alloy conical hub. And frankly the chances of fnding one were slim.
But again - a good friend of mine has come to the rescue. We had often talked about a Manx front wheel he had in his collection - which was nothing less than a genuine Francis Beart TLS Manx wheel - which I believe were produced in very small numbers by Beart towards the end of his tenure tuning Manx Nortons.
Francis Beart has always been one of my hero's, and actually I did have the opportunity to buy this particularl wheel from its previous owner many, many years ago - but did not have the funds at the time, instead letting my friend know about it.
Yes, I know that strictly speaking this wheel is of a slightly later date than the 1950 bike - and that the brake plate is actually the later Featherbed TLS Manx type brake - but I ask you - if you had the chance to fit what might be considered the ultimate Manx wheel to your Manx - wouldent you want to do it! And of course - can you really see anyone objecting when it is going on a genuine Manx (that may have been fitted with it at a later date anyway) - and what a talking point - with those huge fins and period alloy 'Bacon Slicer' . . . I cannot help but feel it will raise a smile from most who cast an eye over it!
So, eventually a deal was done and this has now filled the missing gap. When eventually I do get to putting this bike together - the idea (if not to decrepit by that time!) I would like to do a couple of fast events on it - and I know from past experience, the difference between a well setup Manx SLS front brake and a later TLS type is quite marked - and I do like the idea of being able to stop well - so I do not feel too bad about breaking originality to fit this later type of front wheel - after all, it was made for a Manx!
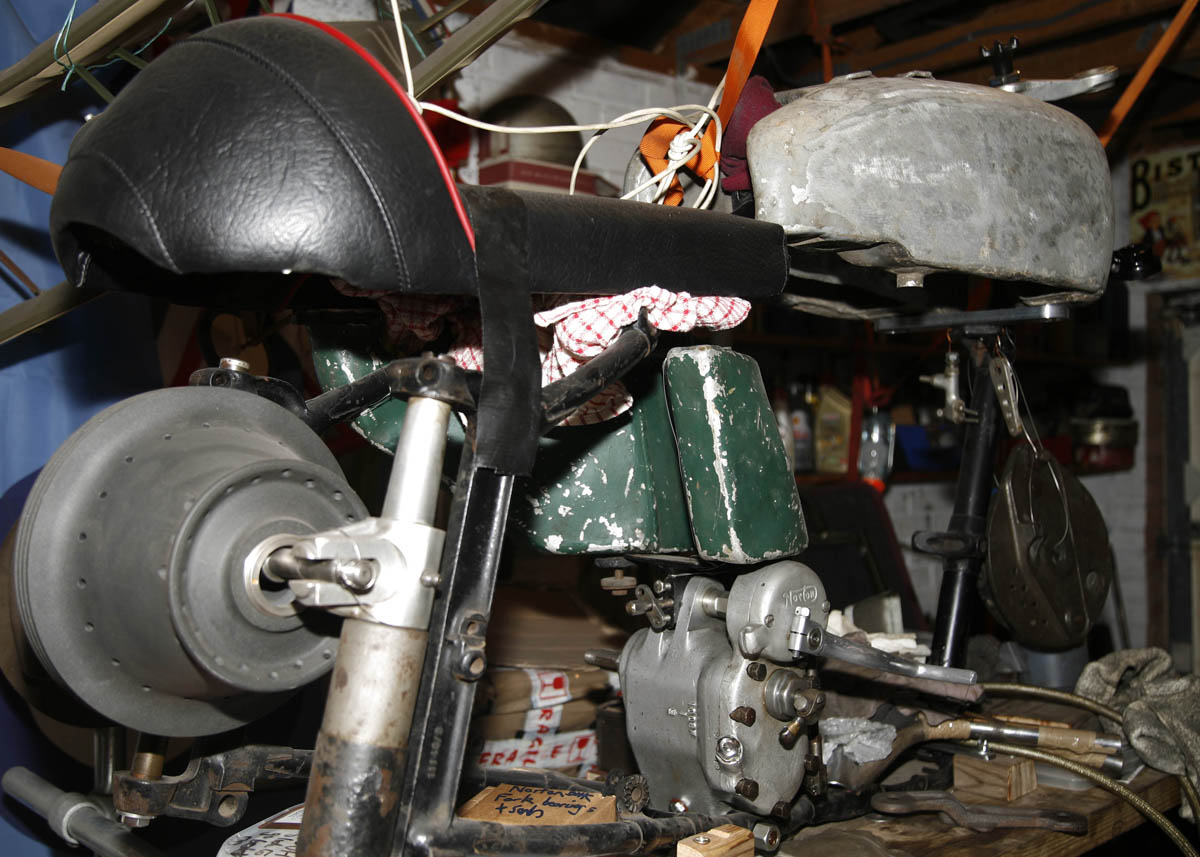
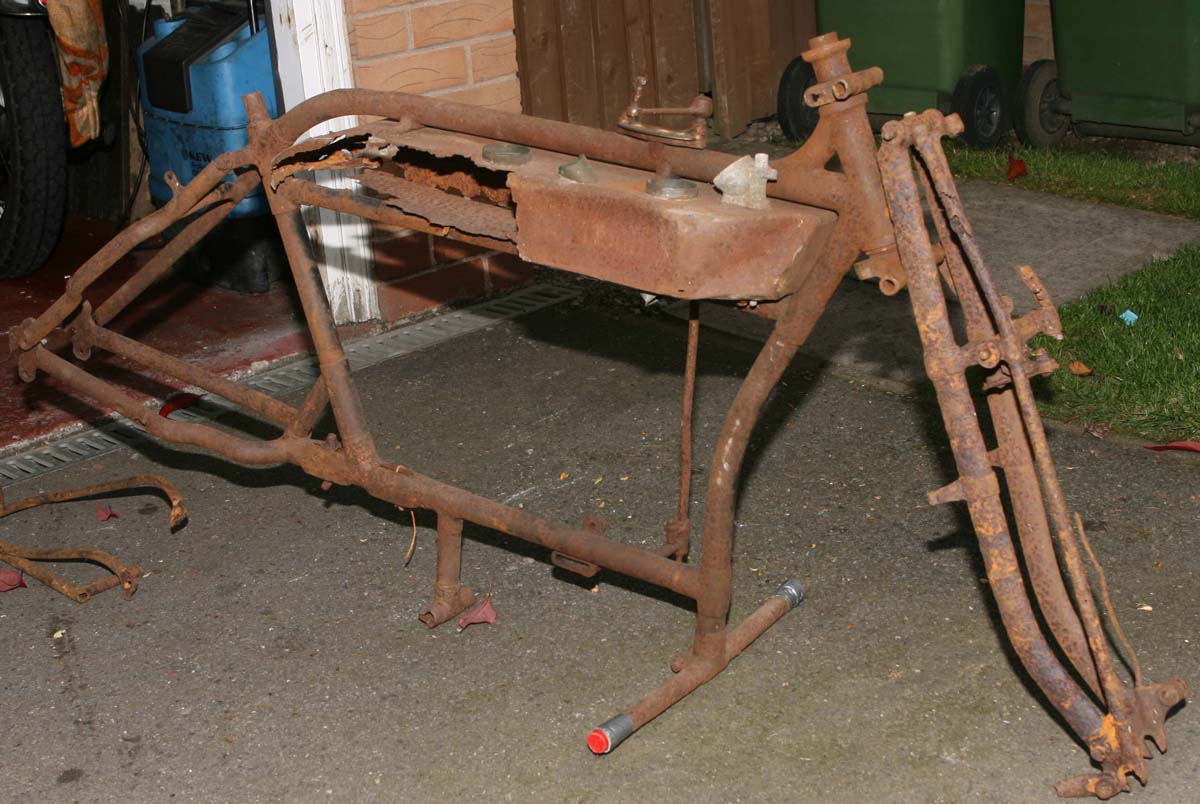
Above: An Interesting 'Walk-By' Basket Case
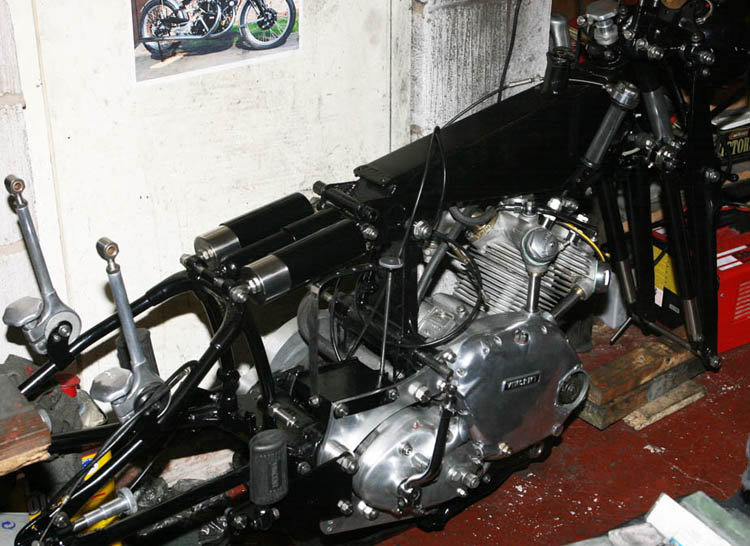
I have the 1950 DOHC Manx on its own 'Build Platform' in one of my workshops and as it is on a raised scaffolding above another bike - it provides an interesting 'Walk-by'. If you look closely you will see that although only loosely placed together - it has a few interesting trinkets attached it. Note also genuine alloy 1950 Manx petrol and oil tanks - both will need some restoration work before painting - but nothing beats working on the original parts and trying to reclaim them
-
So Back to the Other Builds For Now:
So that is about it for this particular project for now. I have done a number of other small jobs on this project in the last couple of years - simply because it is sat on a 'build platform' I often walk by - so it makes a nice occasional change to move off the current project to twiddle with something on this bike.
I have also got a couple of other nice trinkets to go on this bike - which should ultimately make it an interesting bike for people to talk over when sat up at a bike meeting.
The picture on its right shows it loosely assembled as it is at the moment (motor not fitted at this stage) - but if you look closely at the steering head you might see it has one of those trinkets fitted - a Top Crown in alloy, of the type as were fitted to the early Feaatherbed Works bikes (i.e. Ray Amm era). It is definitely of that period - but I have compared it to what I know was a genuine Works top crown - and although very similar, there are a couple of subtle differences. I am told by some one more learned than me that it is possible that Francis Beart may have also been at work in this area - and it may again be another Beart item - but that in itself makes it a prviledge to fit!
08/12/20: Another childhood hobby I have been enjoying through Covid
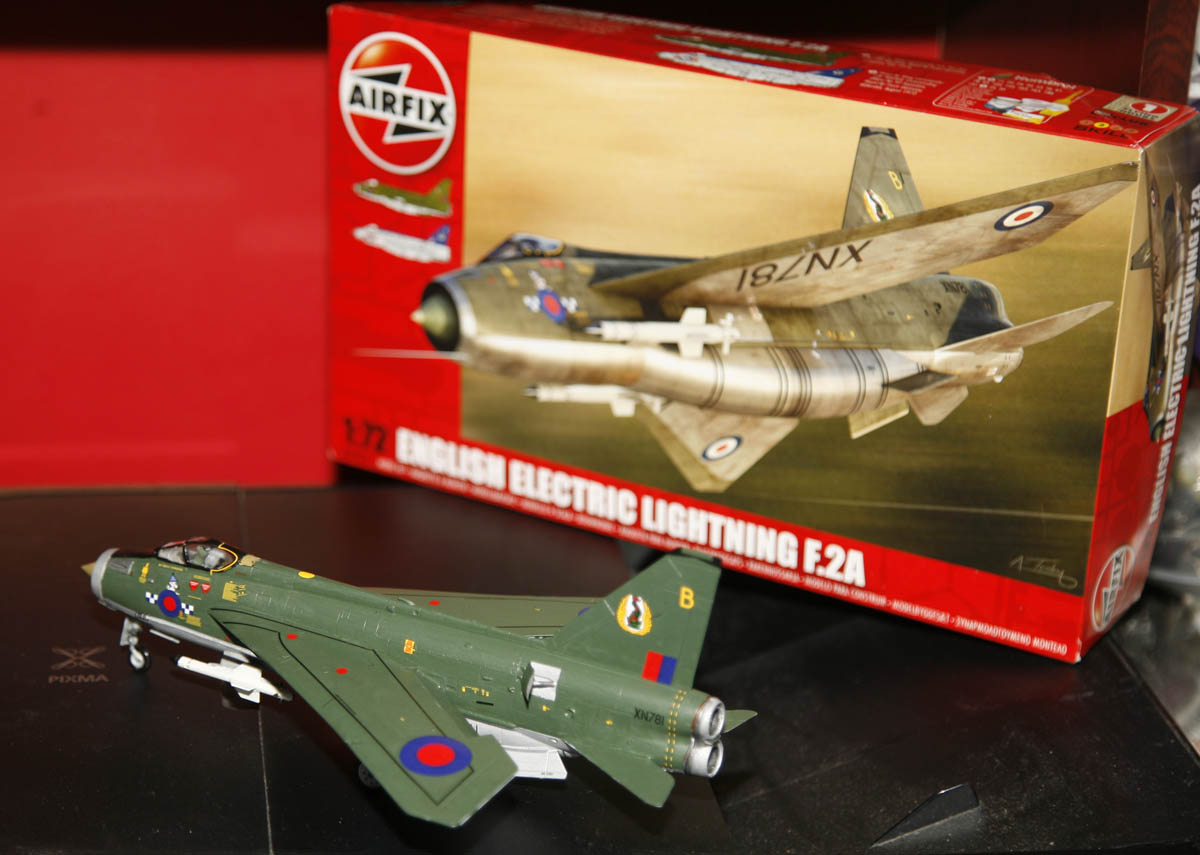
A recent addition to my dusty model shelf is this English Electric Lightning - which I spent some time building and painting . .. but am pleased how it has now turned out . . . I have memories of watching these fantastic fighter jets flying overhead in pairs when we went on holiday on the Norfolk coast in the sixties and seventies.
And although at one point it seemed like Airfix were looking like going out of business - I am pleased to see they seem to have had a real resurgence of late - and this kit is an example of the excellent kits they still do
I could probably start this small article by saying - the enforcement of house lock-in as a result of Covid has been responsible for me re- starting an old hobby I used to do as a child - but the real truth is, I never really gave up building plastic model kits . . . I just did not really shout about if for many years!
The reality is, I am a child of the sixties, when kids like myself loved nothing more than opening my presents on Xmas morning . .. and finding an Airfix model (or maybe a new Action Man uniform, or plastic machine gun!) in amongst them.
Later, as a kid in my teens, i had expanded this love of plastic kits to include a reasonable collecton of Humbrol paint tins and various other paraphanalia for getting them to a standard of authenticity where I could consider putting them on display - or hang them from the ceiling or on a bookshelf - until my mum got sick of the dust they collected and managed to swipe one off with the duster, until it was smashed back into its constituent parts!
Anyway, for many years plastic models seemed to lose much of their popularity - and although I would occcasionally make a model of a bike through my 20's (possibly to help alleviate a hangover!). .. I am pleased that in the last 10 years or so, the plastic model industry seems to have been having a bit of a resurgence, with lots of the old names still thriving - and some specialist model shops now (seemingly) flourishing on the T'Internet.
But in these difficult times of Covid, I have found a couple of hours on a Sunday morning building some recreation of a Cold War jet, or some form of racing car or motorcycle (still my favourite subject matter, particularly therapeutic.
I have a shelf in my little back room of the house, which has two plastic boxes full of various Humbrol and Tamiya paints, and a reasonable collection of brushes and tweesers and other tools for helping to make these models - and even a pair of those big magnifying spectacles that you see jewellers wearing - more of a necessity now I am
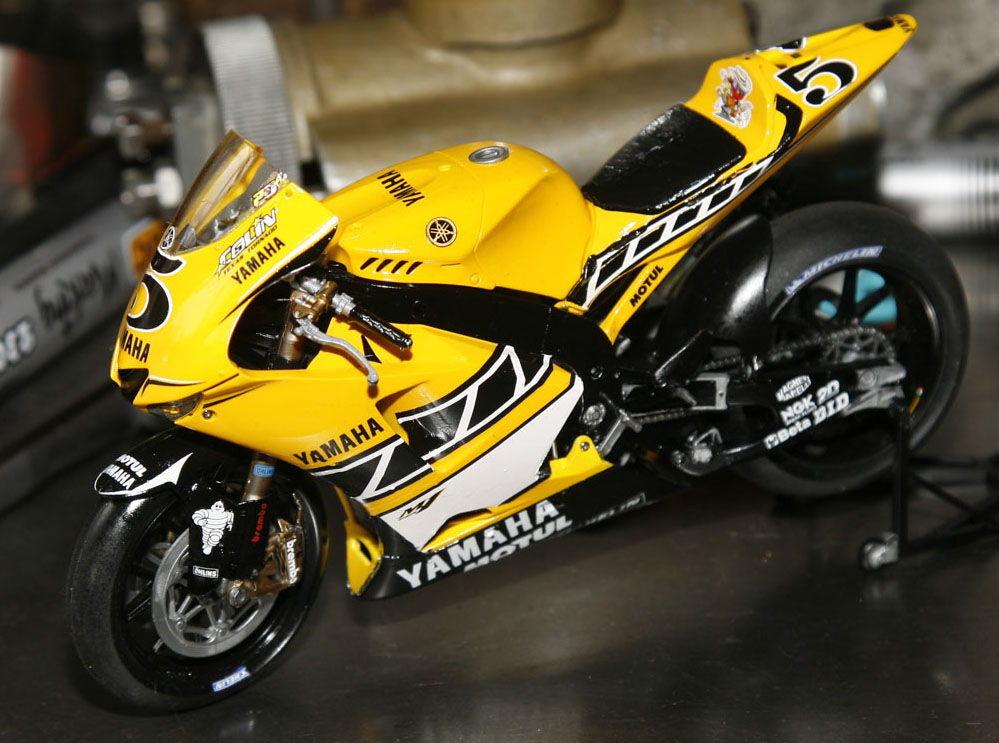
This Carl Edwards Works Yamaha is a few years old now - but still looks great in classic Kenny Roberts yellow.
The kit is made by Tamiya - who I still rate as the very best of all the mainstream model makers . .. and make some great motorcycle and race car models - fantastic attention to detail, and they go together extremely well.
Some of the older kits are still highly sought after, and can fetch reasonable money on E-Bay . . . but are worth looking for if you fancy an accurate replica of one of your favourite motor bikes or cars - I still have a number tucked away in the attic!
into my late '50's and reading glasses on their own are only just enough for standard stuff - not the really detailed stuff.
The two models shown here are the labour of the last few months of part-time building, while not able to get out that much - which has meant more modellng activity than I would normally do.
The Tamiya Yamaha model on the right was actually started about 3 years ago and then put to one side, but was resurrected once the Covid lockdown was in full swing. It is now finished and looking pretty reasonable - although my main (Victorian style) display case is already filled to overflowing, I have managed to find room for it alongside another Tamiya model of Honda's immortal Jim Redman 6 cylinder 250 - a nice comparison.
I had forgotten how therapeutic this is as a hobby - even though once they are complete, I am struggling to find any more room to display them! . . . but all I can tell you, is if you are looking for a new way to stop yourself bouncing off the walls at home - you could do worse than re-living your childhood with one of these kits!
25/11/20 : Douglas 2 3/4hp (TT Rep) Progress
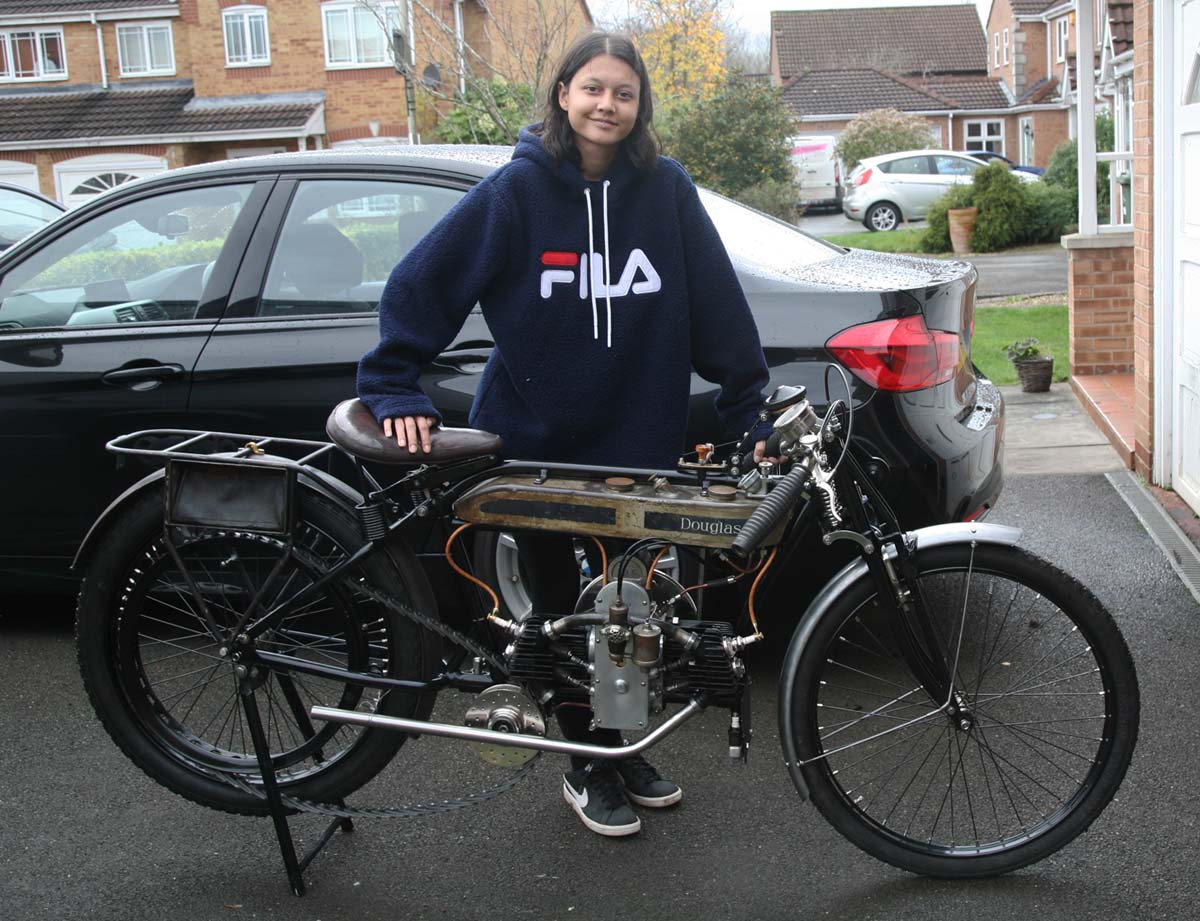
Younger daughter Steph (who is also my manager(!) in our RacingNorton office) was visiting while I was tinkering on the Douglas recently , so I made her stand behind it while I took the photo.
As you can see, at this stage I am just in the process of fabricating mudguard mounts and brakets, before removing again for painting. Rear carrier and original toolbox are loosely fitted to check mounts - but still require final work and de-rusting before they will be ready for painting.
Final point of interest - at this stage I have had a first crack at bending a stainless steel exhaust length (into a loose replica of the 1912 TT system) . . . but that has just confirmed how difficult a task that will be to complete - more of that later
Through the Covid period I have still been plodding away slowly with the Douglas
build - trying to do a bit of on it every weekend .. . even if only for an hour.
It is now slowly beginning to take shape and I am hoping to have most of the final fabrication and painting complete by end of stpring 2021.
I have lots of photos taken of the different restoration areas I have tackled as part of the build . . . but never seem to get time to put the article together, so for the moment here are a few 'snippets' in photos - and I will try and add proper articles at a later date . . .
Restoration areas:
- Beaded Edge Wheel Building: I already included photos of this laborious but satisfying task in a previous restoration article - but did have to revisit the wheels again recently - to do further tweaking and final adjustments. Particularly, on trial fitting the front stirrup brake - which works by acting against the wheel rim - as per a push bike(!), that the rim was a few mm out of true and the brake blocks were not properly touching all the way round.
Wheel aligning and spoke truing is not my specialist subject - but a couple of hours in the wheel build jig with a small spanner got the wheel much closer to 'true', and will at least give me some small chance of stopping!
- Fitting Cables: Fitting cables is always a good indication that a restoration project is reaching its latter stages - and had a special significance for this build, as I had purposefully been sorting out some of my 'rarest ' New Old Stock'ous but stisfying task
- Fabricationg mudguards, stays and carrier/toolbox fittings : Fitting cables is always a good indication that a restoration project is reaching its latter stages - and had a special significance for this build, as I had p
Original toolbox that came with the Douglas was badly corroded, but still had traces of WW1 Khaki paint, indicating it was fitted to a WD bike.
I definitely wanted to maintain as much of this original finish as possible - so hear I am fabricating a new base to fit over the badly corroded original base, having treated it first with rust treatment to stop any further rusting.
The toolbox was eventually matt clear lacquered over the original paint
Toolbox's and Original Brooks Saddle:
Two areas that are very specific to an Edwardian restoration are the rear carrier toolbox’s often fitted to bikes of this age, and the pan style saddles used at that time.
In the case of the toolbox’s – only one came with the kit of parts when I bought the bike, and although it was suffering badly with rot at its base, on close inspection it looks like it may have come from an original WD Douglas, and looked to still have remnants of its original WW1 dark khaki paint. For me, it was imperative that I try and retain this link to the past – so in the photograph on the left you can see here, as I was carefully removing what was left of its original cardboard and leatherette interior, and rust treat as much of the corroded tin as possible – before fabricating a new base. Obviously, to keep the original paint, I had to use pop rivets to fasten it, not welding – before sending it to a specialist toolbox maker, who made a lovely new leather cover, as well as a newly fabricated second toolbox to the same dimensions as this original. I will cover this in more detail in a future article.
.
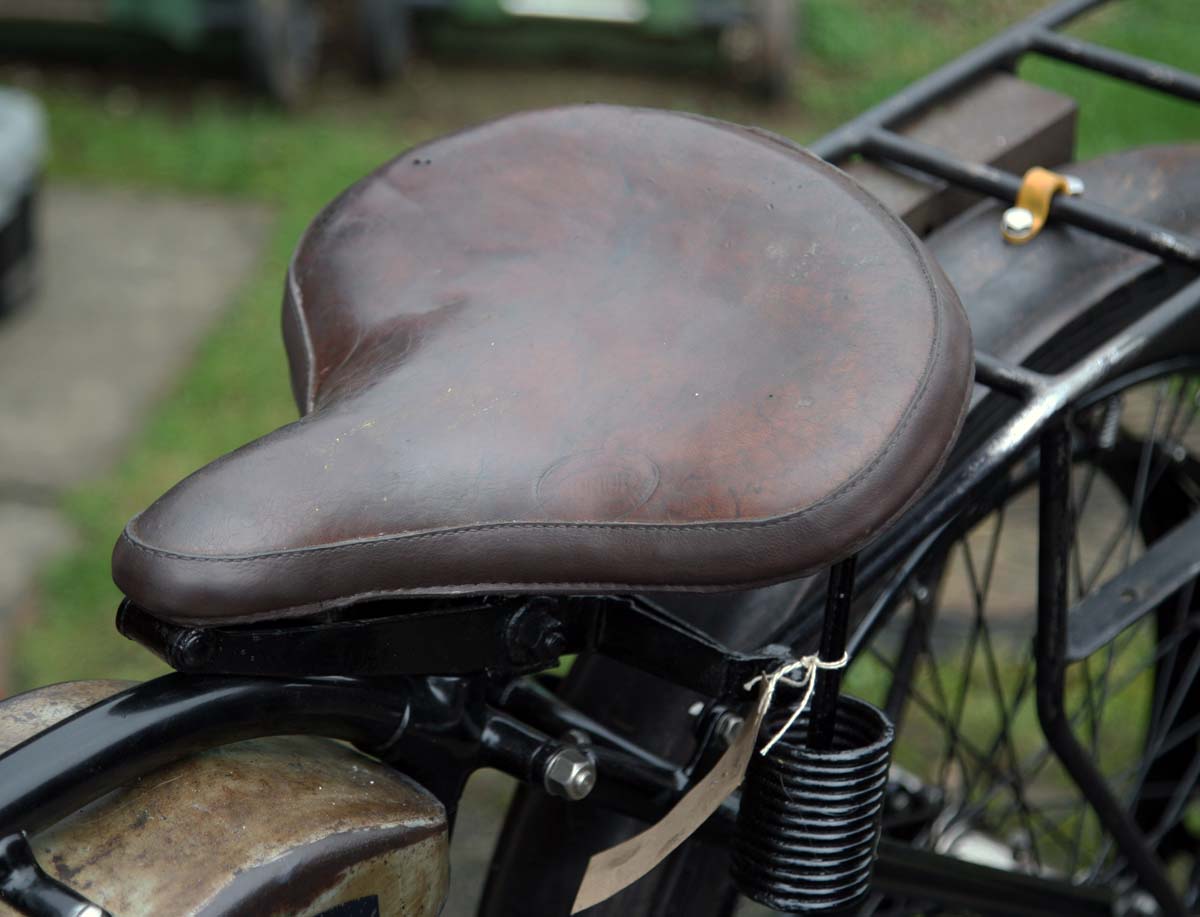
Original Brooks Junior saddle is another item that has recently been restored, and although I was able to clean up the base – I know my limitations, so took it to a specialist horse saddle maker to have an additional insert sowed in at the base of the pan, as it was badly split around this area. After much saddle soap soaking and his excellent work, the finished job now has a fantastic chestnut coloured patina (and although not visible in the photo, still has it original ‘Brooks’ brass label at the back
And then similarly – this lovely Brooks ‘Junior’ saddle photographed on the right after sympathetic restoration. This is not actually the saddle that came with the bike, which was a ‘Gough’ saddle, but I purchased it (not cheap) shortly after starting the restoration, because of its lovely original patina. Being a ‘Junior’ it is slightly smaller than many period saddles and perfect for my ‘TT Replica’, but although the main seat leather was still usable (after much soap saddling), unfortunately the leather around the stitching and seam had perished and split. Again, I will cover this in a future article – but save to say . . . I decided to send it to a specialist leather ‘saddler’ in Leicestershire, who did a great job of sympathetically sowing in a new insert around the seam and re-packing its horse hair – it now looks lovely and has great patina.
29/02/20: DOHC Cambox Stripdown Article - Part 2
One of two DOHC Shortstroke cambox's purchased at Stafford Bonhams auction earlier in 2019 - after sympathetic refurbishment - read the article to see the before and after and what they look like inside
The concluding article on the stripdown and sympathetic refurbishment of two DOHC cambox's purchased in Bonhams Stafford Spring Auction 2019 - both having sat untouched since possibly last used on a race bike in the 1960's?
Norton DOHC Cambox Stripdown - Part 2
27/01/20 : RacingNorton Manufacturing Update
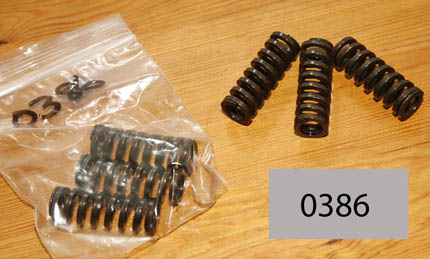
We have just had a new batch of Square section clutch springs to fit both racing 4 plate clutch's and standard 5 plate clutchs (Items 0386 and 0387 in our Gearbox/Clutch section - Click on photo to take you to our RacingNorton catalog
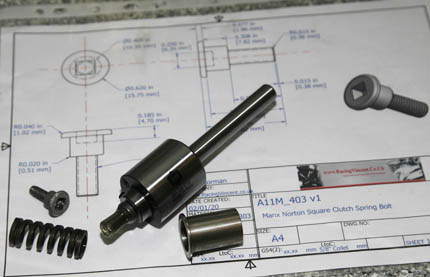
Also, we will shortly be making the distinctive racing type clutch spring retaining bolts wihich had an unusual square head. The strange looking item in the middle of this photo is a Broaching
tool, used to manufacture that square head
Back in December I gave an update on some of the manufacturing updates for September - December (see below). Since then we have still been busy beavering away on many other re-stocks and a few new parts.
I try and update our RacingNorton website homepage with any significent changes or updates as they happen -
so if you want to check for regular updates, then best to check here:
RacingNorton
Alternatively, if you have a part you need and cannot find - or we are showing as out of stock, then you can email my daughter Steph at sales@racingvincent.co.uk Steph deals with all our online orders and also adds customers to our 'Wanted' list for specifc items in the pipeline (but please bear in mind we get a lot of emails and are a small business - so may be a few days to get back to you.
Jan/Feb 2020 - Latest Manufacturing Updates:
- Square Section Clutch Springs: We have just had a new batch of square (racing spec) clutch springs - to fit both Manx Norton 4 plate clutchs and standard 5 plate clutchs. Springs of this type were fitted to some Manx Norton in the 1950's/60's, and this unusual spring type is now very difficult to source. These are UK manufactured by our main spring manufacturer and excellent quality. They give a slightly stronger spring force than the same size standard round spring - and help combat clutch slip. Details are available from the Item listings (Items 0386 and 0387) in our RacingNorton gearbox/clutch section. Click on either of the photos on the right to take you to the catalog section with thse available.
In addition, as you can see in the second picture on the right - we are also in the progress of manufacturing the distinctive 'square head' racing clutch spring bolts that were of the type fitted to racing Norton clutch's of 1950's-60's. The unusual item in the middle of the picture is a Broaching Head for creating that distinctive internal square . .. I am looking forward to shortly trying it on our CNC machine.
I am also looking to manufacture a new batch of stainless spring cups in the next 6 weeks - as shown in the picture, as we are currently out of stock of this item
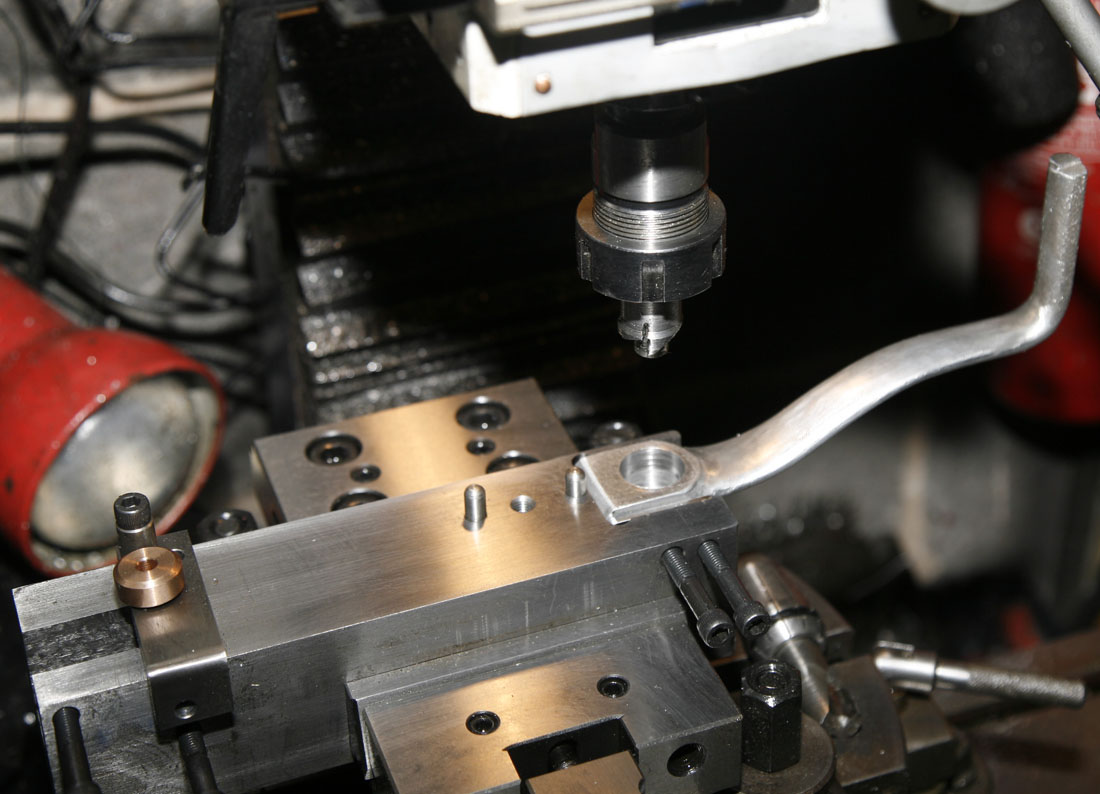
Progress has been made on these M30/racing alloy gearlevers to fit the Norton upright and laydown pre-AMC gearbox splines. Below on the left is the original gearlever - from a pre-war Manx upright gearbox (possibly Works?) and on the right are the first two castings after initial machining on the jig above. Broach is now completed and expect first batch of these to be about 3 months away
- - Norton Alloy Racing Gear Lever Progress: Much progress was made over the Xmas period making machining jigs for the manufature of these racing M30/M40 gear levers - the casting patterns havng been copied from an original pre-war M30/Manx gearbox lever that I purchased with an original gearbox many years ago. Alloy levers were particularly rare - and may even be Works.
As well as first batch of alloy castings from patterns
now made, I have now completed jigs and had the corrrect spline broach manufactured. The first two trial levers were completed this month.
We will now start production and expect to have a small batch reayd within the next 3 months.
As well as fitting competition M30/M40
and pre-Featherbed Manx models, they can also be fitted to SOHC Inters and those road models using the laydown Norton gearbox. Email us on sales@racingviincent.co.uk if you want to reserve one
- Stainless BTH KD1 Housing Bolts: These have been out of stock for a while - but I am just CNC manufacturing a new batch which shoudl be available in mid February. They are a difficutl item to make - as they have milled hex faces, drilled for lockwire and a screwdriver slot . .. but they are pretty little trinkets and definitely improve the look on your BTH magneto. Find them here on our catalog:
xxxxxxx
xxxxxxxxxxxxx
- Norton Shims - new batch, all types: These have been on order for some weeks and I am told are progressing well by the manufacturer. Expecting to take delivery 3rd week in Feb. As well as most SOHC shims, we also have a few new shims like BTH spacer shims, mainshaft shims for SV/OHV Norton engines and Norton gearbox shims
30/12/19: A Prized 'Works' Type Magneto For My 1938 Gardengate Manx

One of two DOHC Shortstroke cambox's purchased at Stafford Bonhams auction earlier in 2019 - after sympathetic refurbishment - read the article to see the before and after and what they look like inside
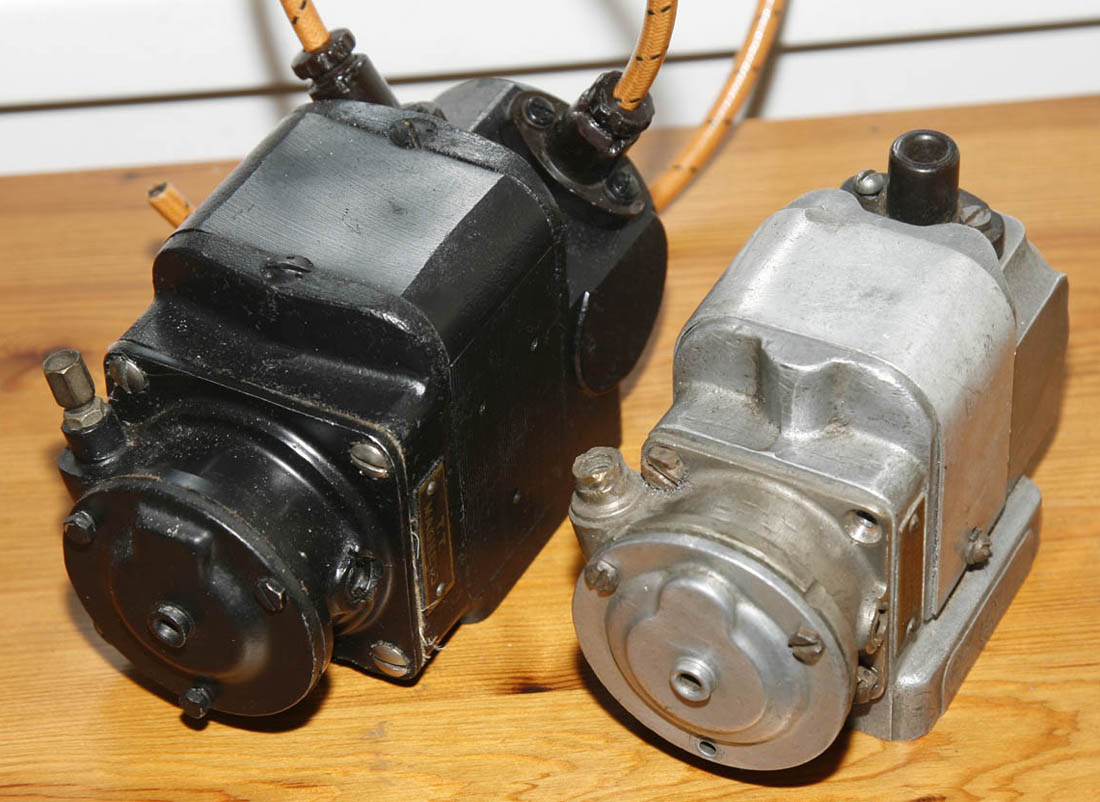
I confess - I feel a bit like the Cat That Got The Cream. because a few weeks ago I was able to purchase this fantastic and rather exotic BTH KH2 - twin spark racing magneto - of which a handful were supplied fo Norton, for use on the Works bikes in 1935/36 (and possibly 37/38 . . . does anyone know more???).
I have known of this mag for many years, belonging to a very serious and well known collector of racing bikes, and have been trying to persuade the owner
to part for it for the last 10 years. Anyway, a few months ago we were able to finally do a deal, and it is exactly as I remember it, when I last saw it - which was on a visit to see this collector with my old friend Titch Allen about 12 years ago.
As for the magneto itself . . . it is a very interesting item. On first impression it looks just like a 'standard' BTH KD1 competition magneto, but with the addition of a second vertical pickup for the second spark - giving the magneto a distinctive 'dog kennel' appearance.
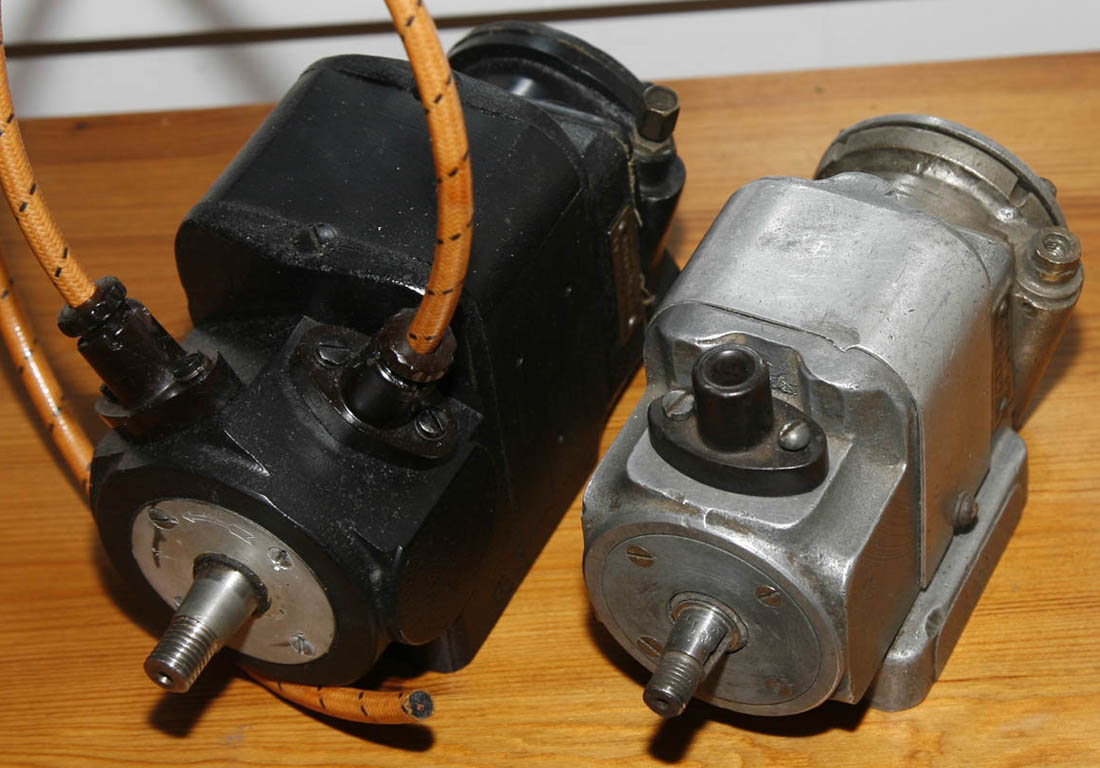
However, when you compare this magneto alongside a standard competition BTH KD1 as in the photograph below, it is immediately apparent that the KH2 is significently bigger, as well as heavier - despite the body being manufactured in magnesium alloy.
At the rear of the magneto - again, initially it looks to have the standard KD1 manual advance/retard housing - but if you look closely you can see that the KH2 housing mounts are both wider and taller vertically than the KD1. And although it cannot be seen in the picture below, the casting which houses the cable mechanism has a slightly different profile at its base.
I had first seen one of these magneto's fitted to Ian Bain's 1935 Norton, when he was racing in the mid 1990's - and talking to Ian about it, gather much of that bike including the magnetot was genuine Works.
I confess I have coveted this rare twin spark magneto since that time, and knowing where one resided - really wanted it - so I could fit it to the engine you see on the left - which is the engine I have built using our first set of M30 pre-war specification racing crankcases - but using genuine pre-war M30 cambox/head/barrel. Although I am currently building it into a later 1938/38 Manx Grand Prix spec Gardengate chassis (with 'Suicide' forward facing stand), the engine is very similar in spec to the last Works single knocker engines used in 35/36, being full magnesium.
As you can imagine I am over the moon to finally manage to get this particular magneto, and it was not
long after I got home with it that I could not resist taking it to my workshop and trial fitting it on the magneto platform of my engine.
Interesting - two other features of this magneto quickly came apparent - first, it is longer than a standard KD1, meaning it was not possible to fit the standard pre-war M30/Manx rear engine plate . . . I will need to modify it to fit. And secondly, it looks like the sprocket taper is a larger diameter than the standard BTH taper - so it might be necessary to make up a special sprocket to fit. No worries on either of these mods
We have just had a new batch of Square section clutch springs to fit both racing 4 plate clutch's and standard 5 plate clutchs (Items 0386 and 0387 in our Gearbox/Clutch section - Click on photo to take you to our RacingNorton catalog
Also, we will shortly be making the distinctive racing type clutch spring retaining bolts wihich had an unusual square head. The strange looking item in the middle of this photo is a Broaching
tool, used to manufacture that square head
I know that friend and enthusiast Dan Carpenter has also acquired a similar magneto for his own 36-37 bike, and has shown me a photo of an original twin spark head . . . so will cover what the final job looks like in a future article.
If anyone knows more of the history of this interesting magneto I would be happy to hear from them
A picture of Jimmy Guthrie on a 1935 Works Norton - one of only 3 photographs I have seen of Works Nortons fitted with the BTH KH2 twin spark magneto (click on photo for larger version). The engines were still single knocker at this time, but were already employing the magnesium crankcases and other magnesium parts. Chassis is rigid, the 'Big Plunger' style plunger chassis coming in in the following year - 1936
29/01/20: DOHC Cambox Stripdown Article - Part 1
One of two DOHC Shortstroke cambox's purchased at Stafford Bonhams auction earlier in 2019 - after sympathetic refurbishment - read the article to see the before and after and what they look like inside
I recently posted a writeup of the Bonhams Stafford Spring 2019 auction, which I attended on the Saturday, and purchase of two DOHC cambox's. this article covers the stripdown and cleanup of both of those cambox's
Norton DOHC Cambox Stripdown - Part 1
20/10/19: Gresley's Last Locomotive: Bantam Cock V4 - 3rd Loco Now Being Built (By Tornado Team)
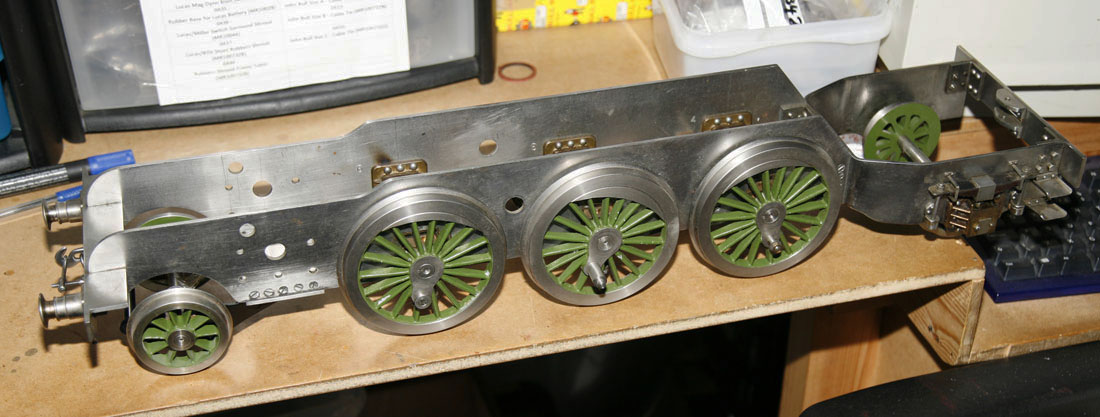
Above is the 3.5" Gauge live steam locomotive chassis I built back in the 1990's - I always promised myself I would carry on with it and get it steaming one day - probably a retirement project now!
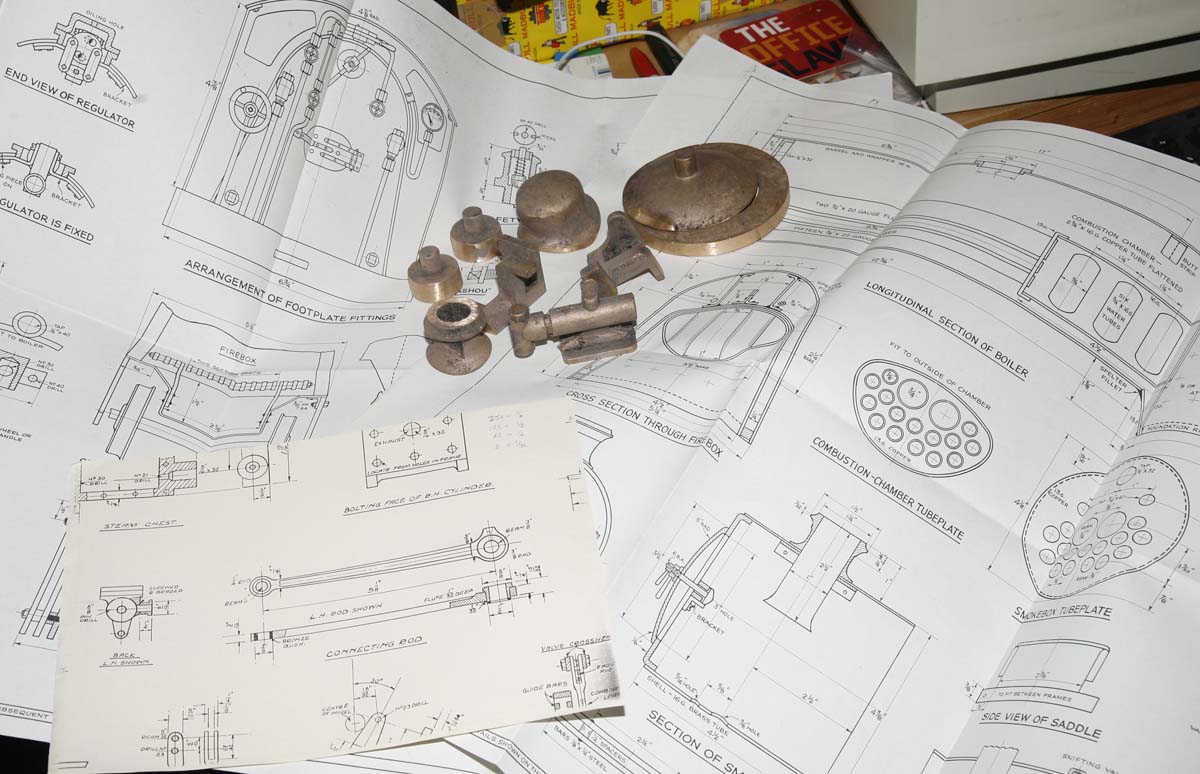
Below are a few of the many large Plan sheets, including boiler construction and Connecting rods. Sitting on top are just a few of the many bronze castings I have for the loco - to give an indication of scale the circular smokebox cover on top right is about 5 inches in diameter
3.5 Inch Gauge Live Steam Loco - Gresley 2-6-2 V4 Locomotive
Just recently I was giving my upstairs home office a Spring Clean (well Autumn actually. . .).
And in doing so - I found another past hobby that I had almost forgotten about, as in the two photos on the left - this is a 3.5" Gauge Live steam locomotive chassis I built from plans many years ago - it being a miniature representation of Sir Nigel Gresley's last locomotive design - the 2-6-2 V4 tender locomotive design, of which only 2 real locomotives were built - those being LNER 3401 (named Bantam Cock) and 3402 (unofficially named Bantam Hen) in the early 1940's.
I gather these two mid-weight mixed traffic locomotives were both good performers and of advanced design - coming from the pen of Gresley, one of the greatest locomotive designers of all time - the same man that designed the A4 Mallard (holder of ultimate World steam locomotive speed record - at 126 MPH in 1938), but Gresley died shortly after the first builds and his successor - Edward Thompson, when he took over replaced this design with one of his own - the better known Thompson B1 2-6-2. The only two loco's built worked for a period in East Anglia (of interest to me as my family come from that area) before ending their working days running trains in the highlands of Scotland.
I have had an interest in model engineering ever since I was a kid, occasionally visiting engineering exhibitions where I had massive respect for those engineers that could build these miniature steam locomotives that are often fully working replicas of the original real sized locos.
The most popular gauges for home engineers were normally 3.5" Gauge, 5" Gauge and 7 1/4" Gauge - but building a locomotive in any of these gauges is a major engineering undertaking and apart from anything else - they can weigh hundreds of pounds in weight when complete!, so when I first decided to build one - at a time when I had recently stopped racing bikes and was just starting a young family - I wanted to choose a design that would not be too large and complex to build - relatively speaking, but would still be capable of carrying my (then) toddler daughter around the garden - and the V4 2-6-2 in 3.5 Gauge was chosen for that reason. It also had many of the features I liked best in locomotives - a tender loco, external valvegear and an LNER loco that looks almost like a smaller version of an A3 Flying Scotsman.
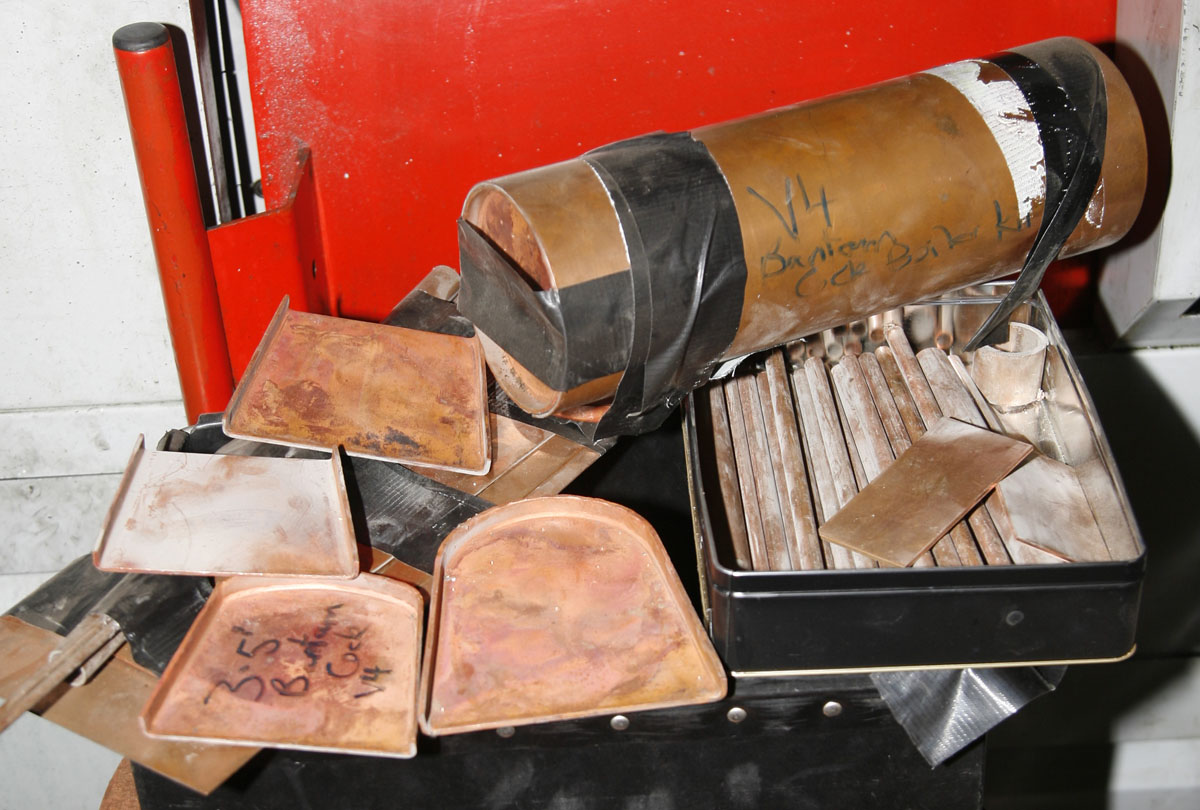
Having gone to the trouble of putting a duster to the chassis . . . I thought it worth digging out the copper V4 boiler kit I bought from Reeves about 15 years ago. As you can see there is a lot of copper there!
Most of the smokebox backplates have had the beads pre beaten around the formers that Reeves had for this loco. Biscuit tin contains all the tubes that will run through the centre of the boiler - a lot of Silver Solder required! !
Model Engineering - A Fast Disappearing Hobby?
When model engineering was more popular in the 1930's-60's there were numerous clubs and specialist's catering for the build of this style of miniature locomotive - but perhaps the best known specialist was Curly Lawrence - better known to most as just 'LBSC'. LBSC over a 40 year period modelled many popular full size locomotives in the miniature gauges - producing plans, castings, and instruction books on how best to engineer them. This V4 design is one of LBSC's less well-known designs, but nevertheless is a fantastic achievement to his skills.
I remember that when I was finding out a bit more about 3.5 Gauge locomotive building - and looking where to start, I went to one of the best known model engineering companies - A J Reeves in Warwickshire (click on link to see their current website), who were able to advise on how best to start - but more importantly, were also the current holders of many of LBSC's designs, and were able to supply plans, many of the castings as well as the raw material to start on building the locomotive. Having rediscovered the chassis and dusted it down a few weeks ago - it rekindled the old interest and I also pulled out the plans to remind myself what they look like - there is an amazing amount of work to produce them, about 11 sheets if I remember correctly, each about a metre in width, and many of them having drawings of multiple parts - all needing to be faithfully reproduced if you wish to make a fully working loco. I remember marvelling at the time - the complexity and ingenuity that went into steam locomotive design, and how so much of this is captured in miniature - it is sometimes easy to forget that steam railways had evolved in the United Kingdom for over a 120 years before their demise in the 1960's and you only have to look at the boiler design and the valve gear complexity (in the case of the V4 the well-known Walshchaerts valve design - all those connecting rods outside the main drive wheels are the characteristic feature of this design) to see that these were no simple agricultural pieces of engineering - even the miniature version in the plans above are marvels of steam engineering in their own right - everything is there for a reason and and they are definitely not toys. As an example of what I mean - even on my relatively small 3.5 gauge loco each main axle has bronze blocks sliding in hornblocks riveted to the chassis, and each of these axle boxs has its own twin spring suspension. The rear trailing axle also has real working suspension - but rather than coil springs it uses leaf springs - each one being a miniture of the real thing. Even the front buffers on my loco are spring damped as the real thing would have been.
Having re-acquanted myself with my own loco - I recently attended a model engineering exhibition again, with an old friend and railway enthusiast. Although it was great to see there were still a packed attendance and many amazing loco's on display - we could not help but notice that the average age of those attending must have been in the '60's! Unfortunately - although the trade stalls looked really busy, you could not help but feel that the future of this absorbing hobby looks bleak, if it is no longer attracting the younger generation - a real shame.
Click on the photo above to take you to the A1 Steam Locomotive Trust web site. It was this team of volunteers who built A1 Tornado, the first new build of a mainline locomotive since the 1960's.
I was amazed to find this group are now also planning to build a Gresley V4 3rd loco, as well as a P2 2-8-2 being built alongside it. Well worth a visit to their site - and the very best of luck to them for both builds
For my own part, digging out and cleaning my own part built loco definitely got the juices flowing again, but with three project bike builds already WIP, and so much going on with the parts business - I dont see me doing any work on it for a while. Never the less - it is something I am really looking forward to going back to one day - probably a retirement project if my current bike restoration progress does not improve!
If you would like to see what a completed 3.5 Gauge V4 loco looks like in the flesh - and how they run, I found this excellent video of one in the US on Youtube:
A similar 3.5 Gauge V4 Bantam Cock Running - Youtube Clip
As a final footnote. While Googling the Gresley V4 history online as part of writing this update, I found that the company that recently built the amazing full size A1 Tornado express steam locomotive
are now also planning to build a 3rd real V4 2-6-2 locomotive. Click on the photo on the left to visit their website. It would be amazing to see a real version of this loco again, but that really is a massive undertaken - I wish them all the best of luck with it and will periodically visit the site to check out progress.
20/04/19: SOHC Petrol Tap Latest Batch - an interim update to customers
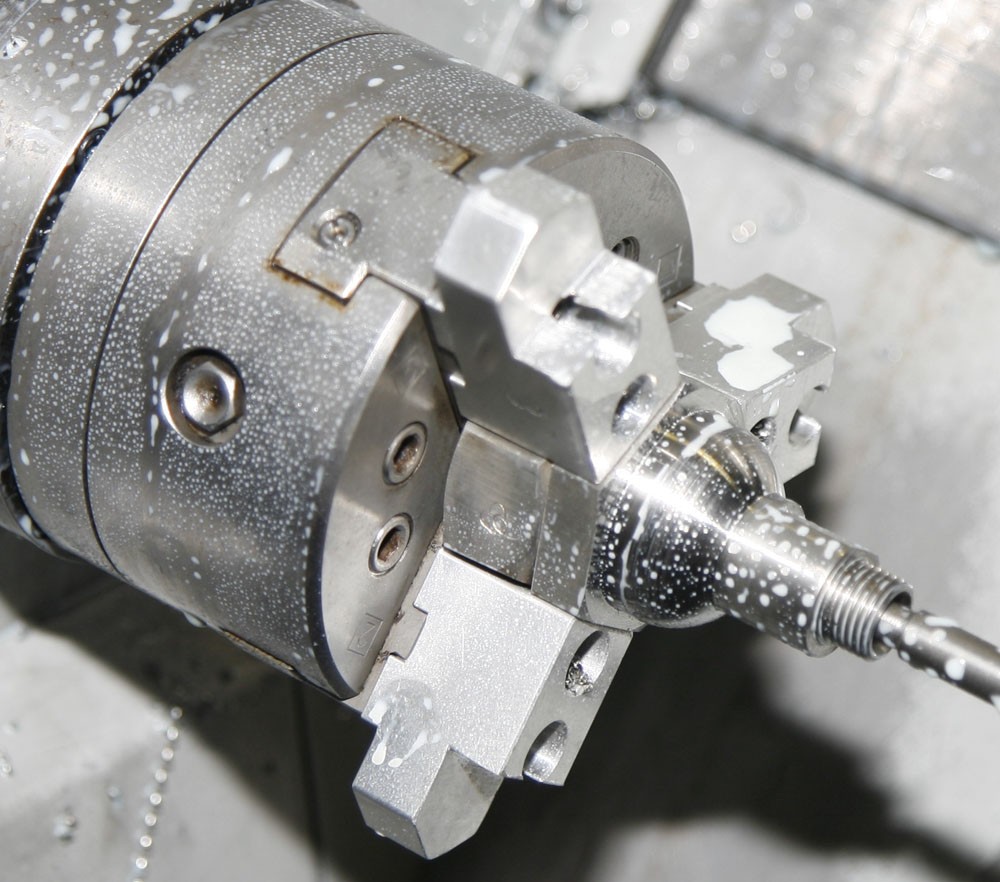
Machining main body of SOHC Petrol Taps on our Emco CNC lathe
I am very aware that since we sold the last of our previous batch of SOHC Petrol Taps, just over 12 months ago, we have had numerous customers on a waiting list for them, with others enquiring when they will be available again? - I am sorry about this, but read on to find out why:
Just to let customers know the background to this and give some visibility - about 15 months ago when I knew they were running low I had placed an order with the previous CNC manufacturer (an excellent engineer, but an older 'one man band' company), and in anticipation had purchased the hard to find (and expensive) Whitworth Imperial sized hexagon stainless steel bar and had it delivered to him. After a couple of normal updates that they should be ready in next 3 months, everything went quiet and it was only two months ago I found out that he had been very ill and would now no longer be able to manufacture them again.
Initially I obtained quotes from some one else to manufacture them, but it was clear the price would be at least double our previous price, due to the complexity and number of operations and parts - so although pretty much at the limit of the functionality I have on my own CNC (which is a 2-axis lathe with 3rd axis C-drive milling capapbility), I have decided to bring this job In-house
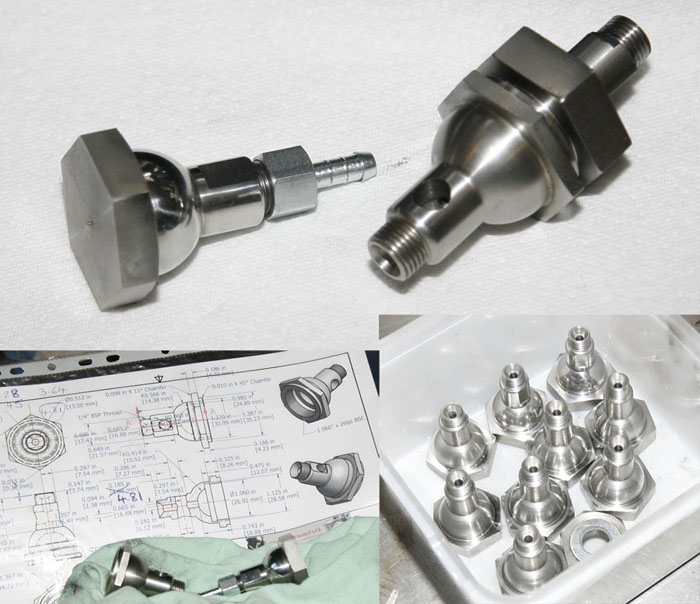
New taps now being manufactured - expect 2 to 3 months
Our original listing photos - showing the stainless Steel 'bowl' style petrol taps we had previously offered in stainless steel. Click on either photo to go to Catalog listing - where we will show the latest 'available' date
So having had to travel out to Lincolnshire to pick up the 3 metre Hex stainless steel (and chop it so it would fit in my van!), I bought it back to base and endeavoured to make out new drawings on the Autodesk Inventor software I use for all my drawings now (Inventor software creates 3 dimensional objects, rather than the older Autocad which is two dimensional - which I had used for the original drawings 10 years ago).
Because of limited time available since Xmas, and finishing off a large batch of SOHC engine bolts on the CNC, I have only been able to get on with this job in the last 6 weeks. I am now making good progress and as the top photo shows - one of the new batch having its final external profile machined on my CNC (it is being held in a Rohm pneumatic chuck using soft jaws), things are starting to take shape.
That said - I am not there yet and still have a number of programs to write, including the special milled taper pins that turn the fuel on/off and the seperate distinctive levers. I am hoping that the first batch should be available in the next 2 - 3 months though (as I only get weekends to CNC machine time). Given the time spent writing and amending multiple programs,plus jigs, tooling and materials - It is inevitable the price will rise from last time (previously £130, which hadent changed since 2011) - but hopefully will not be too much - certainly not the 'double' I was orginally quoted for these! . . . so bear with us and hopefully they will be back available shortly and just
as shiny and pretty as before!
If you need a further update on how these are progressing, then drop us a line on our normal Sales email and Steph will update: sales@racingvincent.co.uk
04/08/18: Website Camera Glitch's and Upgrade - Photography On A Budget

Workhorse Canon EOS-1 recently developed a fault - click on photo for a bit more about photography on a budget
Not something I would normally cover on this site is photography. But as well as being an on/off hobby for many years, it is also an important part of providing content for both of my websites - either for pictures to accompany articles, or images to help show the items we manufacture and offer in our online catalog.
Recent woes with my current website camera (shown left) meant I have had to look around for a replacement. So I also wrote this short article, to help anyone who is just as much as a cheapskate as me, but still appreciates nice quality equipment and doesent mind shopping second hand for a possible bargain.
As well as giving a bit about buying cameras second hand, it also got me thinking a bit about photography as a hobby and how the equipment has changed over the years since I first became interested
Click on the photo on the left or the link below to read the article:
Canon Camera Replacement Time
25/02/18: Having a Norton and Sidecar - a family tradition!
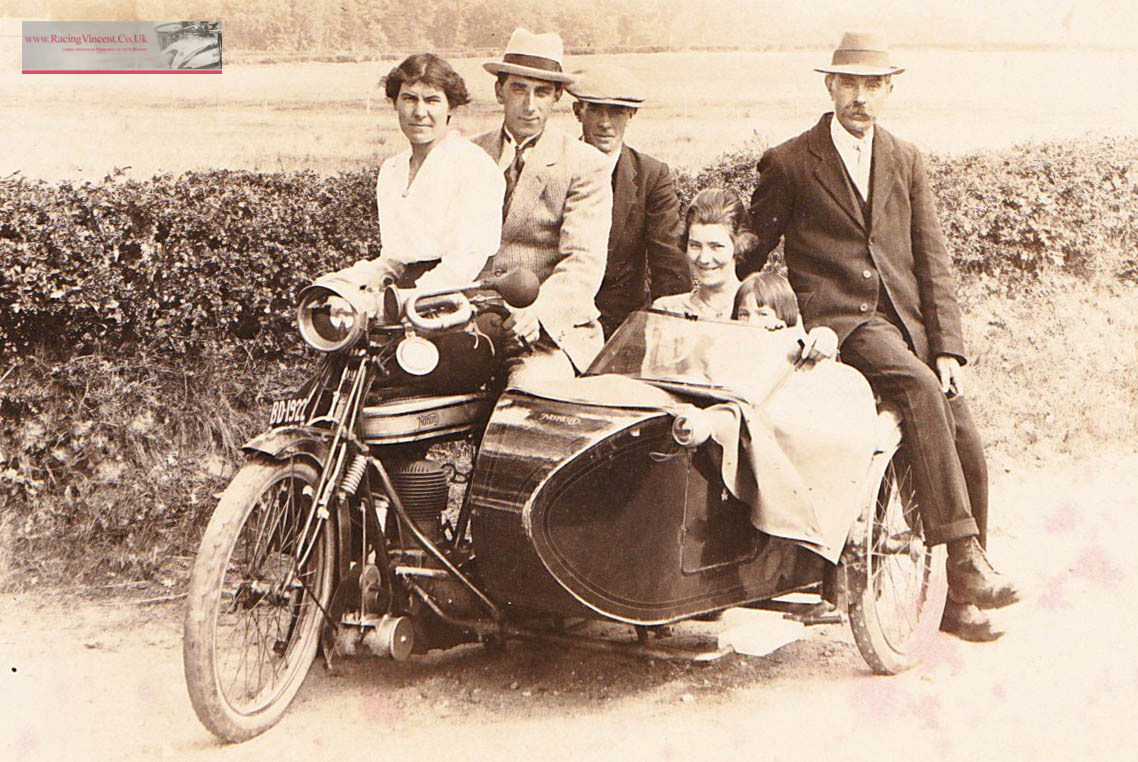
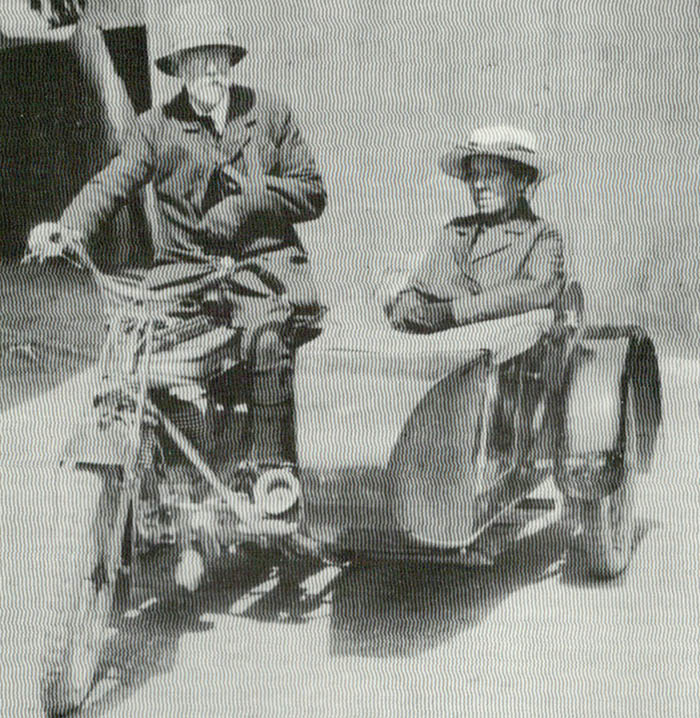
A family photograph with a Norton sidecar outfit I did not expect to find - given that it looks to be almost 100 years old and shows my great grandmother (on far left) and great grandfather (far right) with great grandfathers sister in sidecar and husband riding.
Not sure on year, but possibly 1921-22?
While clearing my mothers house over the last few months - my two sister's and I came across many books and box's of photographs and slides - my father was an amateur photographer amongst other hobbies, another interest he passed on to me!
However, in one of the picture albums I came across some old family photos going back to the early 20th century, including this wonderful picture that I had not seen before - but on close inspection looks to be confirmation that our family were riding Norton motorcycles and sidecars long before my father and I got involved with them.
Having scanned the orignal photograph which itself was too small to make out much detail - I was able to blow it up and print it on A4 paper. Then having shown it to my mother (now 81 and having recently moved into a nursing home, as her health has declined) she was really surpirsed - as she was able to see that the photo looked to be of my grandad's parents (on the far left and far right), and the proud owners of the Norton outfit were probably my great granfathers sister (Zafira?) and her husband - who looks to be the rider. My mum vaguely remembers being told they visited my great grandpartents and family on one occasion in the sidecar, then went on to visit other relatives in the Norfolk area, this may well have been a photo tanken of this visit
My mother also ruefully noted that the gent in the flat cap behind the rider may have been of one of my grandfathers older brothers - Uncle George, whom I gather may not have been 'playing with a full deck', and who sadly ended his days in a home for the mentaly unwell. Just goes to show, how a photograph can evoke a whole new perspective of where you came from and the life your predecessors led.
I have to admit, I am fascinated and pleasently surprised to see that my grandfather's side of the family were already the proud owners of James Lansdowne Norton products almost a 100 years ago - and at a time when James 'Pa' Norton was still alive and still riding an almost identical outfit himself
- as the photo below shows - and having now blown the photograph up to A4 side - a chance to see my great Grandparents close up, where previously I only remember seeing small faded photographs of them late in theirlife in the 1940's/50's.
This is the Norton sidecar transfer I sell - sorry but it is reversed until fitted - but shows well what the transfer on the door of the sidecar looked like
Pa Norton himself, with his wife Sarah in a very similar Big 4 outfit in 1919.
I think Pa's outfit was a 'Colonial' spec model, identifiable by the bigger mudguards and tyres - Pa did a lot of overseas travelling at this time - in part to help advertise his products. Pa Norton passed away in early 1925
What Date Is the Photograph?
I am not an expert on early Nortons of this era - but can see that the front brake is still of the 'stirrup' variety, which dates it to pre 1923-24. I believe the Big 4 model Norton and sidecar was first offered about 1913, and this certainly looks an early model - look for instance at the early style 'sit up and beg' handlebars, but if you look carefully you can also see there is what looks like a tax disc holder mounted on the handlebars - and tax discs were only introduced from
1st January 1921, I was hazard a guess it was sometime around 1921-22. On seeing her grandparents looking so young, my mother thought it may have been earlier - mid late 19'teens, but I cannot think of anything else it would be other than a tax disc holder?
Actually tax discs are something I know a little bit about - having done some reading on them as part of the work we are doing to replicate them for our RacingNrton catalog - and I can see that my great uncle was clearly a law abiding fellow - as the recently introduced law of displaying your tax disc requested that the disc was displayed from one of three places, and one of those places was from a tax disc holder attached to the left handlebar - which is where it is in this photograph! I have tried blowing up the photograph to see if the tax disc is legible, but unfortunately not.
As a final interesting point of detail - if you click on the thumbnail above, as always, a bigger version will be available - and in this version if you look closely you can see that this is a genuine Norton sidecar as it has the Norton insignia on the front top part of the body and just visible under the blanket (nice to see my uncle was enough of a gentleman to offer a blanket to keep his passengers warm!) is the other transfer fitted to the Norton sidecar - which I believe is the same transfer I offer ffrom are RacingNorton catalog - see right
More than anything though, it is nice to know that Norton motorcycles and sidecars have been in our family since the earliest days of motorcycling!
08/02/18: More early Douglas 2 3/4hp Spares Acquired
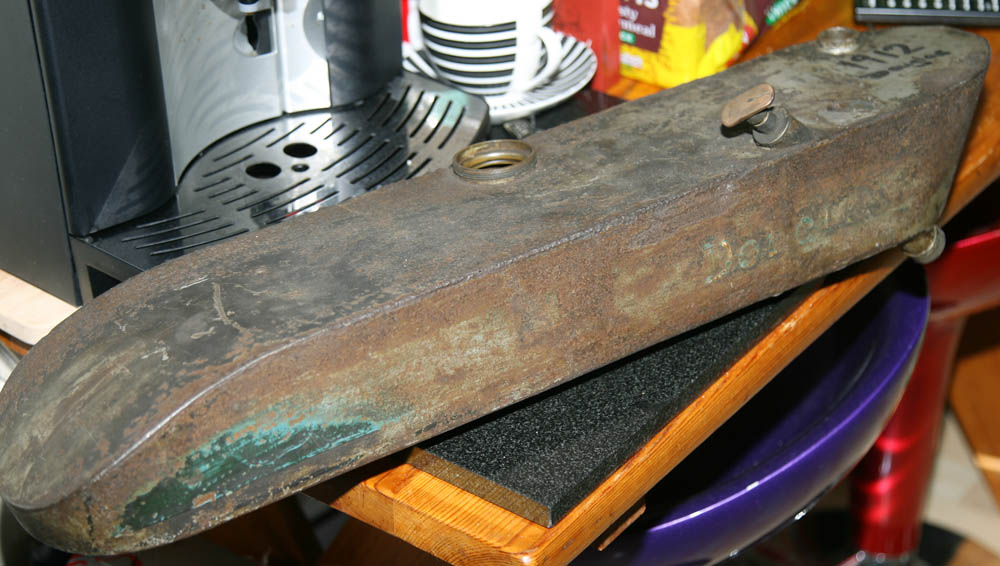
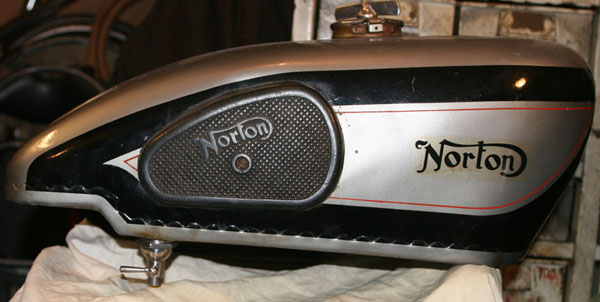
Original 1912 Douglas pertrol tank - including traces of what could be the original pain.t. This early tank lonks longer and slimmer than the version on my project bike
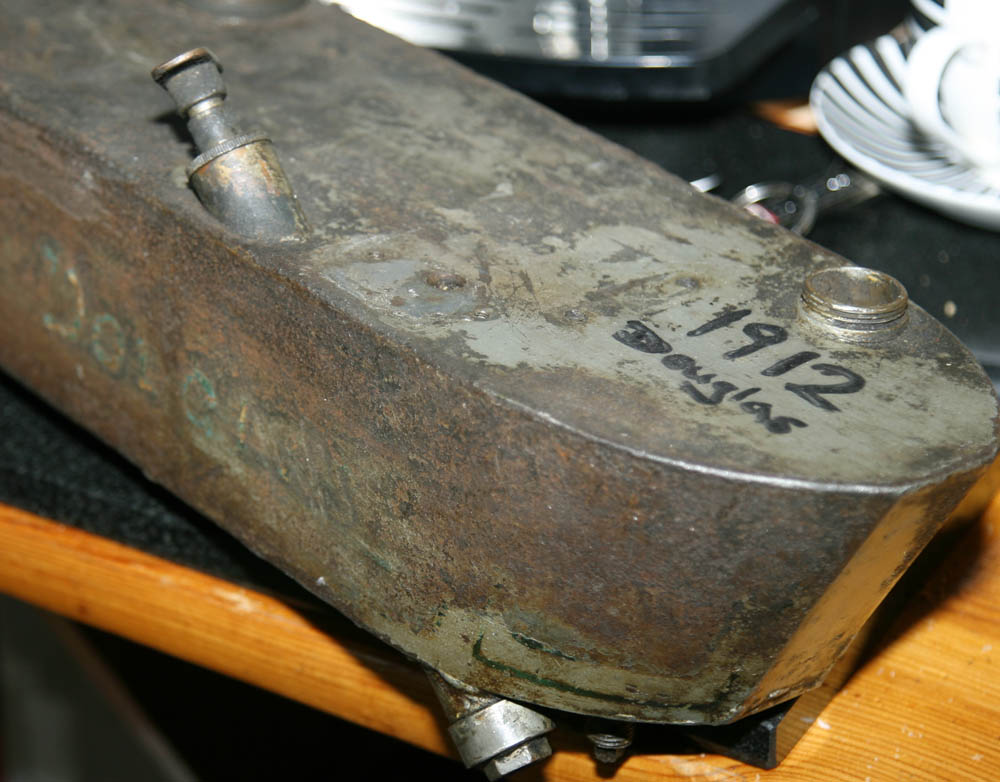
Here you can see oil pump - again slimmer bore than later type. Head of hand pump looks original - including the reduced part whcih I have seen on other similar pumpls. Note the fain traces of the 'Douglas' wording, and lining at base of tank
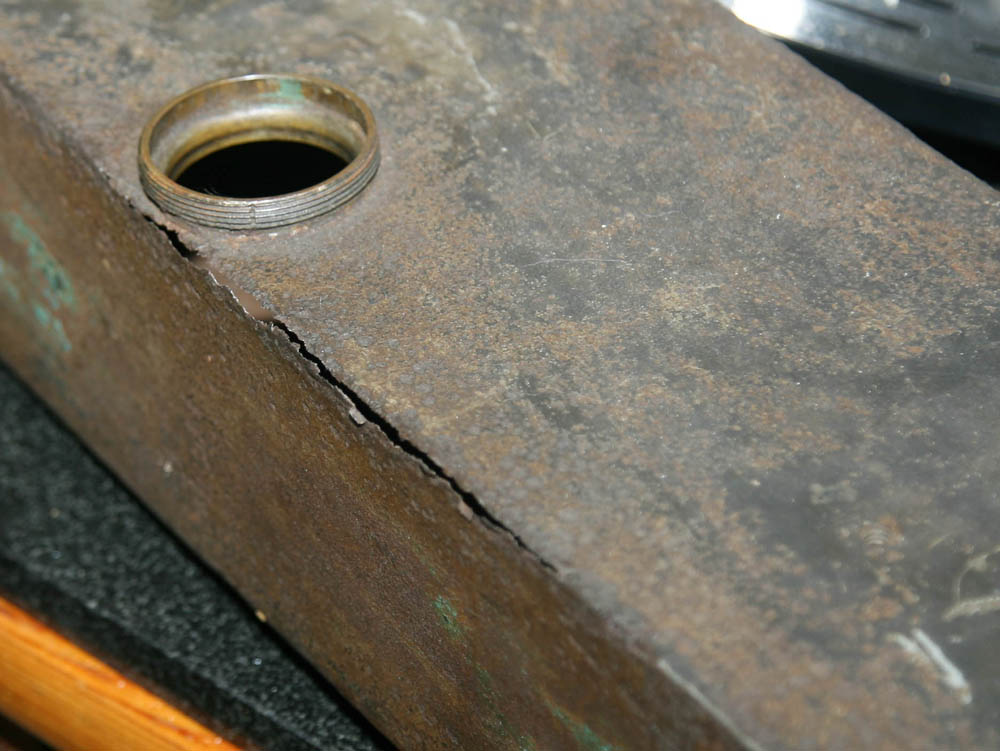
Unfortunately not all goo news - the tank has some long time corrosion and left upper seam has corroded through. At some point some clever silver soldering required
I actually acquired these parts back in 2017, but as I have just got round to working on the Douglas build again, I have dug them both out – so thought would be good to show them here.
Since purchasing my Douglas 2 3/4hp project build back in 2016 I have kept my eyes scoured for suitable spares – and as I have mentioned elsewhere, quite like the idea of one day considering a second build, to make use of my spare engine – possibly to consider a 1913 spec OHV racer. So while searching Bert Poll’s excellent Douglas parts site last year I noticed he was advertising this very original and early 1912 petrol tank. I know my own tank is of the slightly later type – it being slightly wider and having a more shaped front section – but I do really like that tank, and definitely want to keep it on that first bike. But just in case later on I decide I do want to build a second bike (Douglas experimented with an OHV twin using the 2 3/4hp crankcases in 1913, eight years before offering a production OHV twin for sale to the public), this tank would be perfect. As you can see from the photos it is in very original condition and is itself a bit of time capsule. As well as its slimmer construction, it also has smaller oil and petrol filler holes than the later tank, and the hand oil pump is of slimmer bore. The pump itself looks original, but it feels like the spring and leather inner may be missing. Unfortunately it has got some corrosion – and this is quite serious on the upper left side, to an extent that the seam has rusted through. It has gone on the spares shelf for now, but at some point I will need to consider carefully how best to repair. It would be nice if I could somehow degrease/derust the inner faces good enough to feed in some brass L shape bar and silver solder the split seam – but I suspect I may need to cut the bottom to do this properly. We will see.
The photograph below shows another purchase in 2017, this time from E-Bay (I still enjoy a good sniff on E-Bay every now and again!). This is another 2 3/4hp 2 speed gearbox, and although rough and rusty looks very complete. I wanted it mainly because I am missing a gearbox/engine sprocket and they are not offered by the club. Therefore if I can find a pattern, I am considering having a batch made. This one has worn teeth and is of the later ‘6 hole’ variety, but its other vital dimensions are correct. The earlier type was 5 holes and of a smaller pitch chain – but looks similar.
This gearbox once I thoroughly degreased it and cleaned off 80 years of dirt and mud looks relatively good condition and also included the rear belt pulley. Again . . . another missing ‘lump’ that can be saved for a possible ‘second build’. Interestingly – over the span of years this model was made (circa 1910 – 1924) numerous gearbox/clutch permutations were available, including 3 speed models. However, although this looks to be a later gearbox – it is still of the 2-speed clutchless variety that would have been fitted to the 1912/13 race bikes – the other reason it appealed.
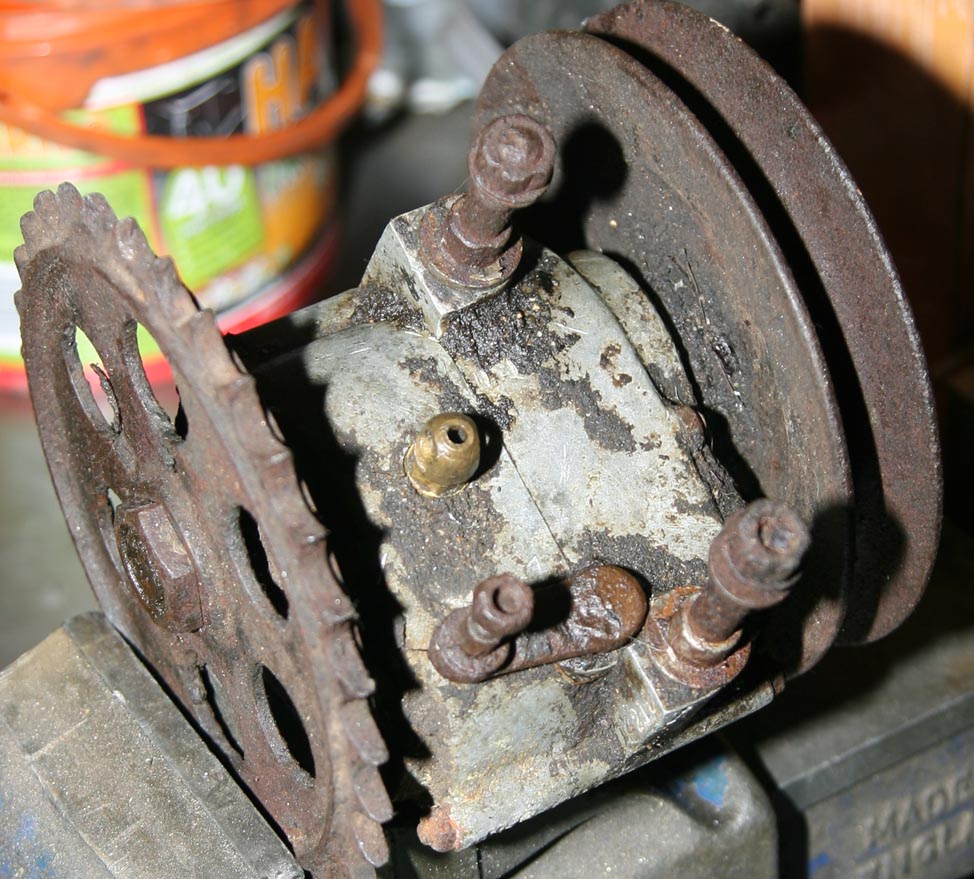
Spare Douglas 2 3/4hp gearbox purchased off E-bay looked superficially rough but solid. It is fitted with a later type '6 hole' engine sprocket which was one of the meain reasonf for the purchsase - I dont currently have an engine sprocket for my main build - so can use this as a template for having a batch made
06/02/18: Wanted: 0 - 50 MPH Bonniksen
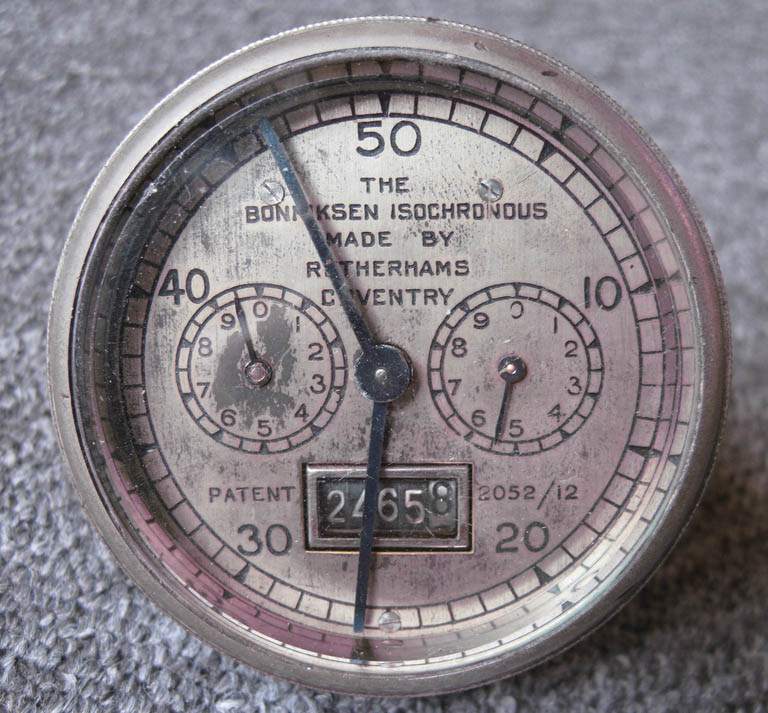
The familiar face of a Bonniksen twin dialled speedometer. I am looking for an early 0 - 50 MPH for my Douglas if you can help
If anyone is able to help - then I am looking for an early type 0-50 mph Bonniksen speedometer for my Douglas 2 3/4hp.
I am not too fussy about which model it is - there were both single dial and triple dial types made, but the very early type had a bezelled glass and knurled ring, rather than the later 'pressed' type ring - as per the photographs here.
Ideally it is this early type I would like to obtain, but any 0-50mph type you may have i would be intrested to know about, thanks.
Any condition considered and if it comes with front wheel gears, cable, mounting clamp then so much the better.
If anyone can help then my email is paul.norman@racingvincent.co.uk
And dont mind offering some discount on Norton parts if it helps!
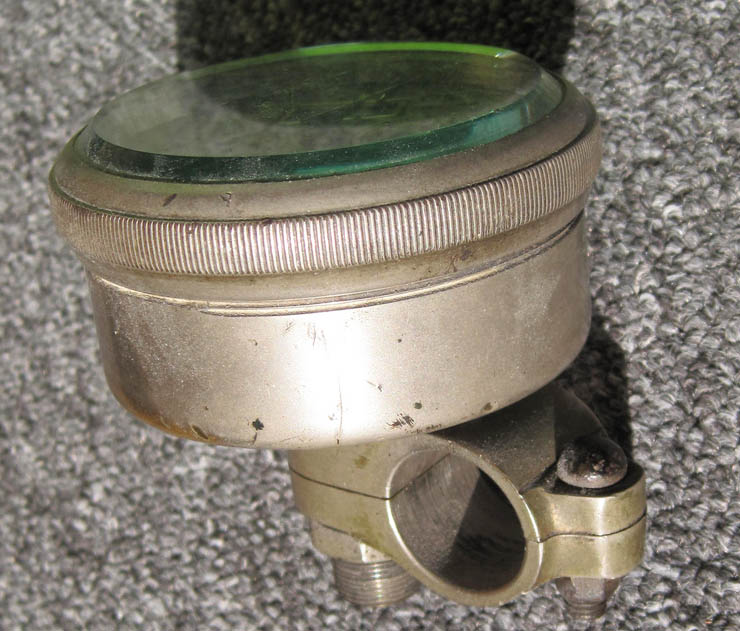
Early type Bonniksens had a bezelled glass and knurled ring similar to this - it iis this type I am looking for ideally
01/02/18: Norton Inter/M30 Omega Forged Pistons - New batch almost ready!
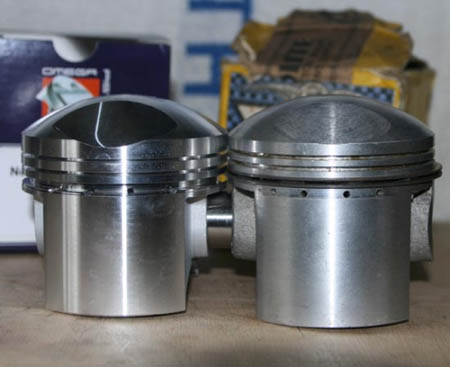
Omega forged slipper piston on left - original pre-war Hepolite Norton Inter piston on right - which was used as pattern for our forged version
Just to let RacingNorton customers know that I am expecting a new batch of Omega forged slipper pistons to fit both Norton Internationals and M30 (early SOHC Manx) models.
I have also had a small batch of alchohol/methanol versions of this piston type commisioned.
They are expected in approximately mid Frebruary 2018 - click on the photo on the right to take you to the normal RacingNorton Head/Barrel catalog section where we list these - they will be showing as back in stock once they have arrived.
Or you can email Steph on our sales email if you want to reserve one of these pistons - a small deposit will be required : sales@racingvincent.co.uk
27/09/17: Douglas flywheel gets a skim after 90 years:
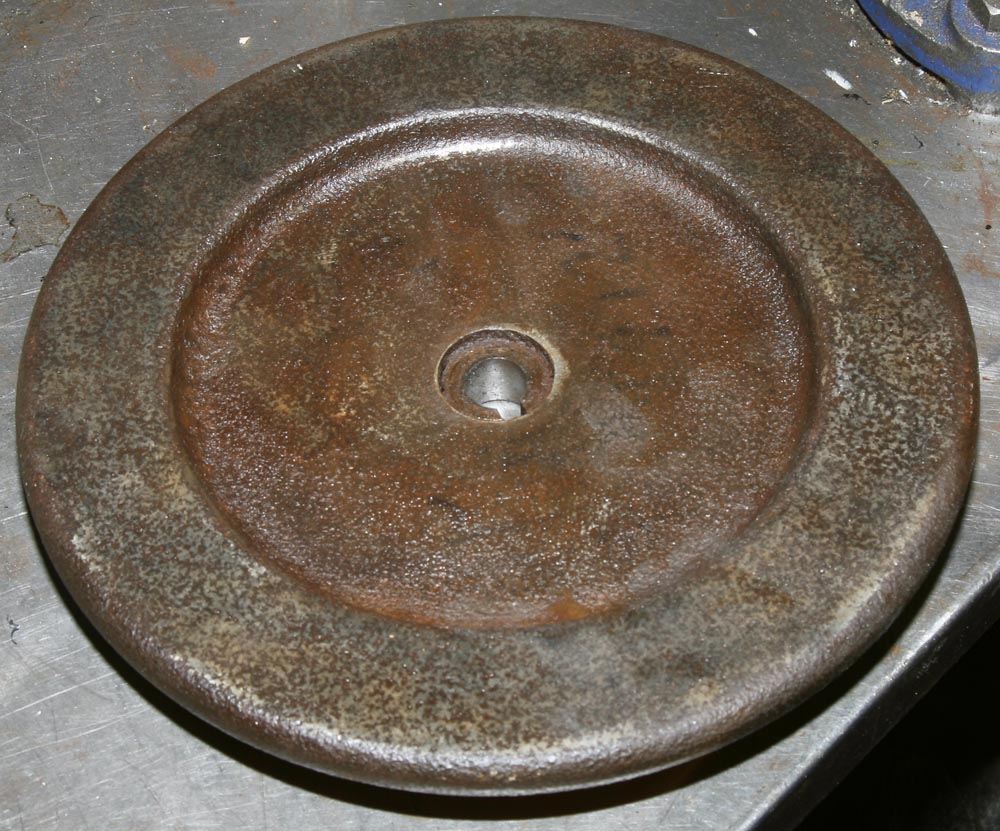
Early douglas flywheel as iit was purchased on Ebay about 12 months ago- in nice original condition - but heavily rusted and corroded
When I originally purchased my Douglas 2 3/4 hp parts kit from Bonhams Stafford auction, the engine did not have the external flywheel with it.
I purchased a second complete engine in the same sale and this did come with a good flywheel - but I wanted that as a complete spare engine, so started the hunt for another for the original engine.
A few months ago I found this nice original flywheel - and the corect early type, which had a woodruff slot to identify this early type, and although rusty - looked to be in good original and uncracked condition.
So a few weeks ago I bit the bullet and decided to give it a light skim on the lathe to remove the worst of the rust. Although I want the Douglas to have some patina to it, this one was a bit too rusty for me, and Ideally i would like it nickel plated.
It only just fitted on the lathe, but having made a tapered peg to support it in a collet, all went well - I just had to take my time and not try and remove too much at once.
It looks a lot better now, and loosely assembled before stripdown for painting the bike looks smarter with its flywheel cleaned up!
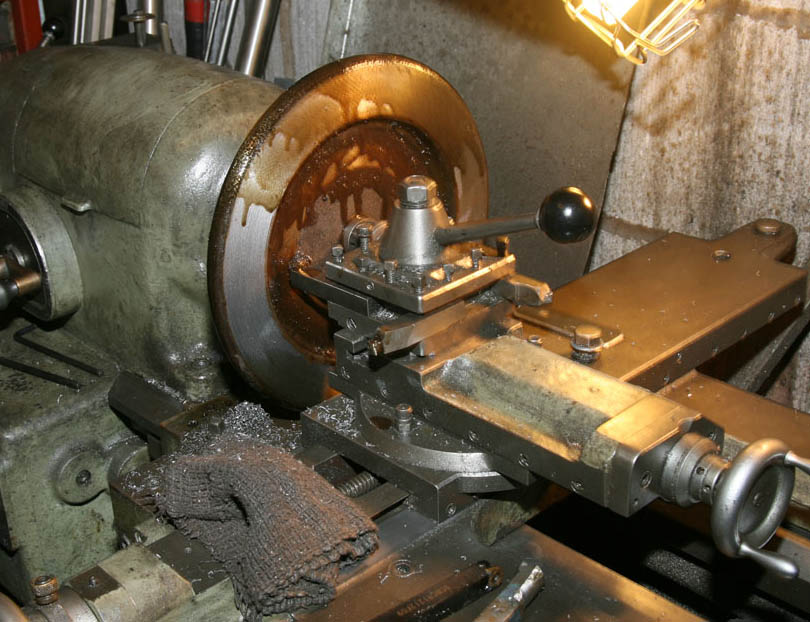
Flywheel mounted on my old Smart and Brown lathe, machined in backgear mode with the crossslide on auto feed I was able to take light cuts, watching the rust coming away in clouds, as well as a minimum cut of outer face
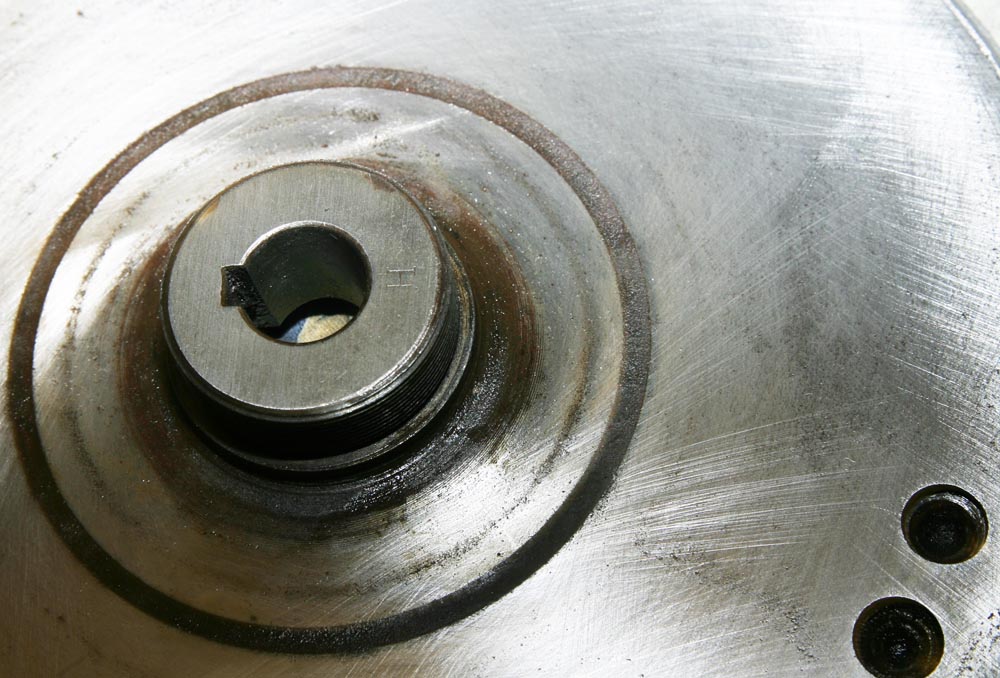
Photo above shows rear flywheel boss with taper. External thread on outside of boss is where sprocket screws on - I am hoping to have some manufactured soon. You can tell it is the early type flywheel, later 2 3/4hp flywheels dispensed with the woodruff slot. My other engine has the later type flywheel.
Finished job below, after machining the flywheel outer bead was lightly linished, it now looks more presentable. It will be nickel plated and inner area painted a dark blue colour before fitting
05/08/17: An Interesting Reminder of a Very Different Time: WWII Blackout Mask
 Slightly rusty but still solid and still with traces of original black paint - blackout mask is a reminder of a darker time. The small white section at the top looks to be white celluloid - and I am assuming it will just give a dull white glow to let oncoming drivers know there is viehicle ahead
I seem to be getting less time to go to bike meetings in the last couple of years - but one meeting I like to try and get to in the summer is the Stanford Hall Founders Day Rally near Lutterworth - if nothing else because it is a good opportunity to look round the huge autojumble for missing Douglas parts. This year while hunting through assorted bins I came across this item sitting forlornly on its own, looking rusty and neglected.
It is a relic from another darker era of our recent past - a blackout mask of the type that had to be fitted to the headlamps of both motorcycles and cars in the Second World War.
Hard to believe that in todays world of Halogen filaments, that in the already dim days of 6 volt electrics (Lucas was not referred to as 'Prince of Darkness' for nothing!) - with the advent of hostilities in 1939 the motorcyclist was also expected to fit this to further shield the light emanating from the front headlamp. No wonder the number of road deaths virtually doubled!
These masks used to be quite common to see at old autojumbles, but like everything else that gets old - you now see less and less. So although I initially walked by the pile of bric a brac this was sat in, I gave it a dobule take and returned back to pick it up. Although with a good layer of surface rust, it was still solid and of strong and clever construction - even the white celluloid strip looked in good condition. I could imagine it having sat on a nail of an old barn or garage for the last 50 years, just in case it was ever needed again!
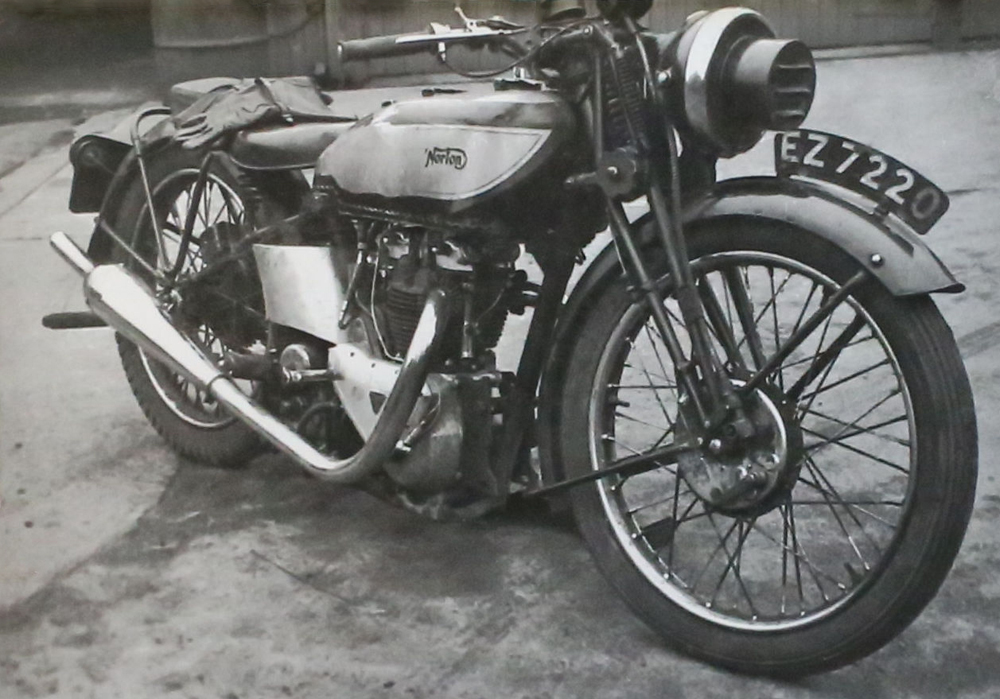
Great period photo of a similar blackout mask fitted to the Rex McCandless Norton Inter/Triumph (first Triton) - dating this photo to some point in the Second World War
In all serousness, I am not sure I will ever use it - but it is an interesting discusion point for when mates come round, and you never know - it may one day come in handy if I ever decide to go to Duxford/Goodwood or some similar place on a WWII enactment day out
 Some Norton purists may be aghast that what looks like a very straight pre-war Inter has had it's cammy engine removed and a Triumph twin engine has been fitted. But actually this was a very clever period build from the well known designer Rex McCandless who later went on to come up with the legendary Featherbed Manx chassis. And actually who could disagree this is not one of the prettiest Tritons ever!
I am indebted to Paul D'orleans for giving me permission to use these interesting period photos - the only ones I could find of a period Norton using this type of blackout mask.
If you would like to read the full background to thiis bike, and many other intersting articles - then visit Paul's excellent website here:
18/11/17: One of Lucas's Earliest Reflectors?
The last 6 months have been difficult due to my mother having ill and in hospital, and a final realisation she is no longer well enough to live in the house I grew up in on her own - so regretfully, we have had to clear the house and prepare it for sale. Part of that difficult task has been to clear my fathers old workshop - not the easiest of tasks as he collected a lot of tools (and junk!) over the years.
Most of the motorcycle parts had already gone many years before, but I did find a few bits and bobs - including the little gem you see here - although it did not look like this when found, having lost most of its paint and being quite rusty - it looked very sorry for itself, and came close to meeting the fate of the other dross I found in the same tray - to be chucked away.
But a quick inspection quickly showed that it looked to be a very early example of a Lucas reflector, including a plain red/rose coloured glass reflector - pre-dating 'faceted' reflectors that I thought even the earliest motorcycle rear lights were fitted with, to bounce the light.
I could just make out some writing on the rear of the reflector, and decided that a careful cleanup and re-paint would make it a very suitable candidate for my Douglas 2 3/4 hp build, this having a frame number dating it as 1920 (but being based on the 1912 spec race bikes) - and therefore hopeful this reflector woud be of a similar era
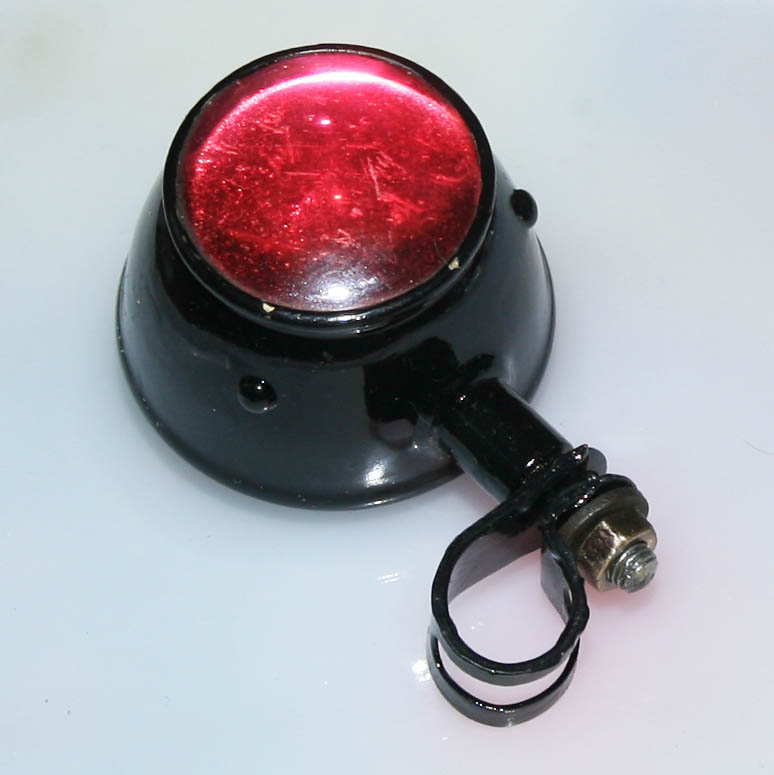
Lovely early Lucas reflector - this photo shows to good effect the very early style of red reflector - it being a simple flat glass without refflective prisms - but also the colour is more 'rose tinted than deep red.
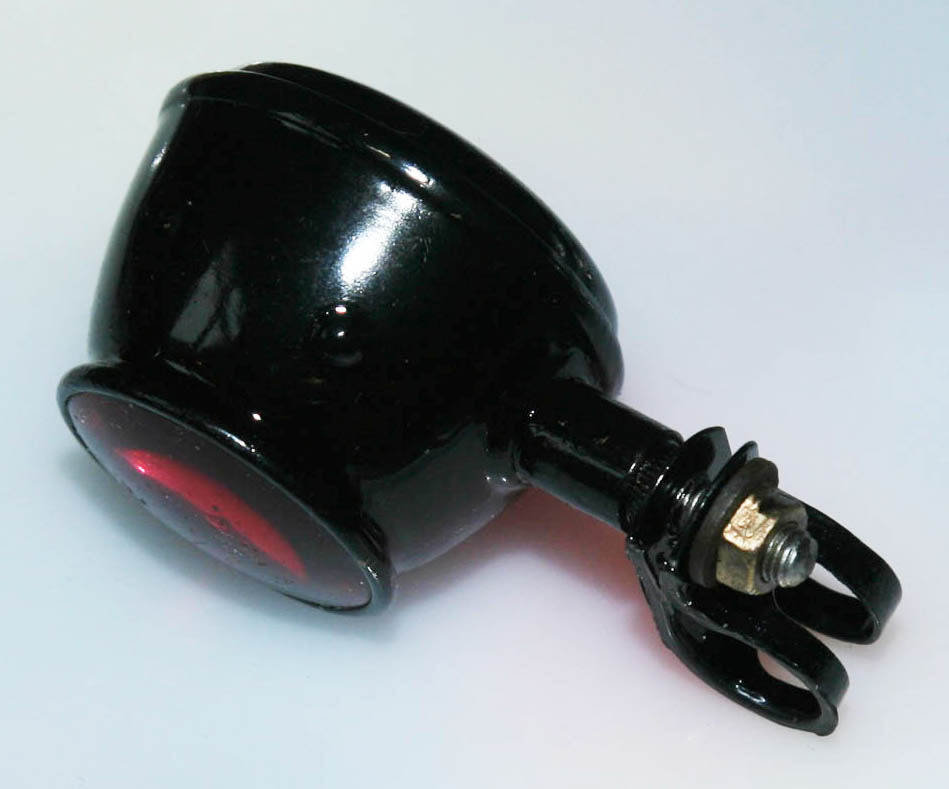
Above - side view. I was not sure when I first picked saw it in my fathers trinket tray if the fixing clip (with disintegrated rubber inner which was beyond saving) and nut were orginal, but on cleaning I am pretty sure they are.
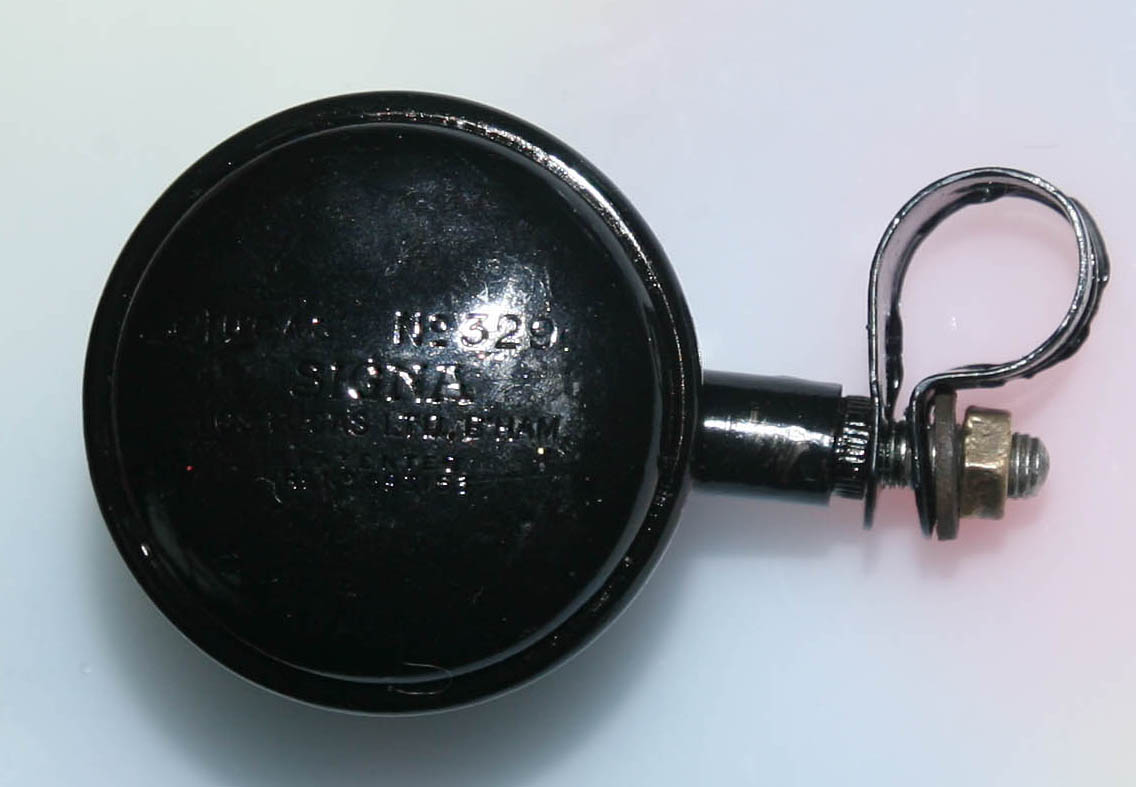
Difficult for the photograph to pick it up - but the enscription reads ' Lucas No 329 Signa' and then a patent number. From Googling this description I gather the light was patented in 1911 - just the right period to go onto the rear carrier of my Douglas 2 3/4hp!
05/06/17: Wot, another Douglas??!
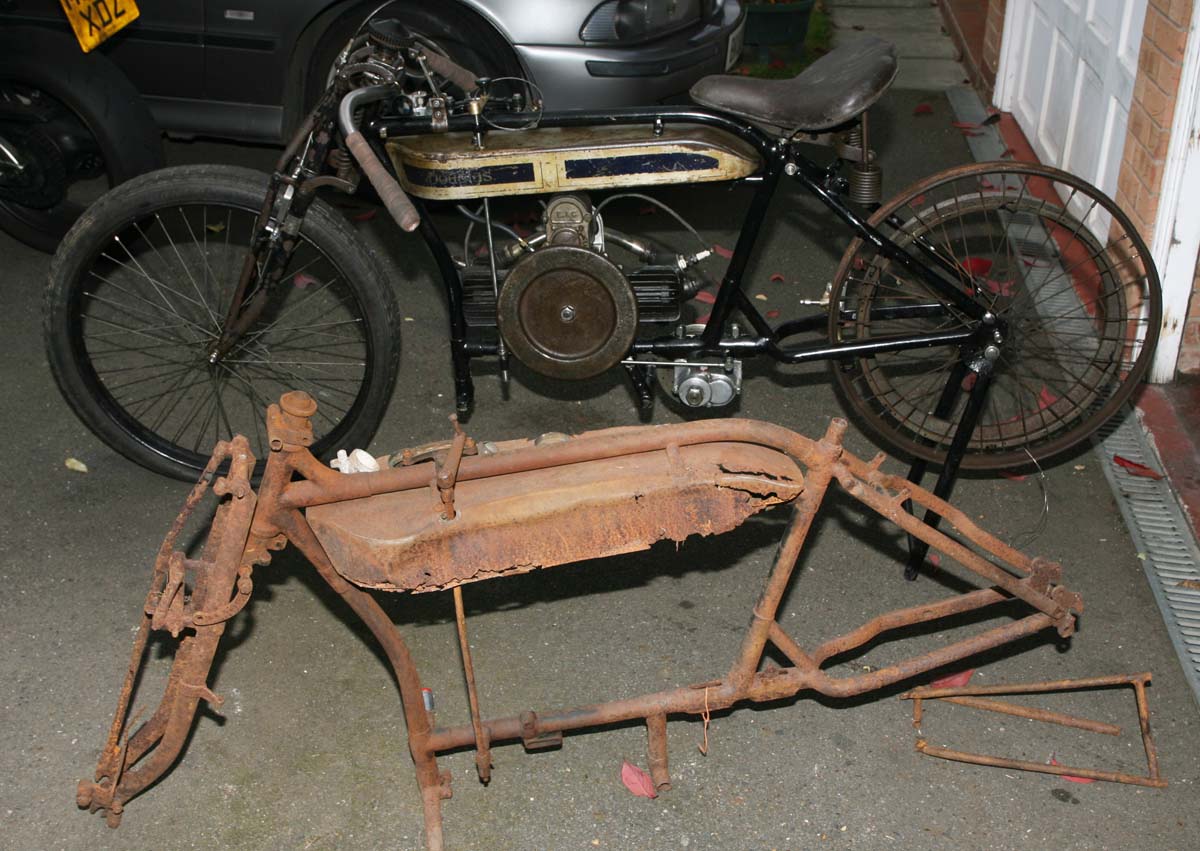
Another Douglas in the driveway - well at least, some very rusty parts of one!
Frame number dates this chasis as 1917 - maybe a British Army bike originally?
Another addition to my ever growing pile of project bikes/spares/piles of old rust - in this case a very dilapidated and rustworm chewed 1917 Douglas 2 3/4hp chassis, to join the 1920 (1912 TT rep!) 2 3/4hp I am already building.
And the reason for buying this very far gone collection of iron ferrous?, well a few reasons actually:
1. It was on Ebay, and at the time I had a search on Ebay for any Douggie 2 3/4hp parts - I was lookng for any useful or missing parts
- and this got the juices flowning!
2. I noticed that although everything steel was very badly rusted - it still had the bronze High/Low gear change gate whcih I did not have (my own 1920 chassis was fitted with a later 3 speed gate, even though fitted with a 2 speed gearbox (both gearbox types were offfered in 1920 concurrently). Daft though it sounds, given that a bid of £200+ was required to buy the chassis - I was considering it just for this missing item alone
3. When I bought the bike from Bonhams back in April 2016, I also acquired a complete spare power unit/magneto/carb. Since that time I have also acquired a number of other duplicate parts, and through the normal process of trying to find out evertyhing I can about the model variant I am trying to build - i.e. a sports/racing rep of pre WWI era - I found that Douglas built their first OHV engined race bike in 2013, but using the 2 3/4hp crankcases as the basis for the engine (the first proper production OHV model was not offered until the early 1920's and used a very different crankcase configuration).
I have only found a few photographs of this rare racing variant - but know two of these models were entered for the 1914 TT, although they did not place in the top 3
Even though I have got a long way to go before the first build is finished - I am already thinking how interesting it would be to try and build a replica of this first OHV Douggie!. The thing is, if you look at period photos you can see that it had a special frame, wtih duplex front down tubes (similar to the 5hp sidecar model of the same era) to allow for the longer length of the OHV engine. So although it might be considered heracy to chop up a perfectly good 2 3/4hp frame to try and replicate the OHV frame - I did not think it would be a bad thing to use a donor frame that is already so badly rusted that a number of the tubes are already rusted through and will need replacing anyway. So wth that in mind, I did my normal bit and put in a reasonable bid with just a few seconds to go - and hey presto, here it is!,
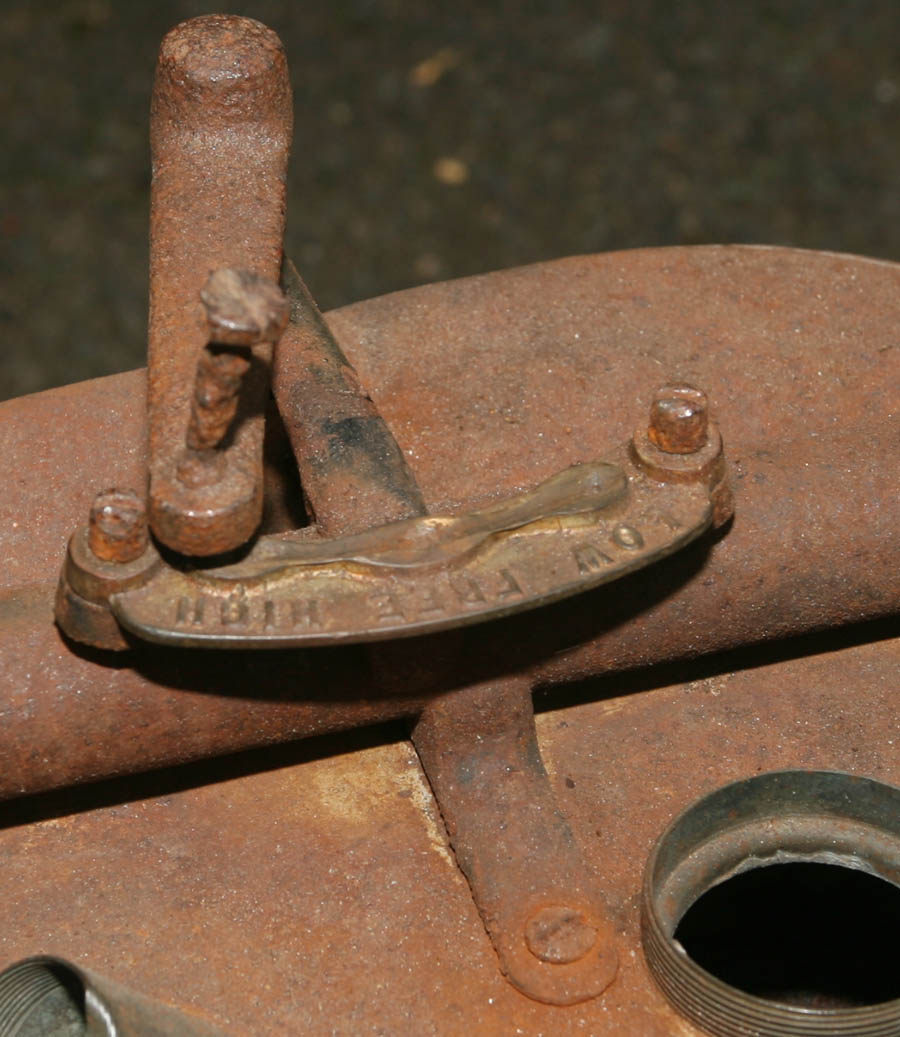
The initial reason for getting my attention - a hard to find 2 Speed Low/High Bronze gear gate. the change lever is probably usable after cleanup as well
This is what terminal rustworm looks like! - with a good part of pertol tank and front forks disolved . It still has a lot of usable lugs and smaller parts though
Some kind of method in my madness! This is a photo that I believe dates back to 1913-14, showing Alfie Alexander on what was the first OHV racing Douglas. Only a few examples of this OHV racing model were made before WWI broke out. The frame is different from the standard 2 3/4hp frame to fit the longer engine. Already having a spare engine - one day I would love to build a replica of this this rare bike and the rusty 1917 frame is a potential vendor to help me with that project. As always, click on photo to see larger picture
You can see from the photo above that the petrol tank and front forks have pretty much disintegrated. The front forks are the ealy type though - as used in the pre World Was One race bikes - I believe these early types were superceded by a later design around 1917 - but some bikes including this one were still fitted with the earlier type. Although the smaller diameter front tubes have totally disintegrated, I am hoping that the main lugs and castings will just about clean up to allow re-tubing, in case another set of forks cannot be found at a later date.
Shortly after thiese photos were taken the whole chassis was examined and then liberally sprayed in many coats of Duck Oil, to try and preven the rust getting any worse. However, while doing this, it gave me the opportunity to have a close look at some of the ancillary clips and fittings - which was very interesting and yielded a lot of good information. It will now be put away as a future - 'possible' project!
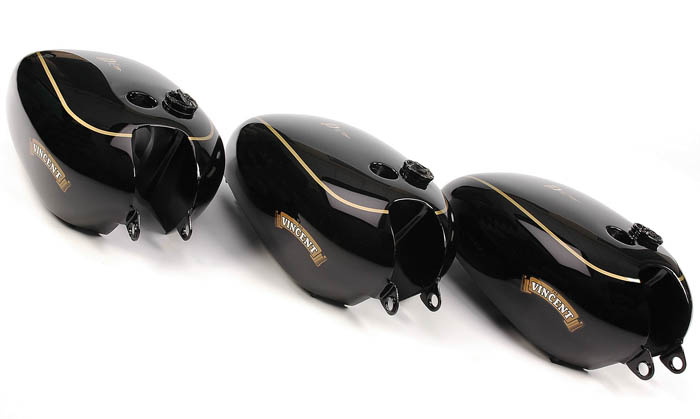
20/03/16: Nice Quality Vincent Bike Covers from VOC
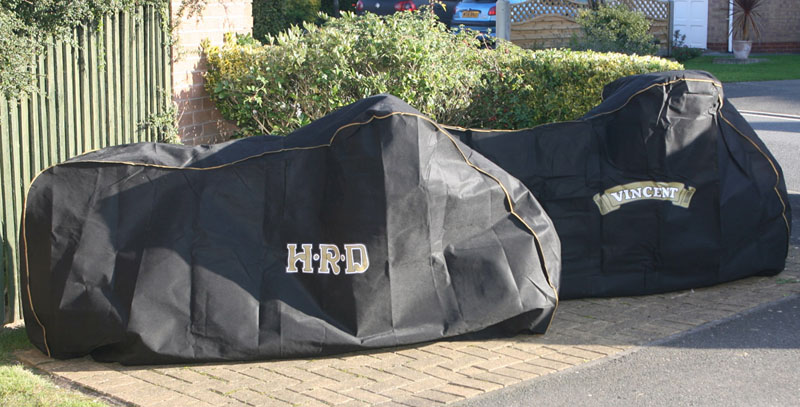
Vincent and HRD covers on my two Vinnies.
Click on thumbnails to see larger versions
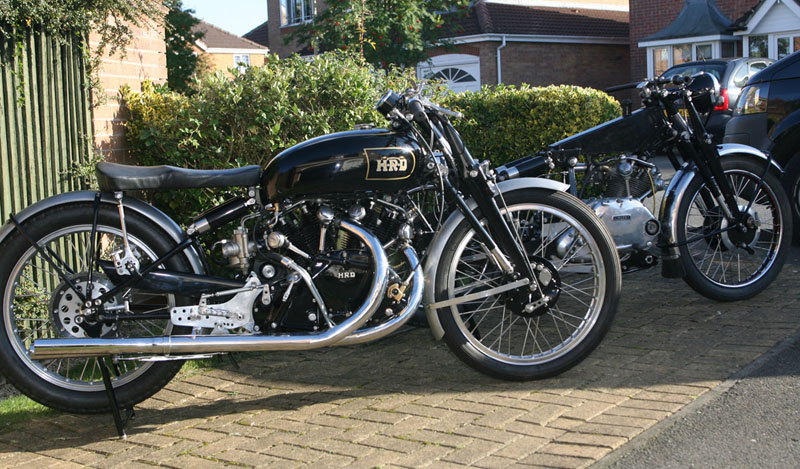
I actually bought these covers from the Vincent Owners Club over a year ago, but only got them out late summer 2015 . . . as I wanted to try them on both my Vinnies at the same time, and the Vincent Comet 500 was not back on its wheels until that time.
I took these photographs when I pulled out the Comet on its wheels and out in the sunshine for the first time.
I had seen them on the VOC website some time ago and thought they looked very smart. I don’t know about you, but in my garage, although I like looking at the bikes – but if I don’t keep them covered they soon end up with dust all over them. In the past I have used all kinds of hand-me-down covers, curtains, old blankets etc, but I quite liked the idea of a bit of luxury with specialist monogrammed covers for both the Vincent’s – one with the HRD motif and the other Vincent.
As you can see they both look very smart, are tailored to the bikes – with them slightly wider in the handlebar than the read end and they each have two gold bead lines running the length of the bikes. As you can see, they are available with both Vincent and HRD logos and are elasticated at the bottom – I note they are both all-enveloping and a very good fit. Since the photos were taken they have been fitted to both bikes for about 6 months and seem very durable, very pleased with them.
If you have a Vinnie and fancy one of these yourself then they are available at the VOC website:
VincentOwnersClub/MiscellaneousSection
24/01/16:
Pre-War 'Roadholder' Catalogs - Why I like them so much

Blue background indicates this is the 1935 edition of Roahdholder - showing the 500cc International for that year
In the last couple of weeks i have treated 'the Norton Business' to a new A3/Colour/Duplex printer - the old HP8550 still giving great quality but now having got very long in the tooth and starting to get unreliable (the new printer has same capability but was on a special offer over the Xmas period - the normal price being £1.5k). Anyway – before I start going all technical and anal about the intricacies of A3 printers (another ‘pet’ subject of mine!) – the point of this blog was to give an unashamed plug for the Facsimile Norton ‘Roadholder’ pre-war catalogs we offer from our Online Catalog.
Because I wanted to use up all the remaining ink on the old HP before moving it out – I decided to print off a new batch of Roadholder catalogs – our 1939 catalog being first as this is currently out of stock (not any more by the way – they are now back in as at 02/02/16). But as always, when printing this latest batch off – I could not help but stop (on numerous occasions!) to read one of the pre-war race writups – or just to look at one the wonderful period line drawings – there being one for every model in that year’s Norton range in every catalog.
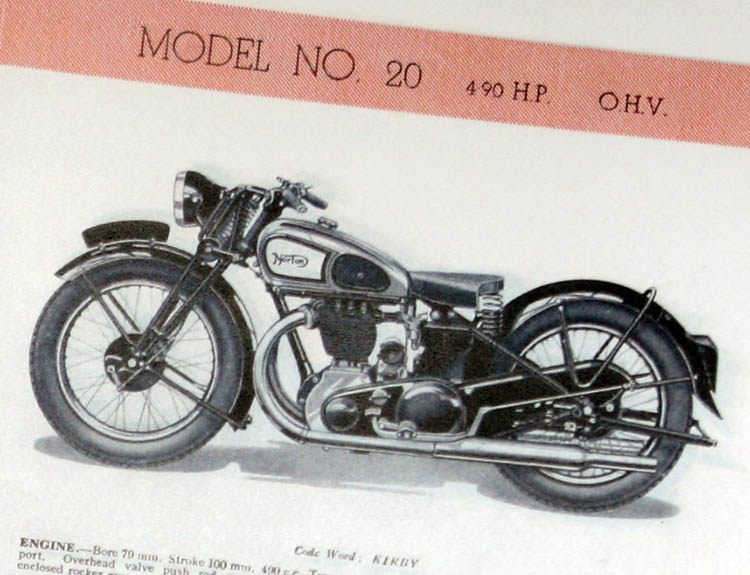
1939 is a particularly nice year – because as well as showing the Model 30, Model40, CS1/CSJ road going SOHC bikes, it also has a picture of the 1939 Racing Inter (i.e. pre-war Manx) – which shows the magnesium crankcase Manx GP Spec model, and if you look very closely even the rare ‘Suicide Stand’ Gardengate frame only fitted that year.
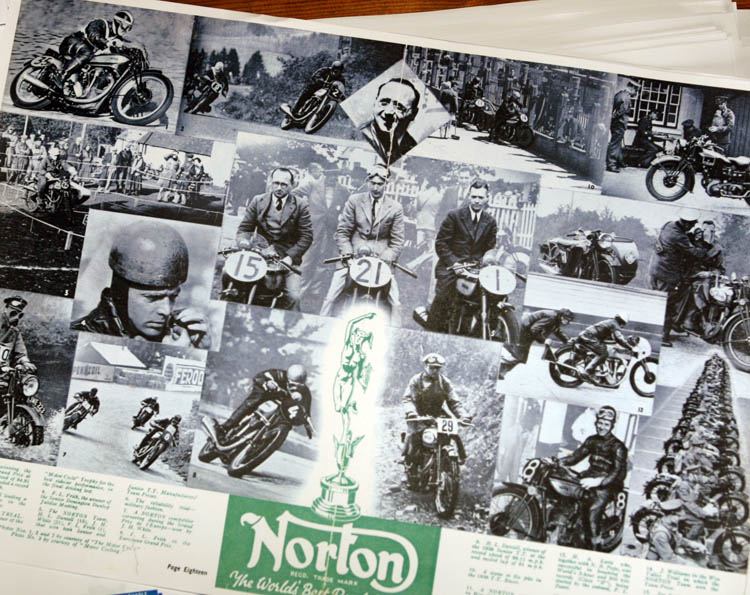
1939 Roadholder is green and this is the centre spread - showing Harold Daniell and a montage of other competition events in 1938
So although this blog may come over as unashamed advertising – it is not meant to be: I just wanted to check with my fellow Norton enthusiasts if they were aware of the format that Norton used for advertising their forthcoming range pre-war, and let them know they were out there. Each year through the 1930’s they would produce what they called their ‘Roadholder’ catalog. This was slightly larger than A5 format. It had a black card cover and was normally about 30 pages in length. The first half of the catalog gave interesting write-ups and (mostly unpublished) photos of Norton’s previous year competition achievements - remember Norton ‘ruled the racing roost’ through most of the ‘30’s, while the second half of the catalog gave a high quality line drawing and specification of every model in that years range. Added to this, the other interesting point about these catalogs is that Norton chose a different print colour each year – i.e. 1939 was a very ‘Art Deco’ green, 1936 was red, and 1934 was blue.
Now extremely rare and hard to find (and I have paid up to £200 each for originals) – these catalogs give a fascinating insight into the 1930’s world, have a lovely art deco feel to them – and also give a great insight for the restorer of what parts should have been originally fitted for that year.
. . . and finally, red represents 1936 - this being that years twin port OHV 500 engine - quite a rare bike today. Each year's catalog shows every model in the range, with a mixture of drive and timing side pictures
I know that the versions I sell may seem quite expensive for what they are – but I can assure you, if you knew the amount of time and effort it takes me to produce these (often having to spend a long time cleaning up the original tears and marks that the originals inevitably pick up – using Photoshop), and the fact that I use best quality paper, inks, printing quality – I hope you would see they are a very reasonable alternative to the great expense of finding an original.
And finally – although I only offer certain years at the moment, if you have a particular year you are interested in – then please let me know; they take a long time to prepare – but I have most original Norton catalogs from the late 1920’s through to the late 1950’s . . . I am always wondering which one to do next – so let me know if you have a year you are particularly after.
Here is the link to our Literature/Facsimile section of the Norton Catalog if you want to have a look: Norton Catalog Facsimile Section
20/02/15:
Vincent Comet Rebuild - Making Progress
Vinnie Comet restoration in January - coming along nicely, about 70% completed
The Vincent Comet is slowly coming together and progressing well - although I have not had much chance to work on it since Xmas. That said, the main chassis/engine parts are now back together, front forks and RFM are built and I now have the wheels stripped down so I can have the original rims rechromed before lining them and then re-spoking using stainless spokes.
So far it has been a really enjoyable build with no major issues, and because the bike was a complete running bike - my fathers main two wheeled transport through the sixties and seventies, it has been far simpler than many of my builds, with all the major parts already there, just needing refurbishment.
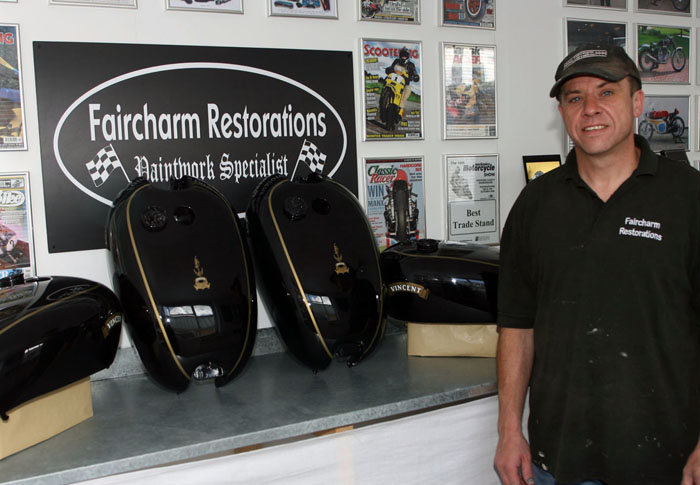
Shane with a nice collection of Vincent tanks he had in at the time I was picking up my own tank . . . mine is one of those shown, but I could not tell - luckily Shane knows which one is which!
By the way, I mentioned in a previous blog that with my free time being quite limited in the last few years, I have finally admitted to myself I no longer have time to do all my own paintwork - a job I used to do for most restorations, which although satisfying was also very time consuming.
Therefore for this Vincent rebuild, I had come to the conclusion the only way I was going to get it done in a reasonable timescale was to farm out all the paintwork to someone else.
Luckily, based in Leicester is an old friend of mine - Shane who owns Faircharm Restorations. Shane has been doing blasting and powder coating for me for many years and I have often admired his 'wet' paintwork when visiting. So with this restoration I just phone Shane up and asked him if he could blast and paint all the parts I was taking off the Vinnie. We arranged first for everything to be blasted, and as this was going to be a bike to be used, I asked for most of the chassis parts to be done to a good standard . .. but not show quality (i.e. the amount of rubbing down and filling reduced) . . . as the majority of parts were in good condition and not pitted anyway.
However, I asked for a concours job on the petrol tank and other high viz items like the fork blades and headlamp shell. Picking up all the parts (having visitied a couple of times imbetween to check progress) was great - the parts looked fabulous and the petrol tank was a 'show' finish (Shane had previously done the HRD tank on my Lightning rep and this was also the dogs doodahs!).
Anyway, now I have admitted to myself I cannot do every job myself anymore, I feel strangely soul cleansed - and it is nice just to leave it in the hands of someone I trust. No doubt I will be doing the same again for other builds. That said, I have no doubt there will still be some little jobs where I can do it myself - so I do not imagine my spray booth will fall totally out of use!
Nice example of Shane's work - professional photo of Vincent petrol tanks painted by Faircharm (not my photo I hasten to add!)
If you are looking for a professional service and top quality paintwork, then Faircharm are at the following website address: Faircharm Restorations
16/02/15:
Collecting Parts for a New Vincent Project - Guess What It Is?
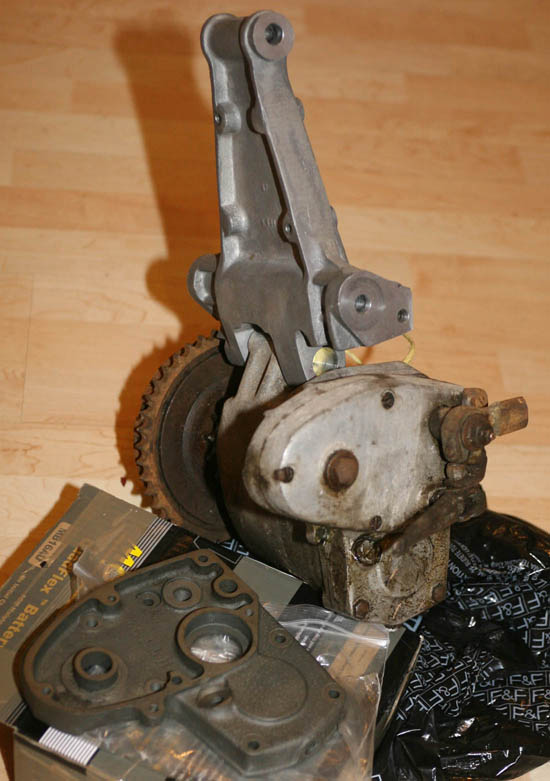
Albion Model H gearbox
The picture on the left shows the latest additions to my personal scrap metal collection, photographed on the kitchen floor (before the missus got home!).
I am sure those of you familiar with the Vincent marque will recognise the top casting as being from a Vincent single, but the gearbox may be a bit less familiar.
For the background behind this interesting collection of bits and to provide an explanation as to why I am so chuffed to have acquired them - then have a read of a short article I put together to explain:- Mystery Vincent Article
18/08/14: 'Article' Webpages and Articles Now Updated!

Click on photo above to go to the newly updated 'Articles' webpage - also accessible from the Button Bar on the Header section of every webpage
As well as adding a new Vincent article (shown below as being in June . . . but actually only just published! now in August), I have now had a major cleanup and update of the Racing Vincent Website, and have sorted all those old articles and updates and added new 'carousel' links on the 'Articles' webpage (available on the main Header button bar at the top of every RacingVincent webpage and also a link by pressing the photograph on the right.
The upshot of this, is that I have now made available all my old website Product updates and Latest News articles, Racing updates as well as some odd ones like the article on the right - giving an update on when i first purchased my now sadly lamented KTM 660.
I cant help but feel there may be a few further old articles still not listed - and I will add these if I find them, but at least they are now all accessable from one 'master' webpage, and in some semblance of order!
04/02/14:
600cc Manx Crank . . . Not the most common of sites!
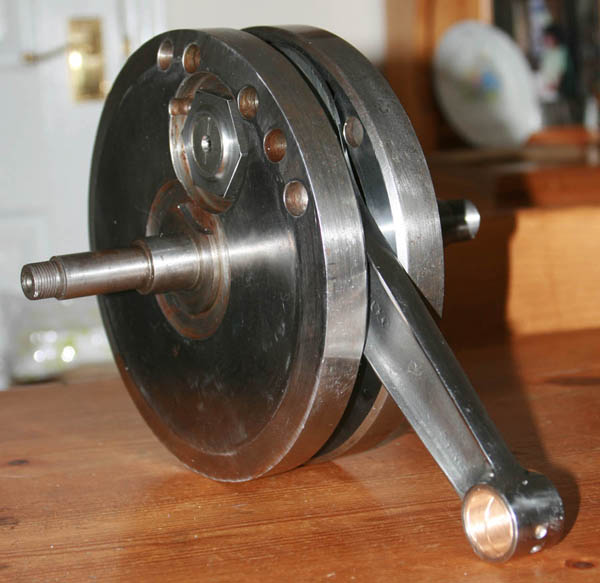
Newly rebuilt Manx 600cc Gardengate Crankshaft - it uses 500cc flywheel billets but note mainshaft shoulder does not correspond to Big End recess - which is further out than a 500cc crankshaft
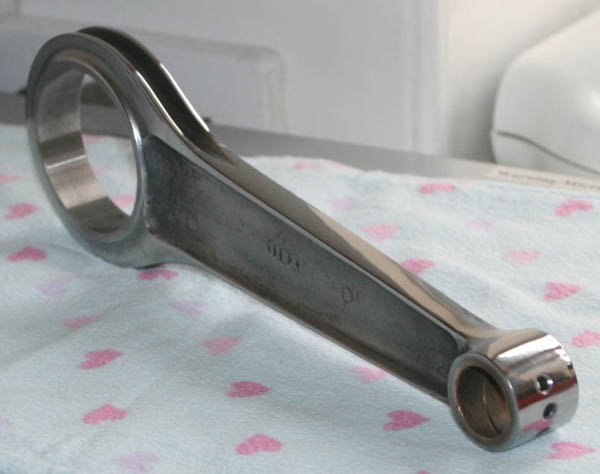
NOS (New Old Stock) Longstroke Manx 600cc Conrod - perhaps the last one in the world??
(well maybe not because I think the friend I bought it from may have another!)
Recently back from my Bigend and crank rebuilding supplier is the Manx crankshaft from my 600cc (sidecar) engine. The flywheels for this crank are standard late longstroke Manx 500cc type billets, but with the Big End journal machined further outwards from standard to increase the stroke to 112mm (from 100mm of the 500).
The giveaway to identify the 600 crankshaft from the 500 is that the Big End recess (for the Big End nuts) is not in line with the corresponding mainshaft shoulder recess, unlike the 500 version, as the stroke is lengthened on this crankshaft. Now this has been rebuilt with new Bigend and Manx conrod, it will be put into storage until I am ready to start the eagerly awaited build of that bike - something I am really looking forward to. I am intending to use a set of my own magnesium (pre-featherbed) Manx crankcases, as I want to be able to give this bike a bit of welly when I get it together - so want to use crankcases I can trust.
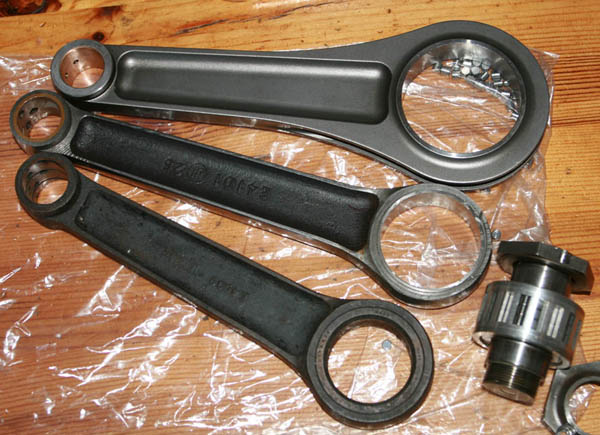
Interesting Comparison: - bottom of photo is standard OHV ES2 with BigEnd outer journal fitted. At the top is new Manx Longstroke 500cc rod (no BigEnd fitted yet), but in the middle is the conrod fitted in the 600cc Manx crankshaft when purchased - Model 19 OHV 600cc conrod, but with outer ring bored out to take a Manx BigEnd - would you trust this in a racing Sidecar outfit??!!
Maybe I should not Re-fit the Old Conrod??!
I was very fortunate to be able to find this rare 600cc crankshaft about 5 years ago. About 2 years previously I had managed to buy from an old friend the frame and some parts of one of only 17 600cc Manx (sidecar) frames made. This particular one was the first 600cc Manx to be sent out to Australia (where quite a few of these bikes went). However, I held little hope for finding any original 600cc engine parts - particularly the crank and long barrel. Therefore, I was over the moon when I was able to buy both this crank and a genuine 600cc barrel at the same time a couple of years later. I bought it from an enthusiast in the Malverns who had the rest of the bike, but at some time in the past had converted the engine from 600cc configuration to the more usual 500cc configuration, therefore these parts were surplus.
Anyway, having bought the assembled crank, 600cc barrel - which had been relinered back to 500cc and showed signs of having been used with a very low compression 500cc crank! and a few other 600cc engine items, I considered myself very fortunate and have since been slowly accumulating other parts for the forthcoming engine build - including bronze bi-metal Manx square head, magnesium cambox etc
What was interesting about the crankshaft though - other than it being based on 500cc flywheels, was that a previous owner had done a little bit of 'home engineering' on it, so that it was not to the same racing specification as when it came out of the Norton factory! I would hazard a guess that at some time in the engines lifetime the original 600cc Manx conrod had 'let go' and broken. It would seem that the owner at the time had been unable to get hold of the proper Manx replacement 600 conrod, and had instead bored out an OHV 596 (8 inch long) conrod to fit a Norton SOHC 350 Big End! Now I would be the first to give whoever it was that did this job 10 out of 10 for ingenuity, but 0/10 for practicality, the surrounding metal of the OHV conrod looks extremely thin and fragile - particularly as there is no webbing around it, unlike a Manx (or even Inter) conrod. I would have been very nervous to have given that engine any welly in a race, particularly with a sidecar hung on the side. Anyway, replaced now with a new rod so I can have a bit more piece of mind - and another addition to the curiosity bin!
12/01/14:
New Commuter Bike . . . because some lowlife took the last one!
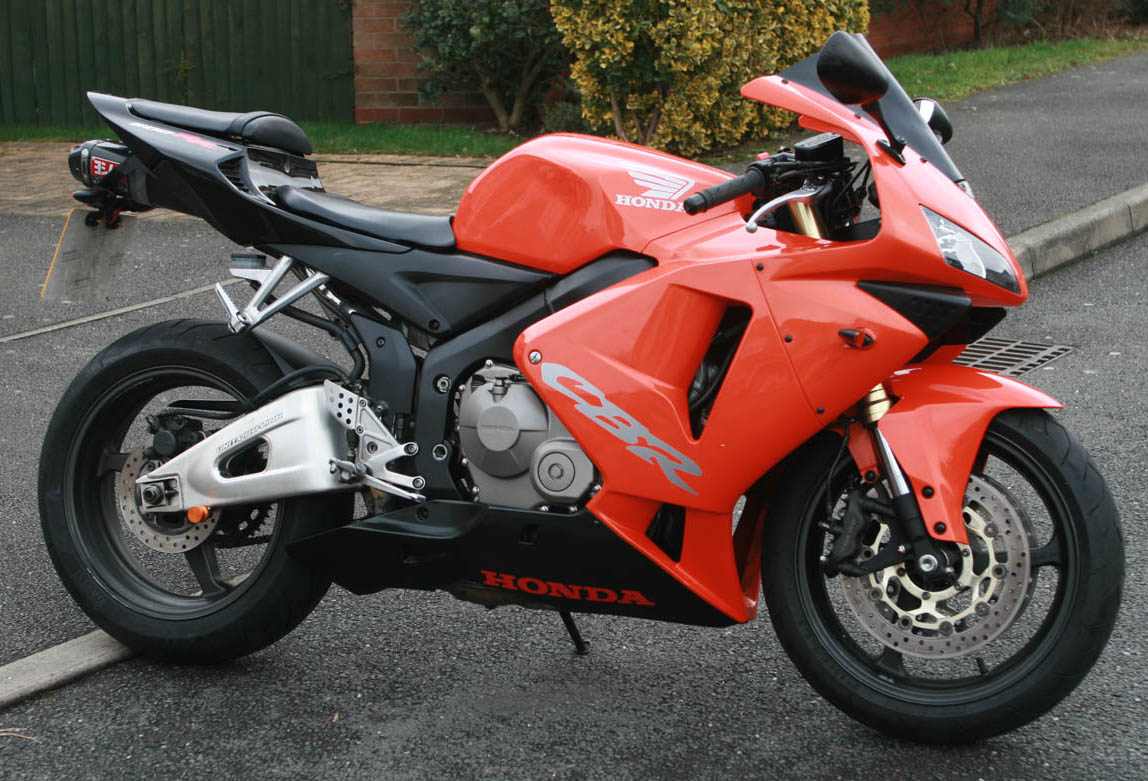 New bike in the 'family' - 2006 Honda CBR600RR. Definitely a cut above the old Honda CB125 commuter bike I had 20 years ago
Not long before leaving my old job at Selfridges, back in October 2013, some lowlife tosser nicked my KTM 660SMC Super Moto road bike. . . from my works car park - right under the noses of the security guards who must have been asleep at the time.
I am hoping that the wanker, whoever he was, has subsequently broken his leg trying to start the bloody thing (as indeed some bloke my local KTM dealer told me about has with his own similar model - twice!, 660SMC's are not renowned for being easy starter's), but I suspect the reality is that the asshole was a semi-professional lowlife from the local estate and (as the police also suspect) and it has now been carted off to one of the local dodgy dealers and stripped down for parts - so regrettfully I have had to say goodbye to it, and just enjoy the memories of what was one of the most extreme and amazing bikes I have ever ridden - with an engine like a modern day Manx Norton and handling so awesome that even an old fogey like me could run it off the edge of the rear tyre!
So although I went through what seemed like a suitable period of 'mouring' (which in reality was waiting for the insurance money to come through), I have now just about got over it and have consoled myself by buying myself a new 'Commute' bike - 2006 Honda CBR600RR
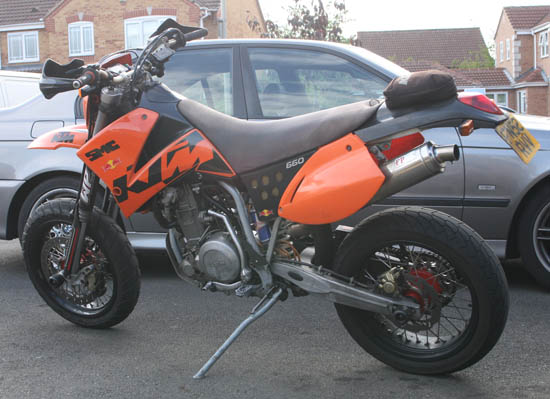
Sadly lamented - KTM 660SMC in better days, sat on my driveway - before some thieving arse wipe decided to nick it - death's too good for some people . . . etc etc
Never being a person to let the burden of practicality get in the way of something I just fancy - I decided this modern mid-weight race replica would be the perfect tool for riding through the winter and nipping over to see my mother each week.
To read the background of how I came to pick this new addition to the stable - read the accompanying article - CBR600RR Article
26/10/13:
Send me your photos . . . Again!!
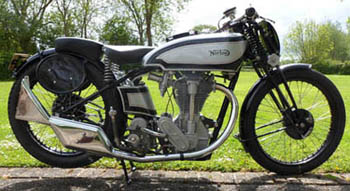
Andy Marks lovely early Racing Inter is one of the bikes already showing on the 'Your Bikes' webpage - send me your photos if you would like your bike to appear as well
About a year ago I asked customers and reader if they would like to submit photos to go onto a 'Your Bikes' page. This webpage was going to become a showcase for your SOHC Norton motorcycles, which as well as giving customers a chance to show their bikes, would also provide with examples of various specification and sub-models for other restorer's to look at and help them with their own restorations.
Well, since that time, I have now written the webpage (see the Your Bikes button on the Heading Bar above) - but due to earlier problems with the PC, have lost 'chunks' of my email history whcih includes many photographs sent to me. Therefore, if you would like your bike to appear
on this page, then please could you send them again, and I will get them up.
When you send the photos, send a little bit of detail as well, so other readers can know a bit about the bike
as well - Year, model, special bits fitted, stuff like that.
And finally - do not worry if the bike is in unrestored condition, or is in large lumps - for restorer's these are often the most interesting photographs
21/10/13:
Lower Bevel Gears Almost Ready For Sale
 New SOHC bevel gears should be ready shortly. The new International/Manx crankshaft gears are shown in the top of this photo, while an original crankshaft gear is shown below for comparison
If you read my recent Newsletter 18, you will have noted that due to much and regular demand from customers - I have embarked on having SOHC Bevel Gears made.
Due to the high cost of initial investment I will be doing the gears in two seperate batch's - with the lower bevel gear pair being made first, as these seem to be the gear most likely to be damaged. I believe this is in the main part due to the bevel gear bearings losing it's little balls and then dropping into the timing chest - with predicatable results. A well known SOHC fault that my old friend Titch Allen once cynically remarked - kept Norton's Service Department going for many years!
Well I am pleased to report that this first batch of gears are now almost ready for sale, with the crankshaft bevel gear being complete and the lower vertical bevel gear just requiring one more finishing operation. I am expecting them to be availabe on the catalog in the next four weeks.
The photograph on the left shows the new crankshaft gears at the top of the picture, with an original Norton crankshaft gear in the lower part of the photograph. I am also confident in saying that these new gears are effectively identical in dimensions to original Norton gears, and are therefore fully interchangeable - including the tooth profile (unlike some other Longstroke bevel gears that have been occasionally manufactured in the last 30 years).
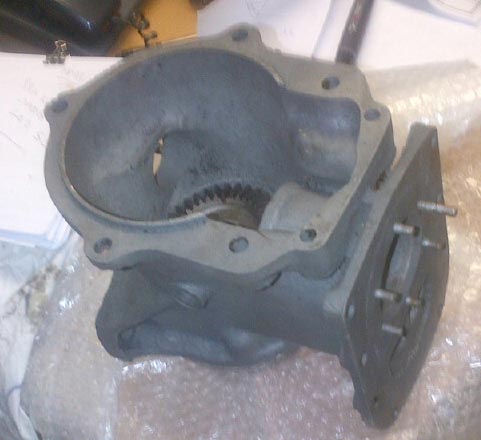
Very interesting pre-war ERA magnesium differential casting was at my gear manufacturers at the same time as my gears - similar vintage motor racing parts still being made together at the same time!
For the crankshaft gear shown above, I will be able to offer both variants - the more normal Norton International type (fitted to aluminium crankcase models) and the Norton M30/Manx type (fitted to pre-featherbed magnesium crankcase engines), which are shallower in depth - both types are shown here.
As far as manufacture is concerned, I used many examples of original gears from which to make drawings and provide the patterns, and a specialist UK bevel gear manufacturer was engaged locally to make them - they have certainly come out looking of a very high quality.and look virtually indistinguishable from originals. Incidentally, while I was collecting this first batch - I noticed another customer had bought in an ERA magnesium (differential?) bevel box and gears - for which new helical gears were being commisioned . . . so it seems the historic racing car people are using this same manufacturer as well.
First batch quantities are limited, so if you would like to reserve a pair now, please email us at our normal mail order address - sales@racingvincent.co.uk
10/10/13:
Do you ever get tired of 'Bump starting' old bikes?
Bright and shiny Solo bike starter having just been delivered. Not sure why, but wife was not happy to find it deposited in kitchen . . .
For those of you that have competition bikes without the luxury of a kickstarter (or even worse, God forbid - an electric starter), then you may be interested in the latest RacingVincent purchase - a Solo Bike Starter, designed to make life easier (and safer) than the old fashioned method of running and bump starting a bike.
I have been doing it the old fashioned way since I first started racing in the mid 1980’s, but for the last 10 years I have been watching on enviously in various race paddocks and events, as I have seen a large contingent of my fellow competitors switching over to using one form or another of this type of starting, and on a few occasions have even blagged a go myself– realising just how easy it makes things.
Even I am having to come to terms with the march of Old Father Time – I am now the wrong side of a half century mark – i.e.51, and although I can just about still manage to bump-start a Norton, there has been more than one occasion when I have been left heaving and gasping and dripping in sweat thinking – what the hell am I doing this for?!
This is even more relevant to me now with the Norton parts business, as I sometimes have a need to fit new Norton bits to one of the racer’s for trying out, before putting it on the catalog for sale. This was bought home last Winter – continually bump starting the ‘38 Norton in sub-zero conditions, with Castor oil the consistency of treacle and ice cold Methanol making life very difficult (not helped any by my wearing multiple layers as thermal protection against the snow!). I decided then that a more practical solution was now a necessity.
Purposeful looking Optima Red Top battery should complement starter rollers well
So having seen that Solo starters look to be one of the best known and widely accepted starters being used in the paddocks, I got in touch with Chris Hawksley the owner of the company and asked him what would be most suitable for starting Manx Norton’s as well as also being capable of coping with a Vincent twin? (as my own Vinnie twin approach’s completion). He recommended that although a 12v version should be sufficient, it would be worthwhile going for a twin starter motor version.
Well the starter duly arrived last week – a nice personal touch being that Chris and his wife dropped it off personally, doing deliveries on a Saturday morning and although I have not used it in anger yet, I have to say it looks a very nice professional piece of kit and I am very impressed with the overall build quality.
I asked Chris what battery he would recommend – and he suggested an Optima Red Top dry gell battery (50ah/815cca), as although these are expensive, they are high quality and have a faster recovery time than normal quality car batteries.
I have now bought one of these, and although I am a bit busy for the next few weeks, I will look to be giving the starter a trial run on both Longstroke and Shortstroke Manx’s in the coming weeks, and will no doubt report back through this Blog page on results – might even do a quick YouTube video.
If you want to check out these starter roller's yourself, then you can visit the Solo website at: SoloMotorcycleProducts Website
.
07/09/13: Crappy Modern Technology and Email Woes
New(ish) laptop is super fast - but is not proving ultra reliable! Backup hard disk on the right of the picture has proven invaluable
Just in case some of you have sent me emails over the last two months and have not got a reply - I have been having issues with the super-duper high spec laptop I purchased about a year ago - which has resulted in 4 unrecoverable crashes over that time period - and have meant me having to go back to the last good backup image I had made - in each case resulting in some email messages being lost. The latest of these happened two days ago . . . just when we are in the process of transitioning from Martin to Rob for the online mail order side of the business - not ideal timing!
I have managed to get most things back, but can see there is a gap of about 3 weeks around early August missing in the email - so if you have a query from that time, please resend.
Just as background (in case you are considering a new laptop yourself) - this laptop is a Dell XPS with a an Intel I7 2760 Ivy Bridge processor, 8gb RAM and and seperate graphic card and full HD screen. I then paid extra to have a Blu-Ray writer fitted. It is a semi-professional model and is well made with awesome performance.
I decided to buy something with this level of specification, because I run some very performance hungry applications to write the website and run the Norton business - i.e. Dreamweaver, Photoshop, Premier Pro, Fireworks, Autocad, full Microsoft Office Suite etc - and for these purposes it is has proved excellent.
However, the last bit of the specification is the Hard Drive (the component that holds all of the data on it). The other 'extra' I specificied when commisioning this laptop was the latest 500gb Solid State hard drive (SSD). This new technology does not rely on a spinnning disk to hold data - a very significent change in hard drive technology, and helps make the processing memory-I/O speed of the laptop extremely fast. The bad bit though, is that I suspect these new drives are still in their early stages and I think this could be the cause of my woes - I seem to be getting irrecoverable I/O errors on some occaosions, and as I started by saying - four of these instances have resulted in the laptop becoming unusable . . . bugger!
Of course, it could be something else, but talking to friends at work (I work in an IT department remember), I know a couple of them have also had issues with the bigger SSD drives and one colleauge has had to buy a replacement for his within a year - same main brand disk drive manufacturer as my own..
After a similar laptop crash about a year ago I purchased backup/image software (NovaBackup), so I could take full 500gb images of the laptop, and this has turned out to be invaluable.
I take regular(ish) full image backups to a 2 Terrabyte backup hard drive, and also setup a seperate 750GB SATA disk, with an indepedent full image of the same PC permanently loaded on it. Now, at least on those occasions where the worst has happened, and the laptop has got corrupted and become unusable - I attach the SATA disk, re-boot using the SATA to load a seperate operating system, then attach the 2gb Backup disk, and restore the laptop from the last good backup image.
All this is a total pain in the backside (as having just spent all day yesterday doing it has reminded me!), but at least I can normally manage to get the laptop back operable within a day, and know it is (almost)
up to date . . . handy if you have as many applications loaded on it as I have - as to load every application on it from scratch would probably take a week.
So if you are considering a new laptop and fancy something very fast - by all means go for SSD technology, but just be aware it might be worth checking out other specialist IT websites to see if there are some more reliable than others.
And by the way, I will also be truthful enough to say the other reason you may not have got a reply to an email yet - is because I am always drowning in email!
06/08/13: Mallory 1000 Bike Festival - Write Up
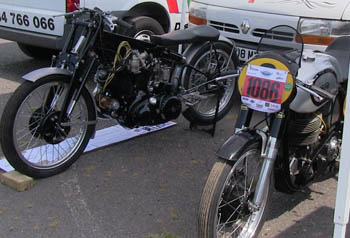
Vincent and Manx Doubleknocker at Mallory 1000 Bike Festival
- Click on photo to read writeup of the day
Well, I attended Mallory 1000 Bike Festival on 14th July, and it was a good day - very hot, with loads of motorcycling exotica to be seen and heard.
I was off on holiday to Spain the week after with my family (their once a year opportunity to remember what I look like - not considered a fully good thing by them), which gave me the chance to do write up (and a brief Video) on the day.
So - click on the photo on the right to read my update on the day
28/05/13: Deja-Vu - Of a Sort!
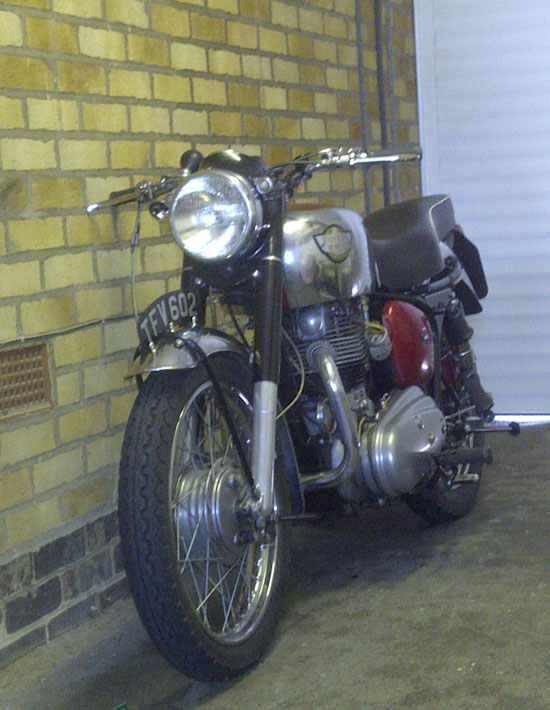
Royal Enfield Constellation propped up against wall at my mothers house last weekend - this year marks 30 years since I first propped it against that wall (and approx 40 years since my father first did likewise!)
As I reported some time ago, 2013 has been a difficult year for myself and my family, with my elderly mother being taken seriously ill and in hospital since early January and having undergone a difficult operation that has not been as sucessful as we would have hoped.
Anyway, without going into too much detail, my mother is now back convalescing at home, and I am now taking regular trips each week to visit her there (rather than a series of different hospitals), and depending on weather conditions and what kind of rush I am in - either 2 or 4 wheeled transport (normally my modern KTM 660 if 2 wheeled), but as the photograph on the right shows - with the UK weather now approaching reasonable, I recently visited on that old family heirloom - my 1960 Royal Enfield Constellation.
The background to this, earlier this year I finally bit the Bullet (spot the play on words, Fnarr), and managed to repair
the head gasket on the Royal Enfield Constellation, after it had badly let go (for the 3rd time!) 3 years ago. At the time, although I had been enjoying riding the bike (despite it being the most incontinent bike in my garage!), I had been having one issue after the other with the engine and this was being made worse because of it being a total bitch to strip down. As I reported at the time - when the head gasket had expired the last time I had chucked it into a corner of a garage in disgust - where it is has resided since, it's only duty being to act as a makeshift platform for storing my fishing rods (another hobby I would like to re-commence later this year).
But having had a rough last 6 months, and deciding not to race this year - for fear of knocking myself up, which would not be good for my mother at the moment, I thought I ought to at least get this bike sorted out so I could enjoy a couple of rides on the road.
As expected on stripping the left cylinder pot down (about the only mechanical plus point with a Royal Enfield twin engine - the cylinders can be stripped independently), I found the head gasket completely blown at the point where it is closest to the other barrel - the amount of head face at this point only being about 10mm. The Constellation was well known for blowing head gaskets at this point, as it was not a good design, made worse by a high compression ratio, and the next model the Interceptor Mk1 changed this design and switched to using a spigoted face I gather.
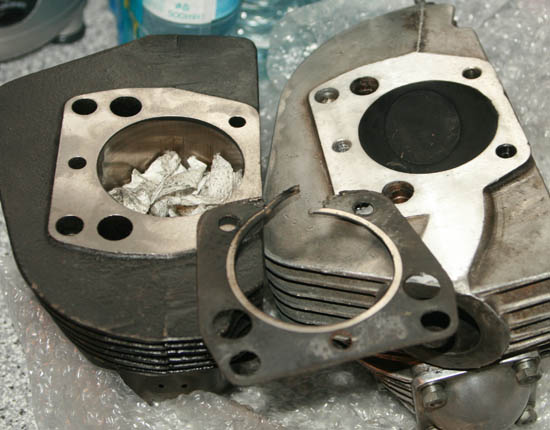
Constellation left head and barrel, having just had both skimmed by my resident machining mate - Rob. Buggered head gasket in the middle shows how comprehesively it blew last time out 3 years ago
As I had suspected last time I stripped the engine that the head might be slightly warped after years of blowing, using the original copper flat gaskets, but Hitchcocks told me they had just introduced a new type of crushable gasket that worked much better - similar to car type head gaskets. I decided to fit one of these first, and certainly it lasted for some time, but when it did fail it was far more abrupt - sounding like a conrod had punched its way through the crankcase at the time!
Anyway, having stripped the left side of the engine down this time, I rang good old friend Rob (who has become an indispensable engineering resource to me in the last 18 months!) and he was able to do the business and skim both head and barrel for me in a short period of time.
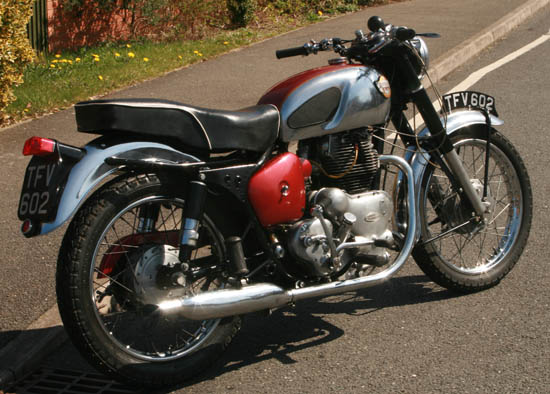
Consellation out in the sunshine again - I restored it about 10 years ago, and the chrome and metallic red paint sill look nice when sun is shining
So I am pleased to report that It is nice to have the Royal Enfield back on the road and I have enjoyed a couple of pleasent country rides in the last few weeks, despite a small amount of pinking, an issue I still need to get sorted. Also, it still leaks its guts out wherever it goes - but that is how it has always been so I will not lose sleep in that direction!
To the point though where I started this article - it occurred to me as I parked the Constellation up against the left wall of my mothers house (where I grew up), that for the RE this was like coming home!, it being where it used to reside for many years, first of all with my father and then later with myself. I remember as a boy we finding the bike looking very dilapidated and abused, in the early 1970's in Wells, in Norfolk. My father restored it well enough to do the occasional ride (with Busmar sidecar fitted), but passed it on to me for my 21st Birthday (the only bke I did not actually buy or build myself!) . . . and I am now 51 . . . which is what made me realise it has now been 30 years. Gosh . . . where have all the years gone!
When the top photograph was taken, I had just arrived at my mothers house and had only just propped it against the wall (and it was seeing it there that gave me a strong feeling of Deja-Vu). But what I am pleased to be able to report - is that the first thing my mother said to me as I walked through the door - was to ask which bike I had come on?, when I reported I was on the Constellation she immediately told me to get some newspaper underneath it - she might have been ill recently, but she was now well enough to remember a lifetime of living with my father and I, and that the Royal Enfield liked to spill its guts all over the driveway!
20/05/13: Look What I Found In The Workshop Recently . . .
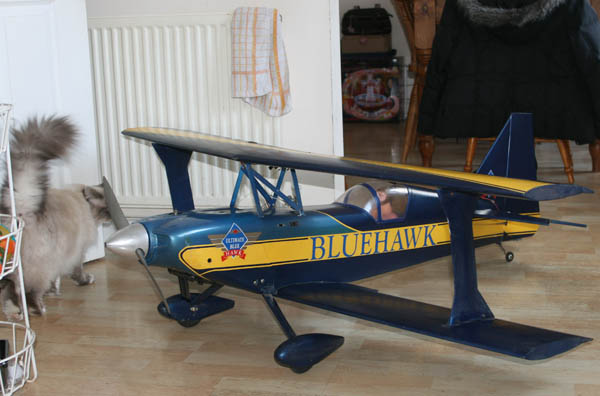
Big 'Ultimate' radio controlled aerobatic biplane - having been hanging in the workshop for the last 12 years, was bought into the kitchen for a final clean before being stripped down and put into storage in the attic.
Our cat Ringo looks on, but is not impressed!
. . . Or as Monty Python said some years ago 'Now for something totally different':!
I have probably mentioned before, that my workshops are not blessed with the most amount of available room, being just a double garage attached to our modern’ish house. The outside garage is packed with bikes, while the inside garage is my workshop and bike building area - and although it is my little oasis to escape to and relax, it has been becoming increasingly cramped in the last 2 years - particularly as I also keep a lot of the larger quantities of SOHC Norton mail order parts in the garage attic space and above the bike projects - on purpose built shelf’s.
Well until a couple of weeks ago, from that 'build area' also hung a relic from one of my previous hobbies - a large aerobatic radio controlled biplane called an 'Ultimate' - a beautiful highly powerful and manoeuvrable plane - quite capable of hanging vertical on its own prop! Although very pretty in its own right, and a nice talking point when people visit (particularly young children), of late I have been struggling to work around the damn thing, and have ended up more than once hanging from the rafters trying to pull out some obscure item of Norton stock from behind its wing or fueselage, much to the amusement of Martin who waits patiently while I swing there swearing and tottering, on the edge of losing my balance.
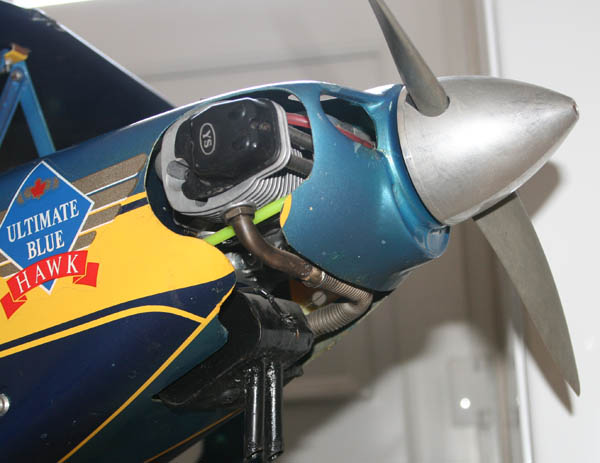
YS competition engine is a bit special - 18cc (120) 4 Stroke OHV Supercharged engine, running on a 25% Nitro/65% Methanol/10% Klotz mix
So two weeks ago I finally succumbed and spent a couple of hours carefully untying it from the rafters it was hanging from and bought it into the kitchen (wifie was out!) where I could wash it down, before stripping the wings down and placing it into the attic.
It did remind me though, how much I used to enjoy this hobby, and actually that I have quite missed it - a shame really, as I would like to do it again, but too many other things going on . . . like any hobby involving expensive toys, they take a lot of time and effort to keep them running well, and always seem to need something doing to them after each flight - the consequences of one of these piling into the ground can be quite serious. . . . They are substantially bigger and heavier than an Airfix plastic model!
Stripping the big Ultimate down, so I could put it up in the attic got me thinking to the last time I actually flew a radio control plane – and I dug out the photograph below which I found was dated 2002 – eleven years ago, although I think I flew for another year or so after this.
The two planes in the photograph are both purpose built aerobatic aircraft (both of a popular design at the time called Excelsior’s) and were my two most regularly flown planes at the time I stopped flying. Although I did not rate myself as being good enough to actively fly in competitions, I was at least able to sometimes manage a full ‘Standard’ class schedule, the least complex of the 3 competition classes – and just occasionally, I could even make one look quite elegant . . . but not very often!
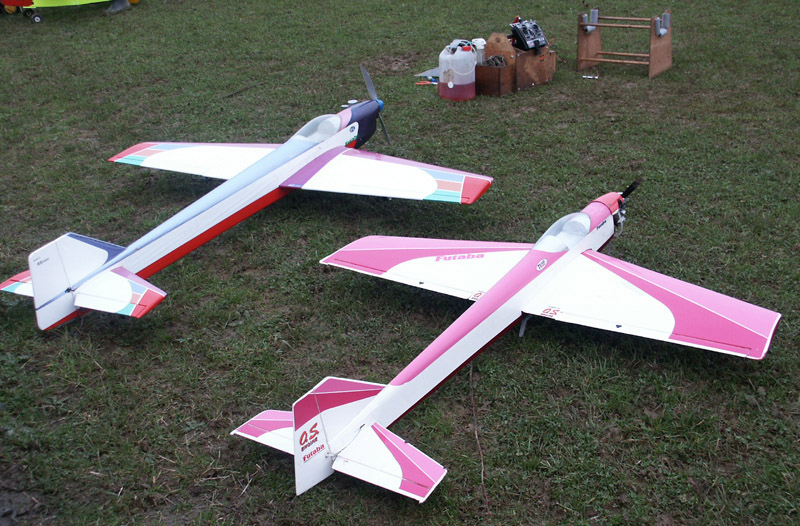
Taken back in 2002, this photograph shows the two large Excelsior aerobatic radio control planes I last flew, before giving up R/C flying. You can just see my transmitter in the background, to give an idea of scale
As you can see from the photgraph, they are both largish aircraft, and a lot more powerful and accurate to fly than your standard ‘club’ plane – a pleasure to fly . The one on the right was about 5.5ft long and was powered by an OS 45 SF glowplug engine, with a tuned pipe (that ran under its fuselage. However the one on the left was physically much bigger, well over 6 feet in length and used an OS 90 glowplug engine and a propeller of approximately 11 inches. This larger plane was a serious piece of kit (built by my best mate – a very proficient competition flyer, who I bought it off when he gave up flying). Running on a mixture of methanol, Klotz oil and 20% nitromethane – you got high just holding its tail down when you ran the engine up before flight! The idea with these large aerobatic planes was not to fly fast, but be able to keep a constant and moderated speed, regardless of if you were flying horizontal, vertical or diagonal ( and either in normal flight or inverted). It was an impressive sight to watch this plane switch to vertical, and on opening up the throttle watch it just hanging from its huge propeller and biting through the air it would just go vertical – until a small speck in the sky! Not being as proficient as my mate, I only used to fly this plane when I had had a couple of flights with the smaller plane – and then only if I was feeling on form, but bringing it in to land after a nice flight, felt pretty good! When I gave up flying about 10 years ago I had just finished building a very pretty SE5A First World War fighter, with a brand new 4 stroke engine in it. Maybe sometime I will start up again and give it it’s maiden flight . . . think I will need a bit of practice with something smaller first though!
11/04/13: Dr James Kelly Swanston (1908 - 2013) Passes Away
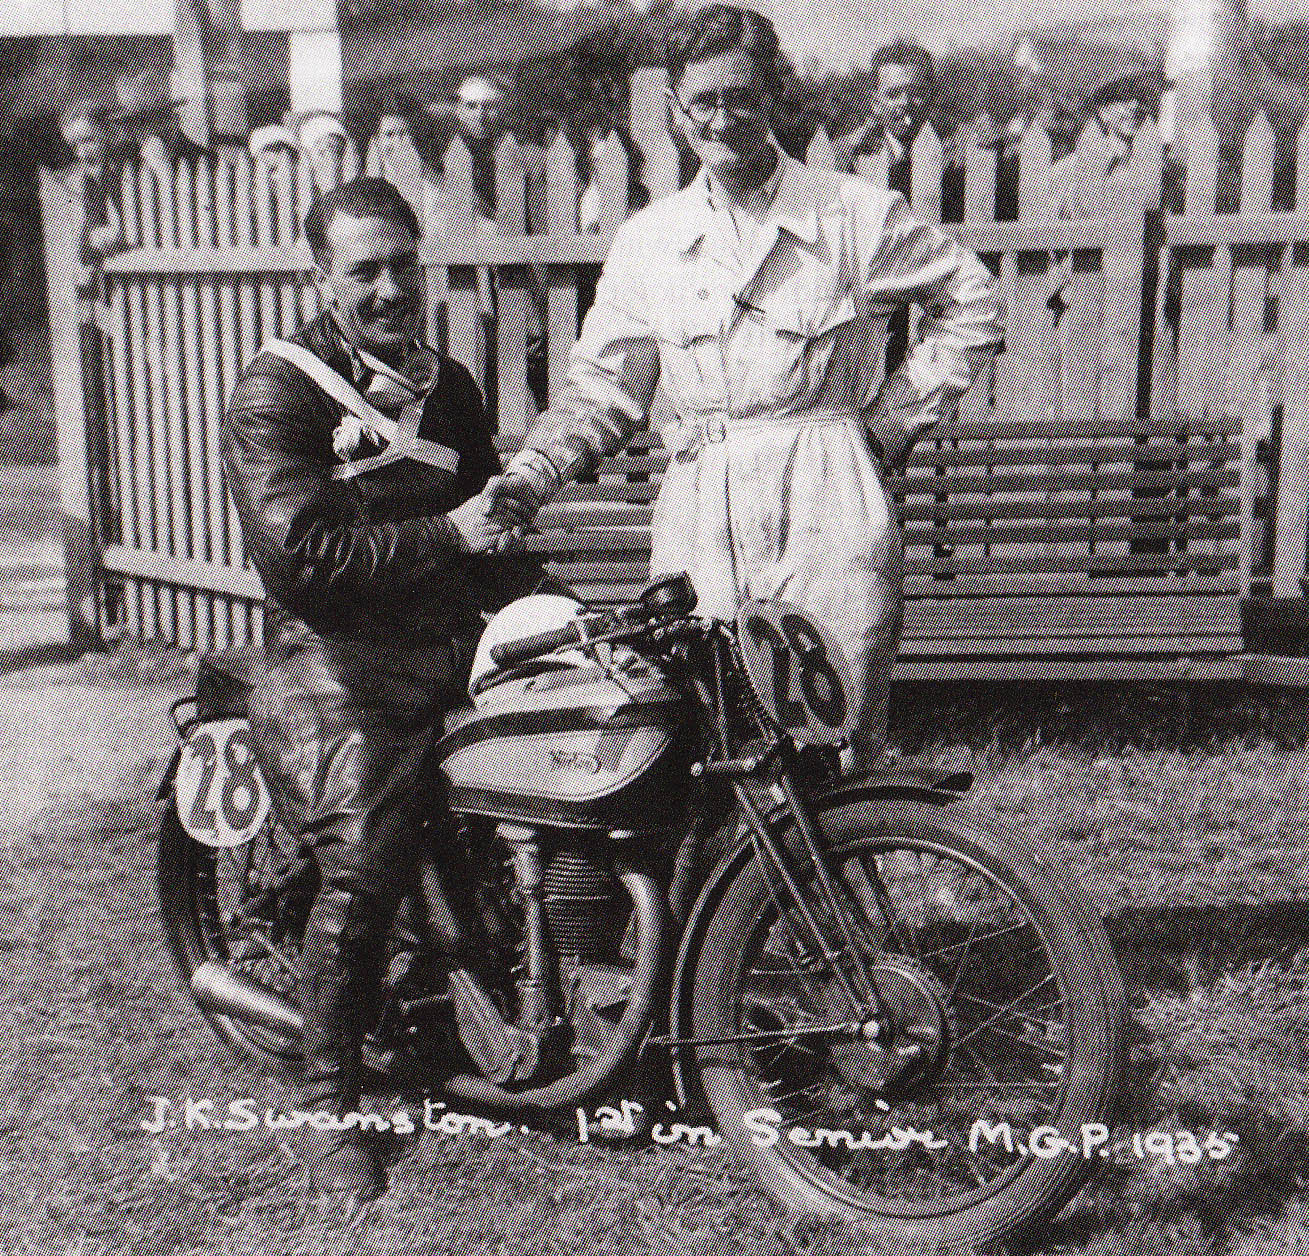
A wonderful photograph of Dr James Kelly Swanston being congratulated, having just won the 1935 Senior Manx Grand Prix, on his Manx Grand Prix spec (magnesium engine) 500cc Norton
While reading this months VMCC club journal I noticed in the obituary section that Dr James Kelly Swanston had passed away on the 26th March 2013 at the grand age of 105 years old.
Although I did not know Dr Swanston, he was clearly a talented rider in his time - having won the Manx Grand Prix premier class in 1935 (narrowly beating Freddie Frith no less!), as well as competing in many other similar events in the late 1920's through the 1930's. It is amazing to realise that he was provided and raced one of the very first KTT Velocettes - KTT 128 way back in 1929!
Although there is always sadness when someone passes away, to have reached the age of 105 years old is a huge achievement in itself, so although I wish my condolences to Dr Swanstons remaining familly and friends, I hope the loss is not too sad
However, my reason for this piece, is that I feel the significence of Dr Swanstons passing is that it marks possibly the last first hand link to anyone that participated in that fantastic period of motorcycle racing between the two world wars - i.e.the 1920's and 1930's.
I am sure that many of the readers that come to this website share the same passion, and a similar background to myself - and part of the reason we own and ride these bikes is because of their association with a bygone age.
I was fortunate to have been bought up close to Mallory Park in the '60's-70's where the fledgling VMCC race section would run race meetings, and at that time almost all the bikes being raced were pre-war, and many of them looked, sounded (and smelled!) just as they would have done back in those days of the 20's and 30's. I was also lucky to have been good friends with some other men with similar backgrounds to Dr Swanston, that raced at that time and I listened earnestly to their stories and exploits - a very different world to today.
So while I too love watching modern World Super Bike while doing the paperwok on a Sunday morning, I would also like to pay my final respects to Dr James Kelly Swanston's memory, and also to the memory of that Pre WWII racing era that he represented - RIP to both of them.
24/03/13: Progress on 38 Racing International Norton - One Step Forward, Two Steps Back
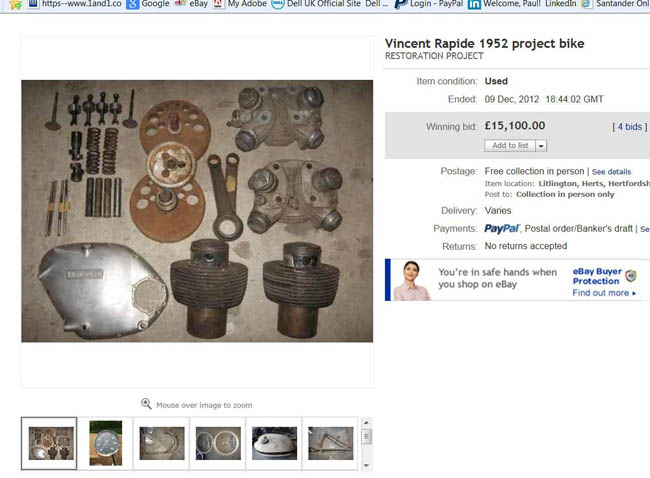
Norton engine back in frame with freshly welded crankcases - see article
You may remember an update I gave back in October 2012, detailing my tail of woes after a particularly unsuccessful race meeting at Cadwell, resulting in cracked crankcases and a failed BTH magneto on my 38 Racing International (see the blog below if you want a reminder).
Well since that date I have been slowly but diligently working to repair the damage and get the bike back together - particularly as I need it back operational so I can test a new batch of parts just being manufactured.
Unfortunately it has been fighting me all the way and has not been an easy process at all (hampered more so by recent family illness, making my time even more limited), but progress is finally has now been made and in the last two weeks I have it back rebuilt and have been able to put a few miles on the new engine build.
For a more detailed update on the rebuild, take the link here:
Racing Inter Rebuild Article
16/01/13:
Sending Me E-Mails - An Update
Please can anyone that is trying to send me query emails at the moment be aware - I am currently only able to reply to a minimum number of emails at the moment, and this is likely to continue for the forseeable future.
Unfortunately, I have family illness at the moment, with my mother being very unwell and in hospital, which is likely to continue for some time. Therefore, as well my normal full time job, I am having to fit running the Norton parts business around regular visits to the hospital. I am trying to answer what emails I can - but bear in mind I now have very little available time for doing this.
My apologies if you have sent emails to me in the last few weeks and have not had a reply, but sorry to say I cannot see things getting better for some time. By all means resend an email if you have a specific question - but please do not be offended if you do not get a reply. As I am sure you will appreciate - what little time I have for the motorcycle side is being prioritised to those customers with orders in progress and keeping the manufacturing/supply side afloat
However, just to make this clear - the Norton parts business is still open and Martin is still running the online ordering process as normal. Therefore if you have any queries around an order you have placed, you can still contact us on sales@racingvincent.co.uk
With this in mind, if you visti our Online Catalog you will notice I have added a new background information page titled 'About Us', which gently(!) updates readers on the present position: Online Catalog Website - About Us Page
Best wishes,
Paul Norman, January 2013.
15/01/13:
£15K Vincent Basket Case on E-Bay
Vincent Rapide For Sale - A Real Basket Case!
As it appeared in recent E-Bay Listing
Far be it for me to comment on someone else's choice in motorcycle restoration projects, but I could not help but feel that the recent E-Bay listing I saw for a Vincent basket case just before Xmas was maybe pushing what was achievable to the limit!
As you can see from the accompanying screen shot taken at the time, someone paid just over £15,000 for a 'do it yourself' kit for a Vincent twin, based on what looks to have been an early (Series B?) Rapide. Now £15k is a sizeable wad of money in anyone's book, but when you look at what the sale included - or more importantly, what it did not include!, you can easily understand that the person who restores this bike is still going to have find a lot of the large missing parts - and still has a considerable sum of money to spend!
In the accompanying advert for the 'kit', the previous owner made it clear that there was only what you saw in the photographs - well if you look carefully at the engine parts, you will notice a distinct lack of gearbox/clutch/timing case parts etc. I know from my own experiences that trying to find any of these parts is extremely difficult and indeed - very expensive.
I also noticed that the timing side crankcase has been in a fire (which the old owner pointed out), so there was definitely some substantial welding and re-machining required. The good news is that there looks to be a complete set of forks, petrol tank (I am just working on mine, making bigger carb cutaway) and a very grubby but complete Rear Frame Member (RFM), which is of the very earliest and correct Series B type - identifiable by the brake stop being a casting, rather than a bolt in part.
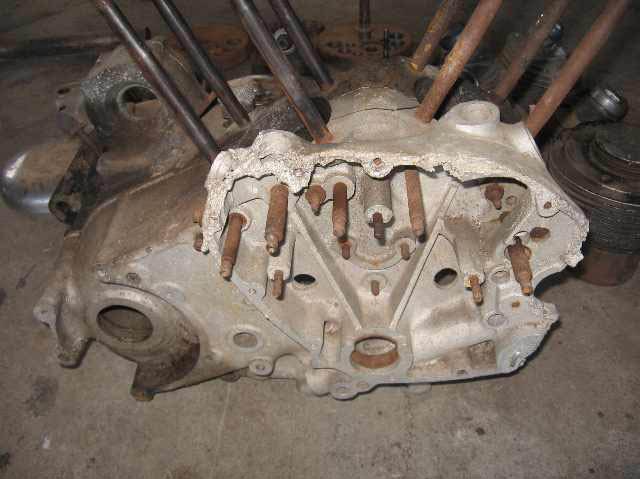 Timing side crankcase - those familiar with Vincent twin engines might notice a molten mass where the rear cylinder pushrods go in and a lack of magneto mount! - not to mention the rust on all the spindles
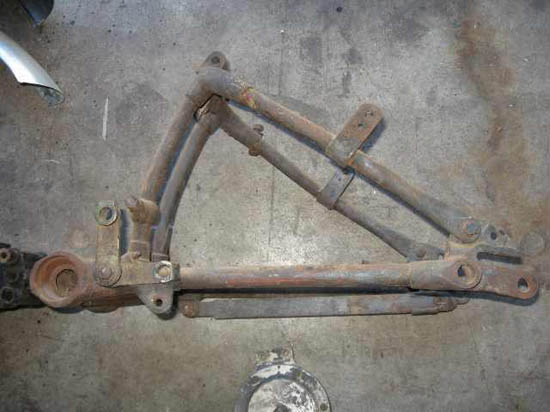 Rear Frame Member (RFM) looks a nice clean one, of the very early type - identifiable by the built in brake cable holder casting on the left down tube
and straight damper holders
Rear Frame Member (RFM) looks a nice clean one, of the very early type - identifiable by the built in brake cable holder casting on the left down tube
and straight damper holders
(my own RFM is the 'later' early type - straight holders still, but cable holder was a seperate part)
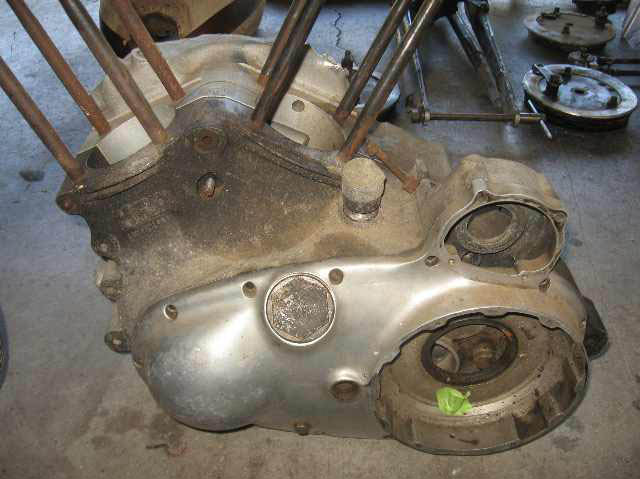 Drive side of engine looks straight but grubby. Notice though the absence of any clutch or gearbox shaft!
 I have to admit, I was somewhat bemused to see this ebay listing - not just because of the substantial sum of money the bike fetched, but more so because I realise that I too embarked on a very similar rebuild exercise when I first purchased my vincent back in the late 1980's. Even then, Vincent twins were fetching substantial sums of money, and at the time I paid what felt like a lot of money for mine. However, although not cheap - the parts represented good value for money, as all the main castings were in extremely good condition and of good background (and actually I am told by the VOC Registrar secretary that the engine unit for mine confirms it as the Rapide that was ridden by my old late friend Phil Heath to 2nd place in the 1948 Clubmans TT!
Save to say, I have never for one minute regretted buying mine - in fact it has been a pleasure working on it, but I also know I have also spent many thousands in buying all the best parts - both mechanical and cosmetic (Maughans stainless parts are beautiful quality!) to get it to a complete usable bike.
I wish the new owner all the very best of luck - but knowing what I do now - I am not sure I would want to go through all the work ahead it entails!
05/12/12:
Yet Another Project - Manx Frame Lugs
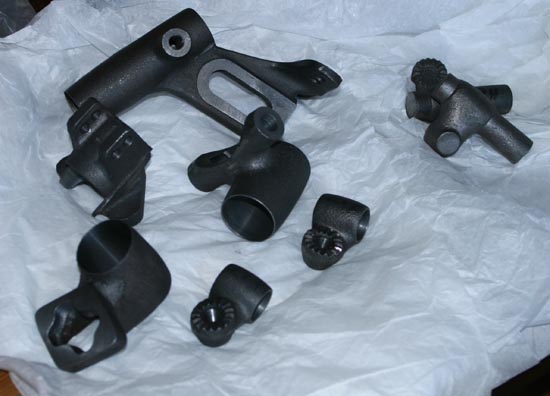 Here we have a part set of frame lugs to fit my 1948 Gardengate Manx project. Note also two more unmachined footpeg castings in the top right - showing how they were cast before machining
I thought you might like to see these - newly created frame lugs for a Gardengate Plunger Manx Frame. This particular set are to go onto another future project I have in the background, which is a 1948 Gardengate Manx 500, which is using a standard ES2 plunger frame as a donor.
I will not bother going into all the many differences between an ES2 frame and a Manx frame - save to say there are very many - enough that I would not even try to attempt this job myself, but there are some castings on a Manx that are so different, they either need to be fabricated - or as we have done here - to have them cast from scratch.
.jpg) Close up of the front petrol tank bridge casting and one of the rear racing footrest mounts
Close up of the front petrol tank bridge casting and one of the rear racing footrest mounts
These castings we made by a good friend of mine, who is also a serious Norton restorer. If he cannot find parts for a restoration, he will invariably have them made. In this case he had the main Manx frame lugs cast, and I then was able to obtain a 'part set' of these castings and have them machined.
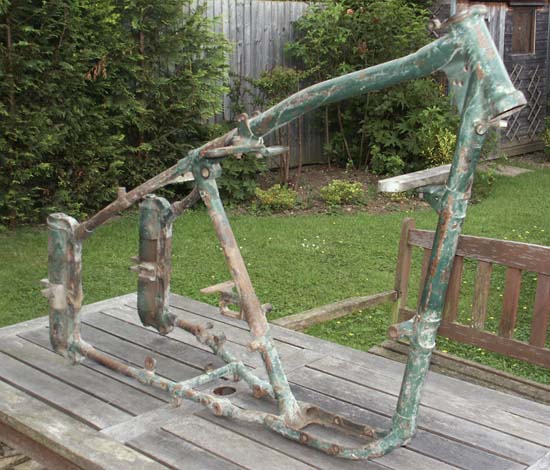 And here as a reminder, is what a genuine Manx frame looks like. You can clearly see in this photo that the two front down tube lugs are both scolloped, a task still to be carried out on the new castings
There is still a bit of work to do on the castings - for instance, the original Manx front down tube castings were scolloped, and also the petrol tank mount castings still need to be drilled to take studs, but this latter task will probably be done once the final top tube angle is confirmed. I will now pass these castings on to another friend of mine who is doing the work on my frame.
In case you are wondering, my friend has no plans to make any further sets of these castings, and the machining of the castings was not cheap - the raw castings are cast with a couple of inchs of solid metal protruding from each end of the cast lug (i.e. representing a section of tube) and these take a lot of machining to remove. However, if I receive enough interest I will at least look at if another batch is feasible - email me at the normal address.
I must warn anyone considering this though - bear in mind that having these castings made is just the tip of hte iceberg - you still need to find a donor frame, consider all the other lugs that need some change - and then find someone that knows how to safely alter the original frame!, I will leave that one to you!
26/11/12:
Burma Star Assoiation and a Passing Generation
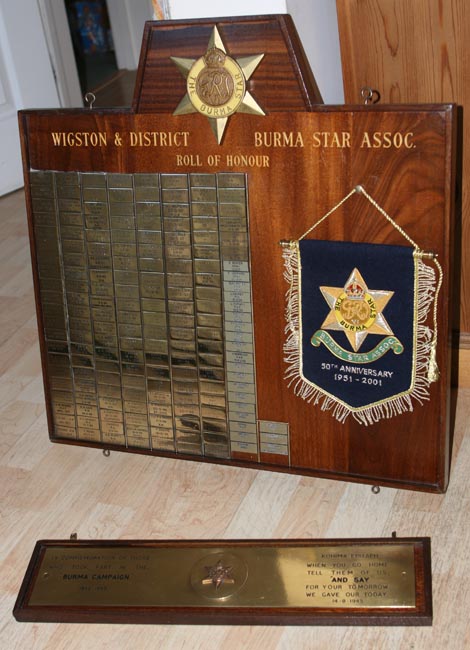 Remembrance Plaque from my late father's Burma Star branch, now updated with those that have died in the last 5 years - marking the passing of a generation that lived through WWII
As a brief aside from motorcycling talk for once, I thought it might be nice to share with you this particular update. I was recently asked by my mother if I could help with a task for the local Wigston (Leicestershire) branch of a society for ex-servicemen that my late father used to be a member of - the Burma Star Association, and I have to say that it was a real privilege to be able to do so. The task asked of me was to update the Plaque of Remembrance with a small brass nameplate for all those in the association branch that had now passed away, and it is sad to report that there are now so few of them still alive, that keeping the plaque updated has not been done for some time, and is probably beyond the surviving members - therefore they were reliant on asking one of the groups offspring to perform the task – something I was only too happy to be able to do.
Before his death 3 years ago, my father had been an active member of this group of ex British and Commonwealth servicemen, all of whom had served in the Burma and Indian continent on active service with one of the armed forces at some point during the Second World War.
Like so many of my age (I was born in 1962), I was part of a generation that grew up with parents that had lived through the Second World War, and when I was a kid it seemed a normal thing for boys to do - playing with toy soldiers and guns and all the other things associated with WWII. For my part, as well as the normal toys I loved building Airfix kits of Spitfires, Messerschmitt 109’s and other such planes. To this degree I think we took it very much for granted what our parents went through, and it was only as I got older I realised what it really must have been like to have lived through the turmoil of that particular time in history, and have served service with one of the armed forces.
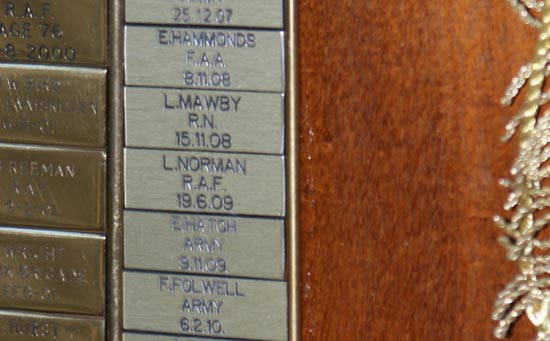 My fathers name - L (Les) Norman joins the other names on the board - which included Lord Loius Mountbatten their patron and who also served in Burma and was the last Viceroy of India
For my father’s part, he was a Sergeant in the RAF towards the latter stages of the Second World War, having lied about his age he joined in 1944 at the age of 17 and trained as a heavy goods driver before being posted out to India where he drove a variety of vehicles. Although he did not talk about it very much, I have vivid memories as a child of looking at all his photographs and asking him to tell me about them – I particularly remember him telling me about a time just after the war finished (late 1945 in their theatre of war), and how he helped dispose of the large quantities of munitions off the airbases by driving them into large clearings in forests, where they were blown up in a controlled manner. On one such occasion, he was driving a lorry load of detonators (the most dangerous component!) into the clearing where the entry flags were set at Green, only for the world to erupt around him. It seemed the young Lieutenant in charge of changing the flags had forgot to set them at Red. My father survived the incident, but did not let the difference in rank stop him from telling the Lieutenant exactly what he thought of him! Although I do not remember ever telling him so while he was alive, I was always very proud of the small part my father played – and of all the other servicemen like him who made that sacrifice.
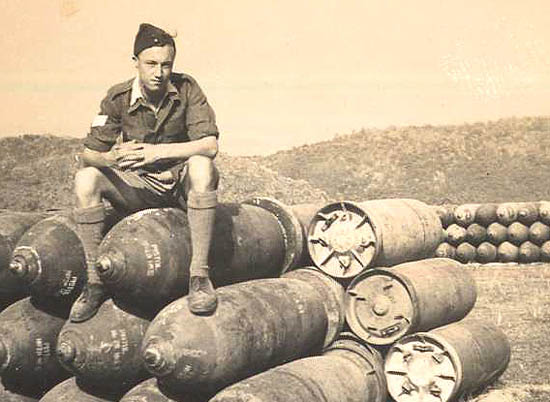 My father sat on a large pile of bombs somewhere in Burma in the latter stages of World War II
My father only joined the Burma Star Association after he had retired, which I think was the same for many of his friends in the group – and they certainly knew how to enjoy themselves, but it was nice to see them all socialising together, and with my mother he went away to many functions with them including Remembrance days and similar parades in London and France - it seemed a good way for many of them to relive old times together and enjoy each others company.
So with that backdrop I visited the local Wigston Working Mens Club, where the Burma Star Association had a small Hall of Remembrance at the side of the building, to pick up the wooden Burma Star Association plaque, and then over the next two weeks gave it a thorough clean and was able to add the remaining name plates, which had previously been prepared by another member – including my father’s who had died 3 years ago. In fact there were only about 4 people still alive from the original group, so they and the remaining widow’s had decided that it might be prudent to add everyone now, so that they knew it was complete. As well as adding the remaining brass nameplates, I also added some brass rods to frame the plates, and then polished all the existing brass plates – which totally transformed the finished look, as this had not been done for some time.
Initially I was sad that the nameplates I was adding were of the last few soldiers of the Second World War who were now passing away, but as I progressed I realised this was not a sad task at all - as every generation eventually passes and is hopefully remembered by the next – and what a great privilege it is to be able to do something small to help remember those that fought in that war, and ensure they are not forgotten.
As a footnote to this, about a week or so after placing the finished and polished plaque back in the Hall of Remembrance, my mother received a Thank You card from the remaining members and widows of the Burma Star Association, who had got together for a now infrequent meeting and had all visited the Remembrance room to look at the updated plaque and see their loved ones name on the wall. Reading this letter of thank you from them was very touching and reward in itself – as I said at the beginning of this article, to be able to do something small for my father and his friends and comrades was a privilege indeed.
By the way, If you would like to read a bit more about my father - I wrote this obituary to him at the time he died 3 years ago:
Les Norman Obituary
15/11/12:
Norton Hubs and Painting
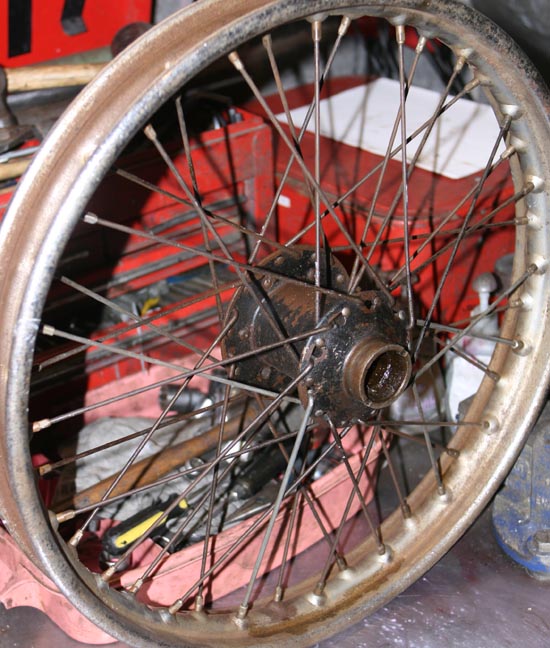 Plunger hub from E-Bay was genuine International - being laced to an original Dunlop 20" rim
Another week - another bike! I mentioned in a recent blog that I had just purchased a plunger hub off E-Bay so I could build up a spare rear wheel for the 38 racer, with a Roadrider soft compound tyre, leaving me to keep the current Avon GP shod rear wheel for the wet.
Well this dutifully arrived, along with an original 20” Dunlop rim laced to it, with the original stepped spokes. That means it was originally fitted either to an International or possible Manx. Although tempting to keep the original rim, its overall condition was pretty rough and a few of the original spokes had been replaced, so I did not deliberate for long before continuing with the original plan to remove the rim, and prepare the hub for a new alloy 19” rim.
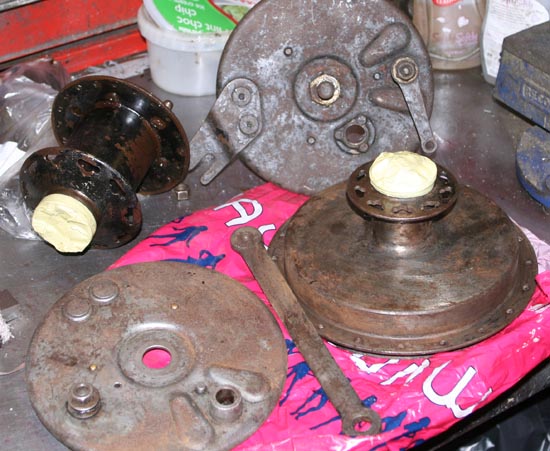 Hubs and brakeplates for 1937 Road Inter. At this stage you might notice that front brakeplate at the back is an 16H/ES2 item, with brake stop for a left side fitting
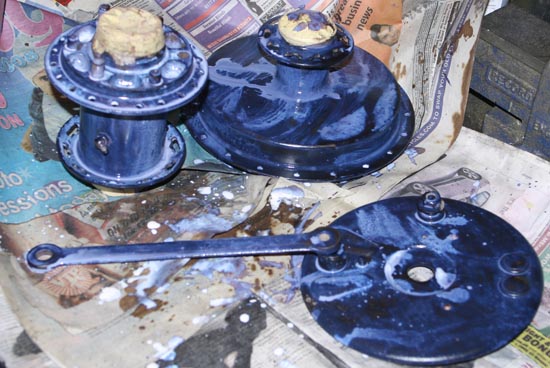 Same hubs having been de-rusted and now being chemically treated with rust inhibitor
So I stripped the hub, by carefully unscrewing each spoke nipple (rather than my other method of doing this job - running a large angle grinder through the centre of the spokes - far quicker!) so I could keep the old spokes as patterns, which then left me with the task of blasting and de-rusting it.
I was in a similar position with the front and rear hubs and brake plates for the 1937 Road Inter build, which is where I had got to when I last worked on it at the end of 2011
- so I decided that it was probably worth doing all of them at the same time.
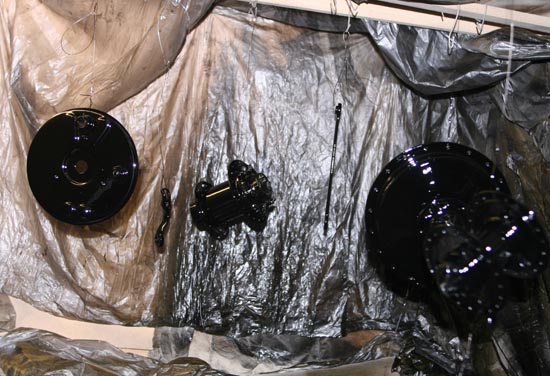 And here they are in my spraybooth - the plastic sheets are actually dust sheets from B&Q, that get replaced every couple of spray sessions
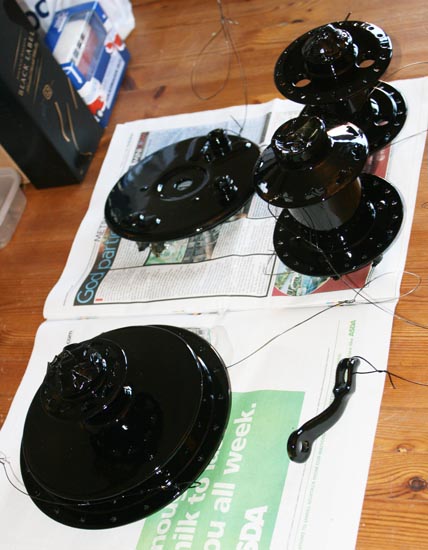 They look shiny, but actually there is a bit more work to do yet - another rub down and final coat to go
All told, these are all pretty unpleasant jobs to carry out, but it always gratifying when they are done and I can apply the first coat of etch primer and then primer filler.
Anyway, it was not long before my spray booth was back in service and the hubs are now resplendent in black 2-pack and looking much better. I treated myself to a new mid-size gun and space heater from Machine Mart as well. The space heater is the biggest 13 amp electric heater they sell (before going over to the industrial type propane heaters), and is perfect for my small spray booth, which is half of my 10” x 8” workshop shed, and gets very cold at this time of year – too cold for spraying without pre-heating. The mid-size spray gun was an impulse buy – top loading and with a paint capacity and spray range somewhere between my normal ‘topcoat’ automotive bottom load gun and my small ‘fine spray’ top feed Devilbiss MP gun. It is perfect for smaller items like hubs and other motorcycle parts, and does not waste paint like my larger gun. This new gun was a fraction over £30 and worked flawlessly straight out of the box. Say what you like about about Machine Mart selling cheap and cheerful tools – but they have come a long way from the dodgy quality Chinese/Taiwanese rubbish of 20 years ago. The gun looks really well made, and even if it only lasts a couple of years (and I think it will last longer than that!) represents great value for money, especially when you consider it is probably about one eighth the price of the Devilbiss!
Now with the hubs themselves painted I am just waiting for spokes to arrive then I get on and build 3 wheels up, the spare for the racer and front and rear for the 37 Road Inter.
I have now moved onto the 37 Road Inter front brake plate, but I will probably cover this in a later update . . . save to say – still plenty of work to do! .
21/10/12:
Bronze Skulled (Bi-metal) 500cc Manx Cylinder Heads - New!
Have a look at the photos attached and tell me you do not think these look beautiful!
This is probably the most desirable cylinder head to find for anyone trying to restore a pre-Featherbed racing Norton (i.e. early Manx) - a 500cc bi-metal (bronze skulled) big 'Square' head . . . of the type fitted to Manx Grand Prix spec Nortons from 1938 until approximately 1950. There are lots of minor differences between this type of head and the early double-knocker alloy skulled square head of the same design, but the DOHC type head has slightly different valve angles, which means that although it can be made to fit at a push - it is not ideal if you want to seriously use it for racing with a single knocker cambox.
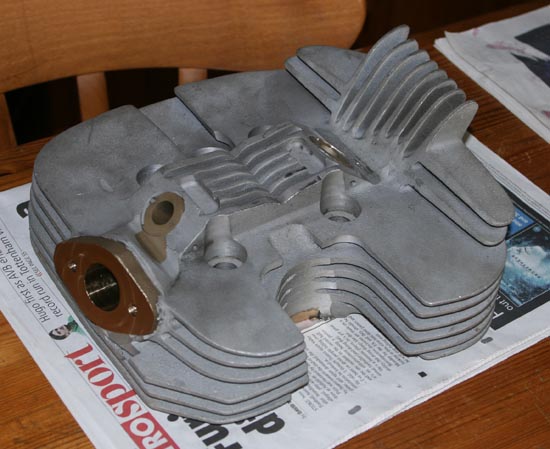 Hard to believe that this Bi-metal cylinder head has not just come out of the Norton race shop
Because the original bronze head was only made in comparatively small numbers, and they had a propensity to break fins, they are now extremely rare and can cost a huge amount of money if you are lucky enough to find one. Added to which, often when you do get them you find the combustion chamber can show signs of having had previous catastrophic valve failure - with obvious consequences, and the bronze is very difficult to repair.
With this backdrop, can you imagine the luxury of being able to just go out and buy a brand new one 'off the shelf'! Well I found myself in that very enviable position some months ago, and here is the actual head. It is virtually identical to an original and is extremely well made. The patterns were made to cast the bronze skull first - as per the original, then a second set of patterns are used to cast the alloy finning around that skull. The result is stunning, they look just as per the originals.
I bought this one to fit to my 600cc SOHC Manx Plunger engine (for which it will need a small amendment - to fit the larger bore), which I will shortly be building up. The heads were made (at much expense) by a good friend of mine, who is very serioius about his builds. There is a small possibility there could be further heads available in the future, but due to the very large outlay this would have to be based on the amount of interest shown. If you think you might be interested then email me at the following email: paul.norman@racingvincent.co.uk
Safe to say, if you have to ask how much they will cost - then you probably cannot afford one! . . . but you can ask anyway.
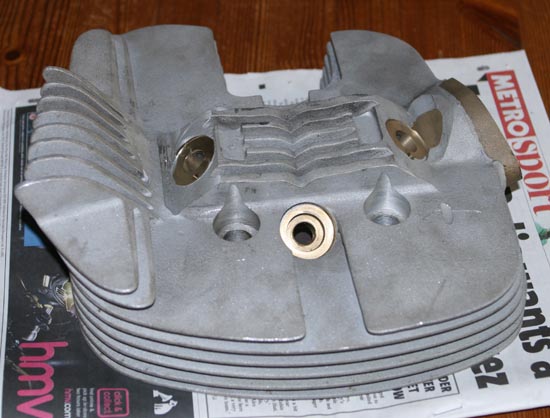 xx
xx 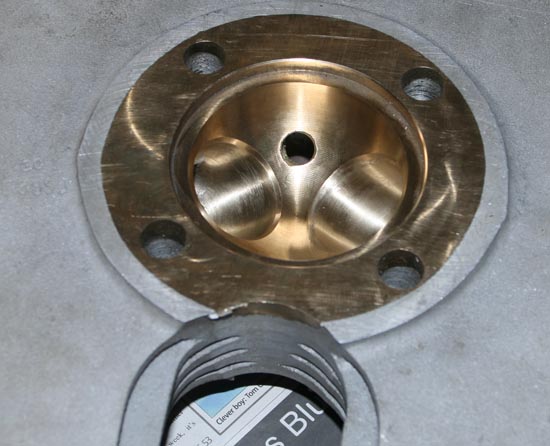
Lovely reproduction of Bi-Metal Manx cylinder heads, as fitted to SOHC Manx Nortons from 1938 - 1950.
15/10/12:
Further Racing Update - BHR Cadwell (a catalog of errors!)
I attended my second BHR (British Historic Racing) race meeting of the season at the beginning of October, and frankly it all ended up being a bit of a nonsense - and I have no one else to blame but myself! . . . make a mental note Paul . . . do not enter proper race meetings unless you have made time to fully prepare!
In my last update I had mentioned that in the first race meeting of the year at Mallory, back in April, I had gone out in the second race with crank failure. This was a bit of a mystery at the time, but there did not look to have been anything serioiusly amiss - other than the balance factor was quite well out - in main due to me changing piston types before the race - from an Arias piston to a much lighter Omega piston. I did not actually notice any excessive vibration in the first race . . . but then again, i was not really thinking about much else but trying to keep on the black stuff!
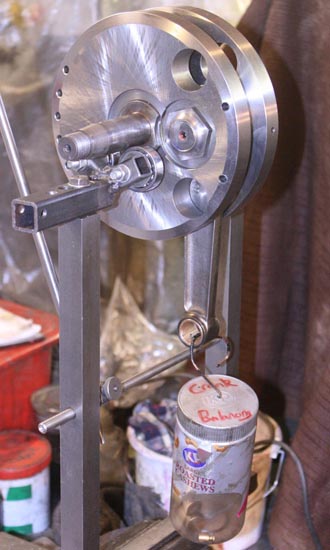 Rebuilt Racing Inter crank, being balanced
Anyway, after Mallory I had the crank rebuilt and had got the balance factor spot on for the new Omega piston, and put everything back together. I had also put a new alchohol TT needle in the carb and a few other bits were replaced that had suffered from the previous failure
The problem was, I had had precious little time to do any of this since the last race and was trying to fit it in alongside everything else, I had only got the bike finished a week or so before the meeting. So, when good friends Ric, Erica and myself travelled up to the 2 day Cadwell VMCC weekend on the Saturday night, I had only ran the bike up for a few minutes on the driveway the week before, and had no idea really if it would run ok - particularly as I had changed the carb settings . . . Cockup number 1, you can see where this is going cant you!
Although a two day event, I was only down to race on the Sunday, and I awoke very early on the Sunday morning - stuck my head out of my VW Van (more comfortable than you might think) to find it was a very cold, drizzly, grey Sunday morning . . . Mmm, think I would like to go back to my proper bed now!
Forcing myself up, I quickly got ready, donned leathers (and thermals underneath . . .big girls blouse) and headed off with Ric for scrutineering and noise meter testing.
This all went smoothly, but because they had not got the full agenda of races in the day before, they were moving very quickly. I knew first practice was at 9.00, but starting the bike up, I could sense carburation was off, so quickly came in to adjust the needle which took about 10 minutes. By the time we got to the practice area first practice had already started and I was then told there was only 1 practice on the Sunday of a two day event . . . and I had just missed it! . . . Cockup number 2, this was not looking good.
Fortunately, the VMCC guys took pity on me and told me I could go out in the first race, providing I start from the back of the grid - suits me!
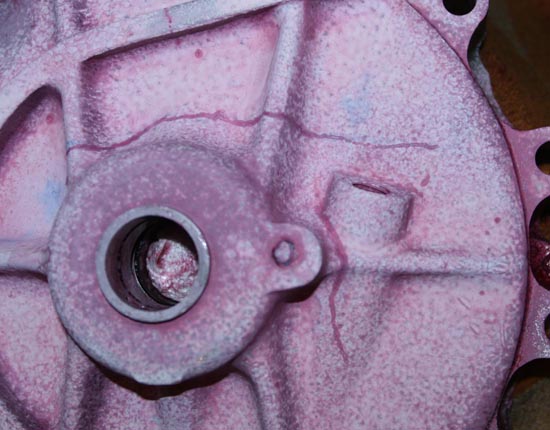 Ouch - Penetrant Dye Testing highlights the cracks to the crankcase - inside and out, and how close to 'grenading' the engine I came when the magneto packed up
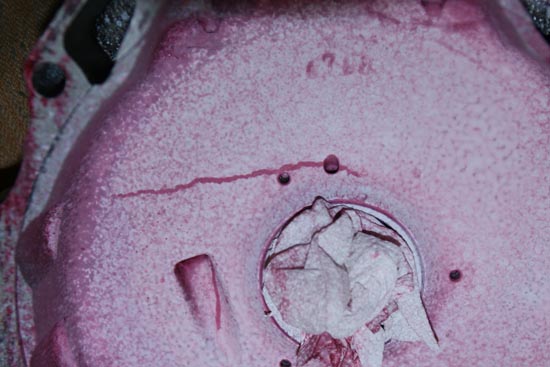
While waiting for my first race, it occurred to me this was Full Circuit Cadwell (i.e. the Mountain Circuit), and I had not gone round Cadwell for almost 20 years . . . not a good position to be in starting my first race, without practice.
However, I needent have worried - as we went out for the warm up lap (and waiting on the line it started to heavy drizzle . . . Joy!), it was clear all was not well - the carburation felt rough as a badgers backside, and it was not picking up cleanly. But just as I reached down to attempt some (pointless!) adjustment to the TT carb, there was a brief lurch followed by a completely dead engine - Bugger! I freewheeled off the circuit and sat the race out cursing silently to myself.
Back in the pits, still furious, I tried to figure what the issue was - it seemed very strange that the engine was still turning normally but would not fire. It did not take long to find the cause - a very obscure issue - having removed the points cover off the KD1 BTH mag, the points plate just dropped out onto the grass . . . ahh, that would explain it . . . no sparks! It turns out that the centre screw that holds the points plate to the brass armature body had stripped the brass thread from the armature body - I have never had this issue before, so I can only surmise that the previous crank failure, which had shifted the magneto, had also weakened the thread . . . another reason why I should have done a practice session before hand - Cockup number 3.
So, although pissed off, I was feeling a bit better that the cause of the failure was not too serious, when looking down at the engine crankcase, I noticed a slight oil mist line running just above the bearing housing, that did not look quite right to be oil spray from the primary chain . . . in fact, on looking a bit closer . . . it looked suspiciously like a crack . . . balls!!
So that was end of play for the day, and not suprisingly I was pretty brassed off with the whole weekend. But it just reinforced what I already knew - there is no point going racing proper unless the bike is sorted before hand.
Due to my lack of time in the preceding weeks, what with my job and the Norton business, I had not had time to do the necessary preperation and practise runs, and this had been the (not surprising) consequence.
I could easily have come away from this thinking - right thats it, no more racing, and stick the covers over the broken Norton, while I go back to one of the other bikes. But that would be a bit too much like giving up, so in the subsequent two weeks I have now stripped the motor down (again!), and the crankcases have been carefully cleaned and re-assembled and have been bolted together with a steel mandrel fitted between the two bearing housings. Assembled thus they have been sent to my best specialist welder (Arther Sosbe in Leicester- now almost retired) in the hope he can maybe save them. They are pretty serious cracks, but at this stage they have not distorted the bearing housings, so providing the bearing housings are kept rigid while he welds the outside, there is a small chance they will repair without me having to jig bore the bearing housings afterwards - we will see
I am also in the process of building a new 19" rear wheel as a spare. The current rear on the racer is fitted with a 19" competition compound Avon GP. When I was at Mallory earlier this year, Mike Farrell and Ian Bain were telling me that the better compound to use in the dry these days is the Avon AM26 Roadrider in a race compound. These look to have a fuller tread pattern than the GP (i.e. more rubber on the road), but Mike told me the Avon GP is probably a slightly better tyre in the wet (bigger gaps between the blocks for better water dissipation?). Therefore, I thought it would be a good idea to build up a new rear for the Avon Roadrider, and keep the current wheel, with Avon GP, as a 'wet' wheel. Incidentally, as per the current wheel, I am using a Plunger rear hub, even though it is going in a rigid chassis. The reason I prefer ths hub for racing is that this hub, with its 3 locating studs and 3 threaded studs, takes the ribbed rear brake drum, which I prefer for racing. I am not sure how much benefit the ribs give - but in my view this should result in slightly better cooling, and maybe slightly more rigid. Also, this type of brake drum has a much better mounting arrangement than the rigid (cotton reel) type hub, which only employs 3 tapered wheel nuts, which I think can have a tendency to loosen off under heavy load.
Although not short of the plunger spindles, I only have one spare Plunger hub (reserved for another Manx build in the future), so a search on E-Bay was called for. Eventually a suitable hub came up, so i sat there with my finger poised over the keyboard as normal. I probably paid a bit over the odds for it, as it was laced to a rare 20" rear rim, but thirty quid or so either way is hardly here or there when you need something - and although it did not have any bearings or spindles, as mentioned, I already had these and would always fit new bearings anyway.
So that wraps up the racing for 2012, not the best entry back into racing, with just a single race under my belt, but we will give it another go next year I think, and maybe have a session or two on a rolling road/dyno before venturing onto the track again. I will keep you informed!